Red Velvet Cheesecake Recipe
Introduction
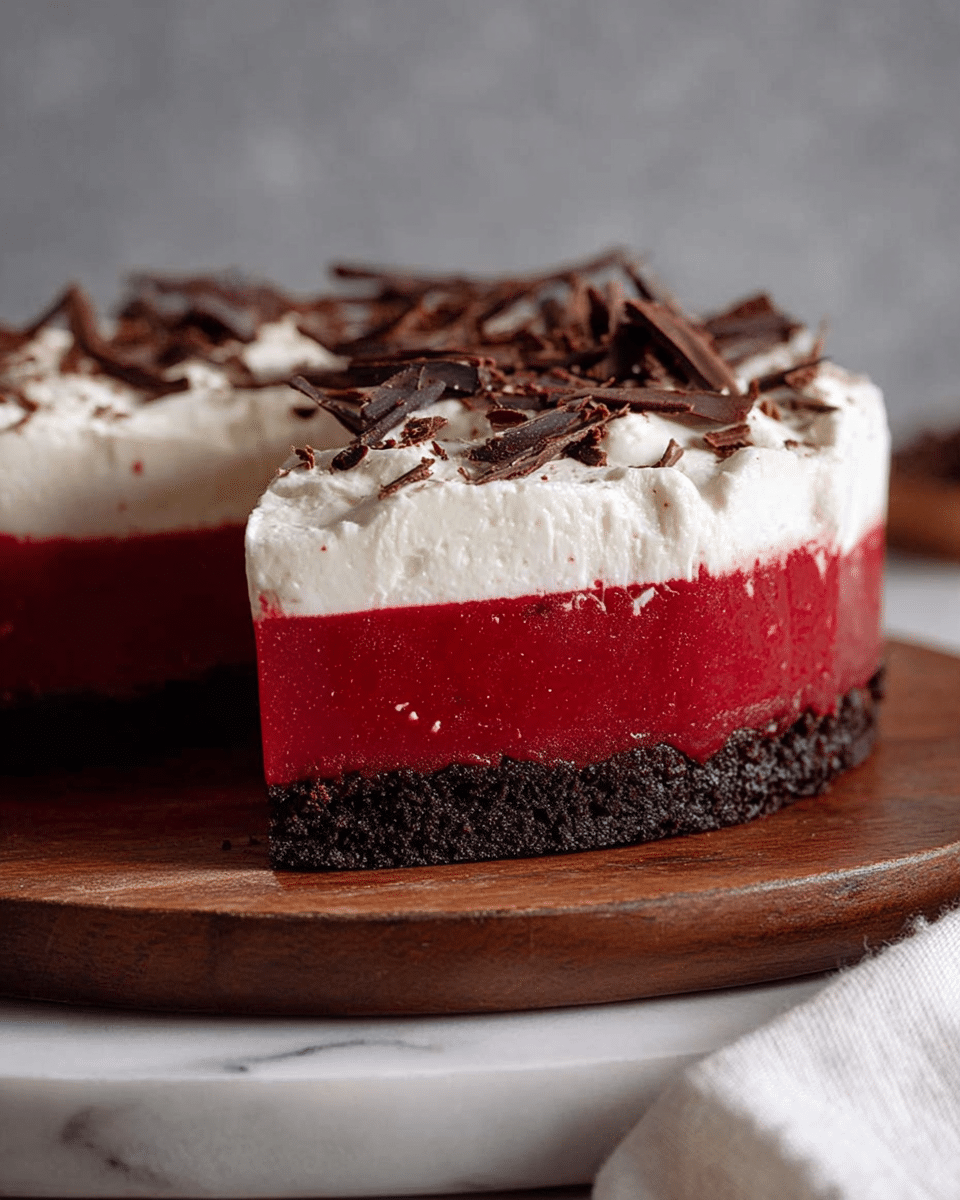
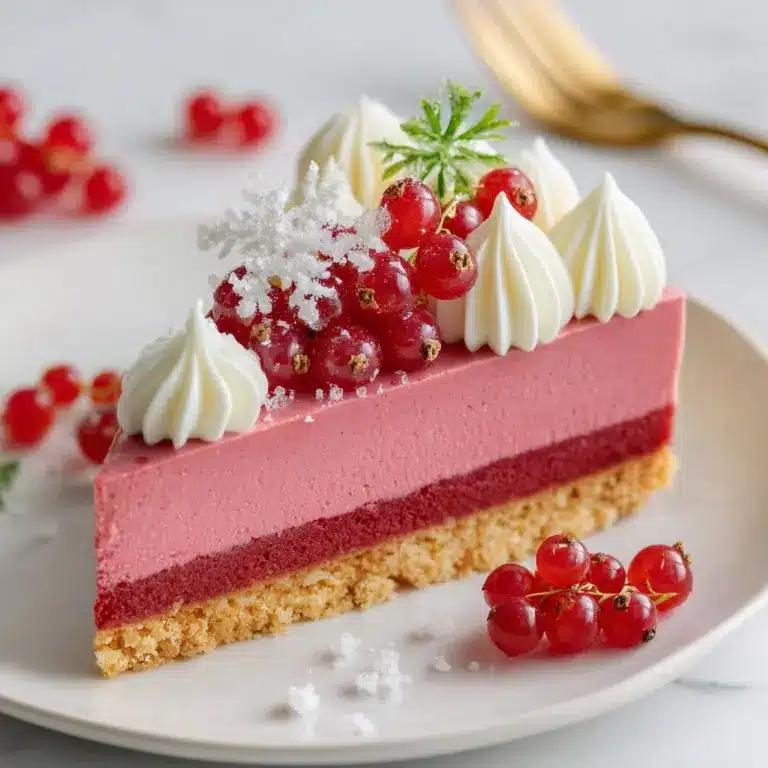
This red velvet cheesecake is a stunning dessert that combines the rich creaminess of cheesecake with the deep, subtle cocoa flavors of red velvet. With an Oreo crumb base and a silky, scarlet filling, it’s perfect for special occasions or when you want to impress your guests at home.
Ingredients
- 200g / 7oz Oreo cookies (about 1.5 standard packs)
- 60g / 4 tbsp unsalted butter, melted
- 2 tsp gelatine powder (unflavoured)
- 2 tbsp water
- 1 cup heavy/thickened cream, fridge cold
- 500g / 1 lb cream cheese, softened (block form)
- 3/4 cup caster sugar / superfine sugar
- 1 tsp vanilla extract
- 150g / 5 oz 70% chocolate (or dark chocolate)
- 6 tsp red food colouring
- 1 1/4 cups heavy/thickened cream, fridge cold (for whipping)
- 3 tbsp caster sugar / superfine sugar
- 1 tsp vanilla extract
- Optional: 2 tbsp shaved or grated dark chocolate (for decoration)
Instructions
- Step 1: Prepare the pan by flipping the base of a 20cm / 8″ springform pan upside down. Lightly butter the base and press a square sheet of baking paper onto it. Attach the pan sides and line them with baking paper as well, letting excess paper stick out for easy removal.
- Step 2: Make the Oreo base by roughly breaking the cookies and blitzing them in a food processor until fine crumbs. Add melted butter and blitz again to combine.
- Step 3: Press the Oreo crumb mixture firmly and evenly onto the pan base using the underside of a straight-sided cup. Set aside.
- Step 4: Bloom the gelatine by sprinkling it over water in a small bowl. Stir and let sit for 5 minutes until rubbery. Microwave for 15 seconds to liquefy, stir, and let cool for 3-5 minutes. It must be liquid when added to avoid lumps.
- Step 5: Whip 1 cup of cold cream until stiff peaks form (about 2-3 minutes on high speed).
- Step 6: In a clean bowl, beat the cream cheese and sugar for 2 minutes until fluffy. Add the cooled gelatine liquid and vanilla, beating another 30 seconds to combine.
- Step 7: Add the lukewarm melted chocolate and red food colouring. Beat well for 1 minute until the mixture is a dark scarlet red color.
- Step 8: Gently fold one third of the whipped cream into the cream cheese mixture until combined, then fold in the remaining cream.
- Step 9: Pour the filling into the prepared pan and refrigerate for at least 6 hours to set fully.
- Step 10: To decorate, remove the sides of the pan and use the baking paper to slide the cheesecake off the base onto a serving plate. Peel off the paper from the sides and underneath.
- Step 11: Whip 1 1/4 cups of cold cream with 3 tbsp sugar and 1 tsp vanilla on high speed for 2 minutes until softly whipped. Optionally, stabilize the whipped cream if needed.
- Step 12: Pile the whipped cream in the center of the cheesecake, leaving about a 2.5cm / 1″ border. Sprinkle with shaved chocolate and serve.
Tips & Variations
- Use a good quality 70% dark chocolate for a rich and balanced flavor that pairs perfectly with red velvet.
- If you don’t have red food colouring, try using natural alternatives like beetroot powder, but expect a slightly different shade.
- To stabilize the whipped cream topping, you can gently fold in a little gelatine dissolved in water or use a store-bought stabilizer.
- For a nutty twist, add a tablespoon of finely chopped toasted pecans to the Oreo base before pressing it.
Storage
Store the cheesecake covered in the refrigerator for up to 4 days. Keep it chilled until just before serving to maintain its structure. Leftovers reheat poorly, so enjoy it cold or at room temperature.
How to Serve

Serve this delicious recipe with your favorite sides.
FAQs
Can I make this cheesecake without gelatine?
The gelatine helps the cheesecake set firmly and hold its shape. Without it, the texture may be softer and less stable. For a gelatine-free version, consider using a high-quality cream cheese and chilling longer, but expect a looser filling.
What type of cream cheese works best?
Use a block form cream cheese that is full-fat and softened to room temperature. This ensures a smooth, fluffy batter and richer flavor than spreadable varieties.
PrintRed Velvet Cheesecake Recipe
A luscious Red Velvet Cheesecake featuring a crunchy Oreo cookie crust, rich red velvet cream cheese filling, and topped with lightly whipped cream and shaved dark chocolate. This no-bake dessert combines the classic flavors of red velvet with a creamy cheesecake texture, making it perfect for festive occasions or elegant dessert tables.
- Prep Time: 25 minutes
- Cook Time: 0 minutes
- Total Time: 6 hours 25 minutes
- Yield: 8 servings 1x
- Category: Dessert
- Method: No-Cook
- Cuisine: American
- Diet: Vegetarian
Ingredients
Oreo Biscuit Base
- 200g / 7oz Oreo cookies (approximately 1.5 standard packs)
- 60g / 4 tbsp unsalted butter, melted
Red Velvet Cheesecake Filling
- 2 tsp gelatine powder (unflavoured)
- 2 tbsp water
- 1 cup heavy/thickened cream, fridge cold
- 500g / 1 lb cream cheese, softened (block form)
- 3/4 cup caster sugar / superfine sugar
- 1 tsp vanilla extract
- 150g / 5 oz 70% chocolate (or dark chocolate), melted and lukewarm
- 6 tsp red food colouring
- 1 1/4 cups heavy/thickened cream, fridge cold (for whipping)
- 3 tbsp caster sugar / superfine sugar
- 1 tsp vanilla extract
Optional Toppings
- 2 tbsp shaved or grated dark chocolate (for garnish)
Instructions
- Prepare the Pan: Invert the base of a 20cm (8″) springform pan and lightly butter it. Press a square sheet of baking paper onto the base. Attach the pan sides onto the base, letting excess paper stick out for easy removal. Butter the sides and line them with baking paper.
- Make Oreo Biscuit Base: Roughly break up the Oreos and blitz them in a food processor until fine crumbs form. Add melted butter and blitz again until combined. Transfer crumbs into the prepared pan and press evenly and firmly to form the base.
- Bloom Gelatine: Sprinkle the gelatine powder over 2 tbsp water in a small bowl. Stir and let it sit for 5 minutes until it becomes rubbery. Microwave for 15 seconds to liquefy, stir, and let cool for 3-5 minutes, ensuring it’s liquid before use.
- Whip Cream: Whip 1 cup of cold heavy cream until stiff peaks form, about 2-3 minutes on high speed.
- Beat Cream Cheese Mixture: In a separate bowl, beat the softened cream cheese and caster sugar on high for 2 minutes until fluffy and smooth. Add the cooled gelatine liquid and vanilla extract, then beat for another 30 seconds.
- Add Red Color & Chocolate: Mix in the lukewarm melted chocolate and red food colouring. Beat for 1 minute until well combined into a deep red velvet color.
- Fold in Whipped Cream: Gently fold one-third of the whipped cream into the cream cheese mixture, then fold in the remaining cream until just combined.
- Set the Cheesecake: Pour the filling into the prepared pan and refrigerate for at least 6 hours to set fully.
- Decorate the Cheesecake: Release sides of the springform pan. Use the paper to slide the cheesecake onto a serving platter and peel away the paper. Whip 1 1/4 cups heavy cream with 3 tbsp caster sugar and 1 tsp vanilla until softly whipped (about 2 minutes). Pile whipped cream in the middle of the cheesecake, leaving a 2.5cm (1″) border.
- Add Garnish and Serve: Sprinkle shaved or grated dark chocolate over the whipped cream topping. Serve chilled and enjoy.
Notes
- Use softened cream cheese for smooth texture to avoid lumps.
- When melting gelatine, ensure it is fully liquid without lumps to prevent gelatin clumps in the filling.
- Adjust red food colouring to achieve your preferred red velvet shade; deep scarlet red is recommended.
- The inverted pan base helps with easy removal and a clean look for presentation.
- You can stabilise whipped cream with gelatin or other stabilizers if needing make-ahead topping that holds shape.
Keywords: red velvet cheesecake, no-bake cheesecake, Oreo crust, red velvet dessert, creamy cheesecake, whipped cream topping