Naturally Leavened Sourdough Bread Recipe
Introduction
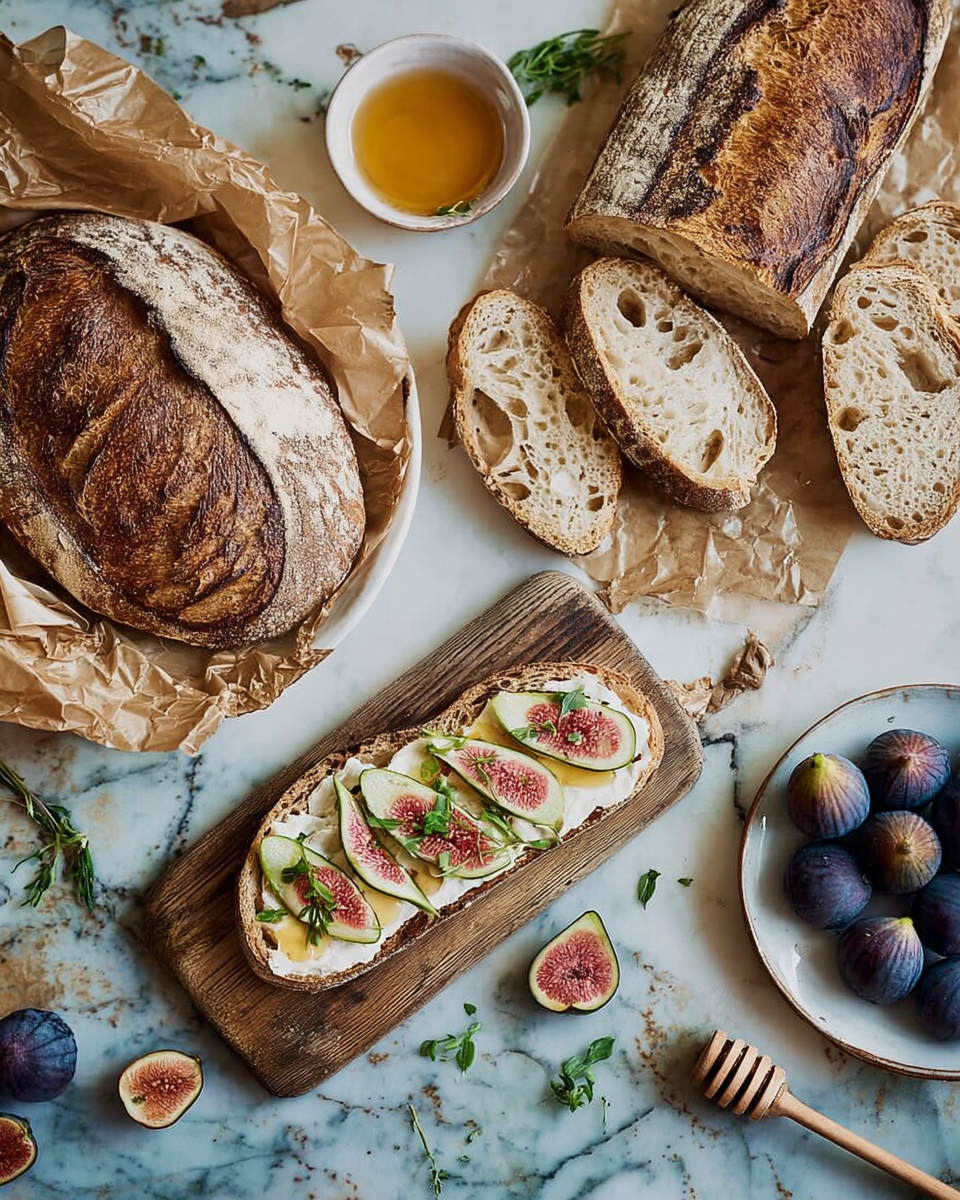
Making naturally leavened sourdough bread is a rewarding process that yields a loaf with a crisp crust and tender crumb. This recipe guides you through each step, from mixing to baking, using a ripe sourdough starter and simple ingredients for delicious, homemade bread.
Ingredients
- 2 cups (454g) ripe sourdough starter
- 5 cups (600g) King Arthur Unbleached All-Purpose Flour
- 3/4 cup (85g) King Arthur Whole Wheat Flour
- 1 3/4 cups (397g) water, at room temperature
- 2 1/2 teaspoons (15g) table salt
Instructions
- Step 1: Stir down your sourdough starter if measuring by volume. In a large bowl, combine the starter, both flours, and water. Mix until all the flour is moistened and the dough forms a soft, cohesive mass. Adjust with extra water or flour if necessary for a tacky dough.
- Step 2: Cover the dough and let it rest for 20 minutes. This autolyse phase helps the flour absorb water and begins gluten development, making kneading easier.
- Step 3: Add the salt to the dough and knead until smooth and supple, while remaining slightly soft and tacky. Return the dough to the bowl, cover, and let it rise for 1 hour.
- Step 4: Turn the dough onto a floured surface and fold it like a business letter. Rotate 90 degrees and repeat the fold. Place the dough back in the bowl, cover, and let it rise for another hour.
- Step 5: After rising, divide the dough into two halves on a lightly floured surface. Shape gently into rounds, cover, and rest for 20 minutes.
- Step 6: Shape the loaves into tight rounds or bâtards and place seam side up in lined and flour-dusted brotforms, floured cloth-lined bowls, or on a floured couche. Cover and let rise until light and airy, about 2 to 2 1/2 hours.
- Step 7: About 60 minutes before baking, preheat your oven to 450°F with a baking stone inside, if available. For a crustier loaf, place an empty cast iron frying pan on the rack below the stone to preheat as well.
- Step 8: When the loaves have risen, carefully turn them out onto parchment paper, slash the tops with a sharp knife or lame, and slide them onto the preheated stone. If not using a stone, place loaves on a parchment-lined or lightly greased baking sheet and slash before baking.
- Step 9: Carefully pour 1 cup of boiling water into the preheated cast iron pan to create steam in the oven. Use oven mitts to avoid steam burns.
- Step 10: Bake until loaves are crusty and golden, about 35 to 40 minutes. Remove from oven and cool on a wire rack before slicing.
Tips & Variations
- Use a digital scale for precise measurements to improve consistency and results.
- For a more complex flavor, let the shaped loaves proof overnight in the refrigerator.
- If you don’t have brotforms, use bowls lined with a floured kitchen towel to shape and proof your dough.
- Experiment with adding seeds or herbs to the dough for added texture and flavor.
Storage
Store leftover sourdough bread in a paper bag or loosely wrapped in plastic at room temperature for up to a day. For longer storage, wrap it well and freeze. To reheat, warm the bread in a preheated oven at 350°F for 10 to 15 minutes to restore crust crispness.
How to Serve
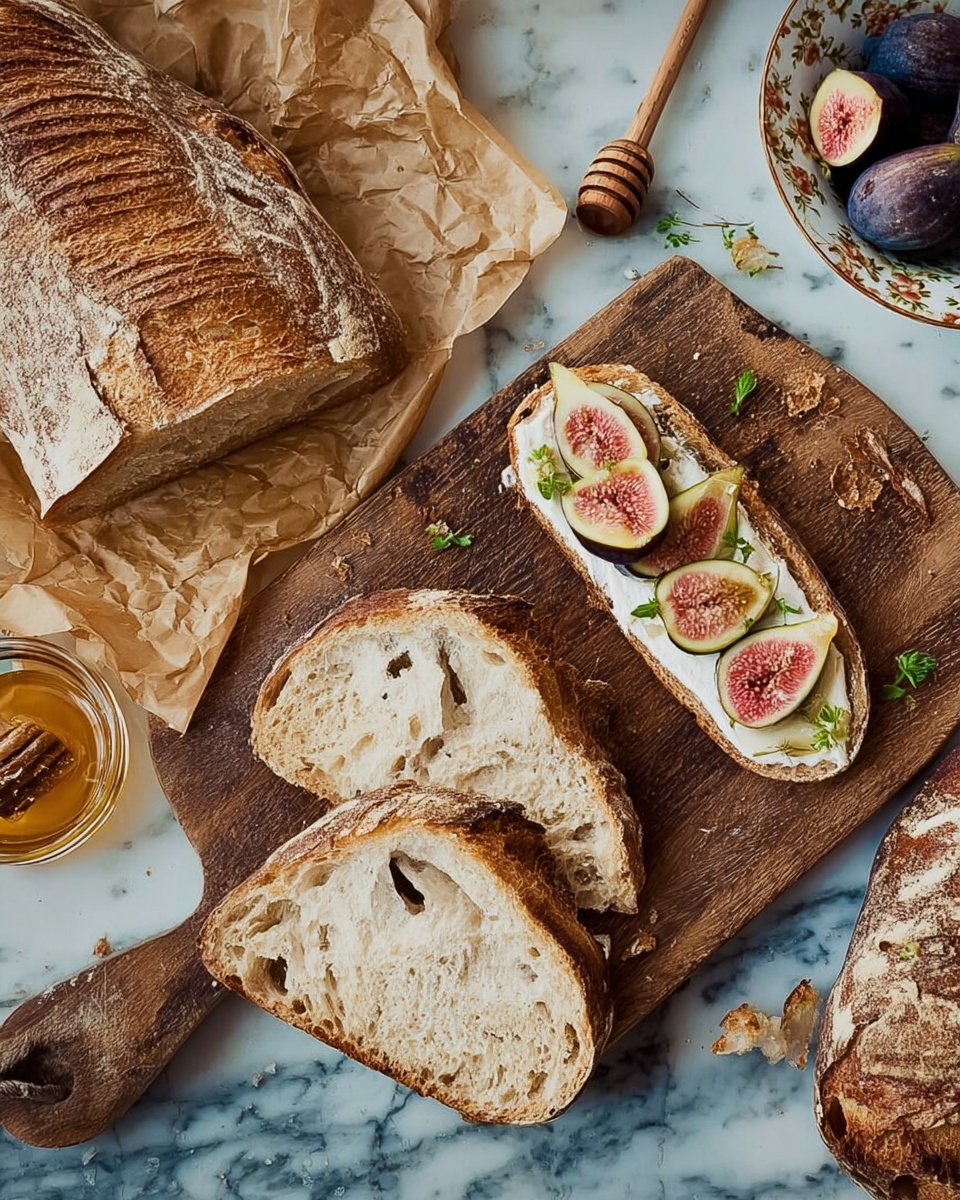
Serve this delicious recipe with your favorite sides.
FAQs
Can I use a different type of flour?
Yes, you can substitute other flours like rye or spelt, but this may affect dough hydration and baking time. Whole grain flours add flavor but may require adjustments in water amount.
How do I know when my sourdough starter is ripe?
A ripe starter is bubbly, has doubled in size, and passes the float test—meaning a spoonful of starter floats in water. This indicates it’s active and ready to leaven bread.
PrintNaturally Leavened Sourdough Bread Recipe

This recipe guides you through making naturally leavened sourdough bread using ripe sourdough starter, a blend of all-purpose and whole wheat flours, water, and salt. The process includes autolyse, folding, shaping, proofing, and baking with steam to create a crusty, golden artisan loaf perfect for any bread lover.
- Prep Time: 15 minutes
- Cook Time: 40 minutes
- Total Time: 5 hours 15 minutes
- Yield: 2 loaves 1x
- Category: Bread
- Method: Baking
- Cuisine: Artisan
- Diet: Vegetarian
Ingredients
Starter and Dough
- 2 cups (454g) ripe sourdough starter
- 5 cups (600g) King Arthur Unbleached All-Purpose Flour
- 3/4 cup (85g) King Arthur Whole Wheat Flour
- 1 3/4 cups (397g) water, at room temperature
- 2 1/2 teaspoons (15g) table salt
Instructions
- Mix ingredients: Stir down the sourdough starter if measuring by volume. Combine the starter, all-purpose flour, whole wheat flour, and water in a large bowl. Mix well until all the flour is moistened and a cohesive, soft, tacky dough forms. Adjust water or flour if needed.
- Autolyse rest: Cover the dough and let it rest for 20 minutes. This allows the flour to fully absorb water and begins gluten development, making kneading easier.
- Add salt and knead: After resting, add the salt to the dough and knead until smooth, supple, soft, and tacky. Then return it to the bowl, cover, and let it rise for 1 hour.
- First fold: Turn the dough onto a floured surface. Using a bowl scraper, fold it like a business letter, then rotate the dough 90 degrees and fold again. Return to the bowl, cover, and let rise for another hour.
- Divide and rest: Turn the dough onto a lightly floured surface, divide into two, and gently shape into rounds. Cover and let rest for 20 minutes.
- Final shaping and proof: Shape the loaves into tight rounds or bâtards and place seam side up into lined, flour-dusted brotforms or bowls with floured cloths, or on a cloth couche. Cover and proof until light and airy, about 2 to 2 1/2 hours.
- Preheat oven: About 60 minutes before baking, preheat the oven to 450°F with a baking stone inside if available. Place an empty cast iron skillet on the oven rack below the stone to preheat for steam generation.
- Prepare for baking: When proofed, gently turn the loaves onto parchment, slash the tops with a sharp knife or lame, and slide them onto the preheated stone or a parchment-lined baking sheet if no stone is used.
- Add steam: Carefully pour 1 cup of boiling water into the hot cast iron skillet in the oven, using oven mitts to avoid steam burns.
- Bake: Bake the loaves until they are crusty and golden brown, approximately 35 to 40 minutes.
- Cool and store: Remove the bread from the oven, place on a cooling rack before slicing. Store leftovers in a paper bag or loosely covered with plastic at room temperature for up to a day or freeze for longer storage.
Notes
- Using a baking stone provides a better crust but is optional.
- Generating steam in the oven helps develop the crust during baking.
- Flour dusting in brotforms or bowls helps prevent sticking.
- Shaping the dough tightly is important for good oven spring.
- Adjust hydration slightly if needed depending on flour absorption.
Keywords: sourdough bread, naturally leavened bread, artisan bread, homemade bread, sourdough starter, baking, fermented bread


