Christmas Present Brownies Recipe
Introduction
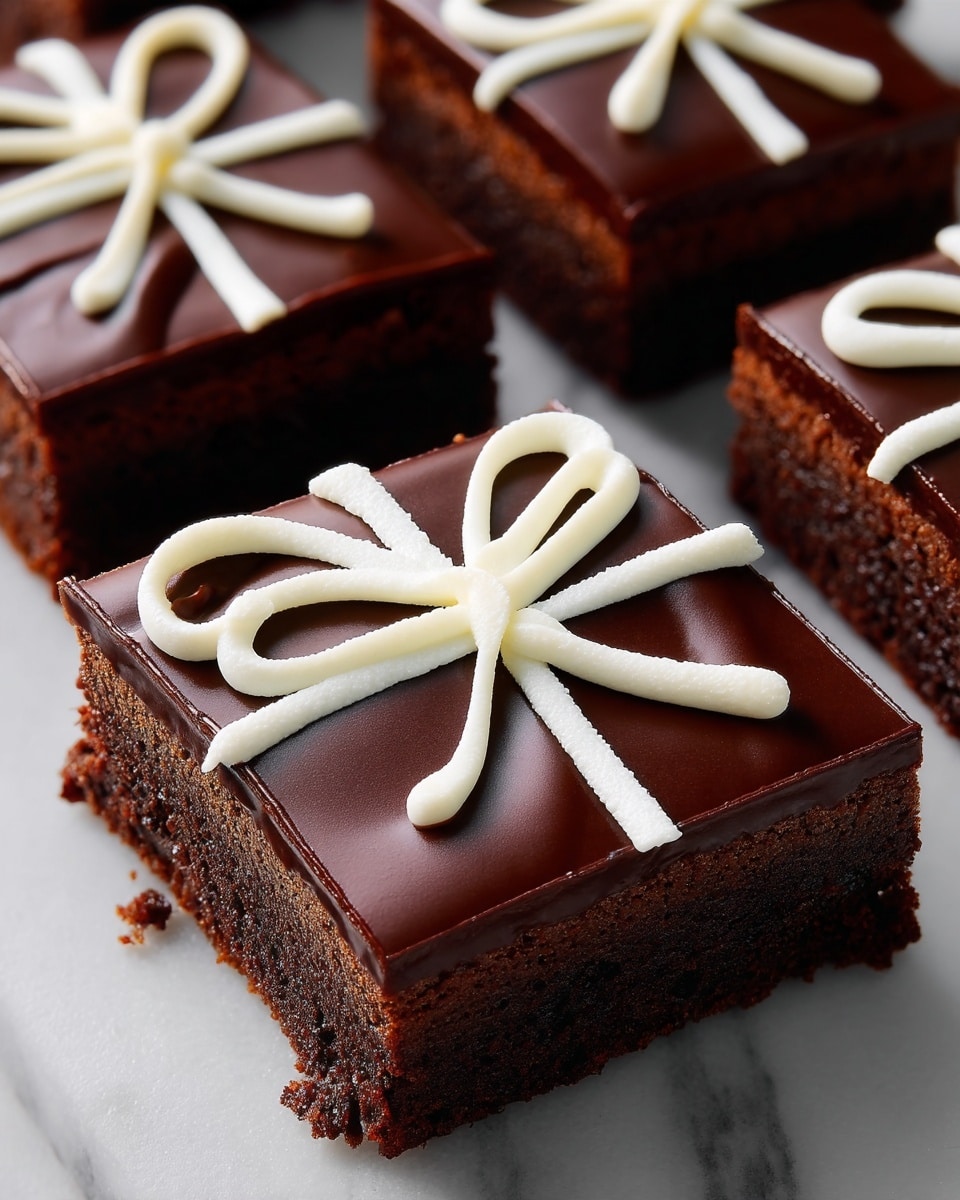
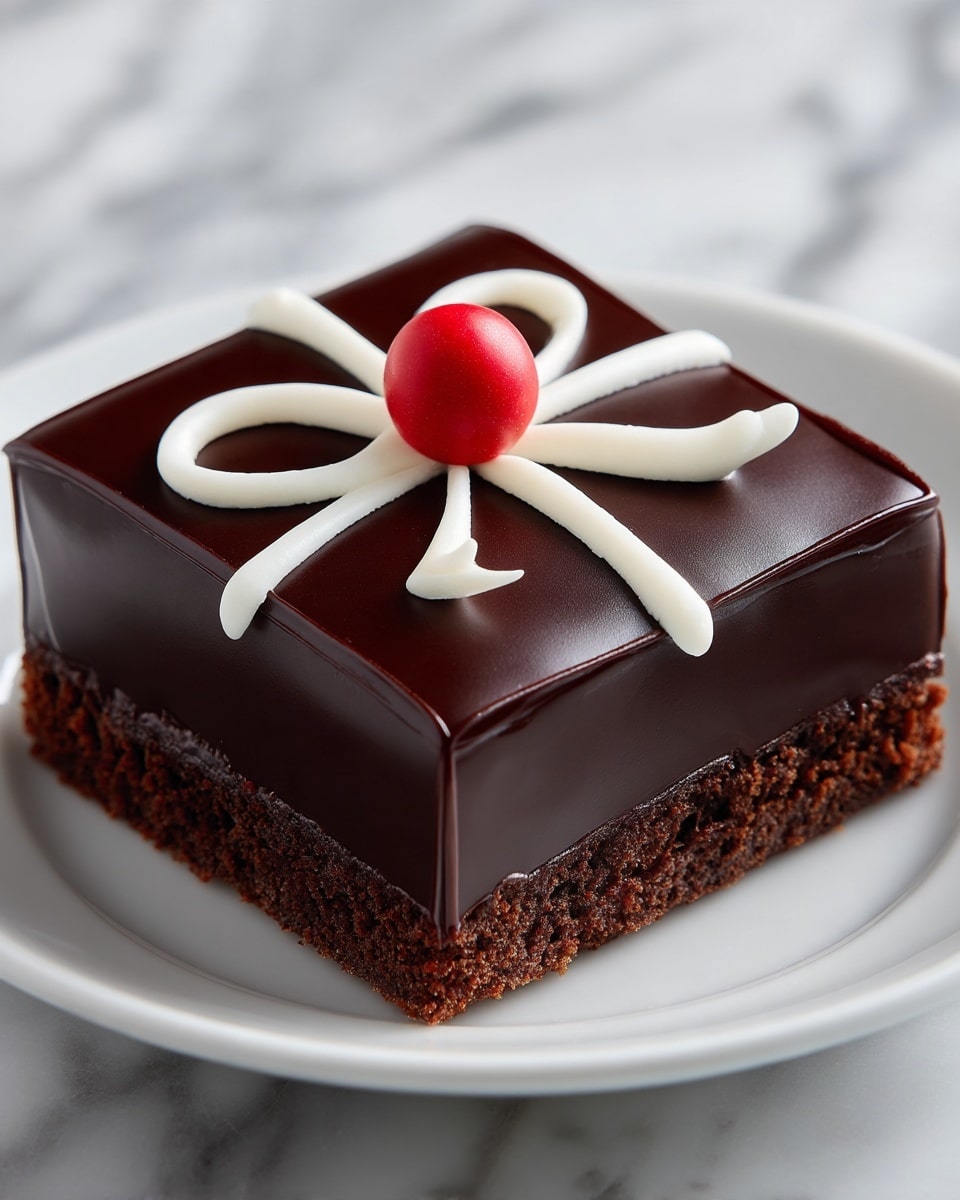
These Christmas Present Brownies are a festive twist on a classic favorite. Rich, chocolatey brownies topped with silky ganache and decorated with colorful icing ribbons make them perfect for holiday celebrations. Impress your guests with these delightful and beautifully decorated treats.
Ingredients
- Cooking spray
- 1 (15.25-oz.) box brownie mix, plus ingredients called for on box
- 1 cup (170 g) chopped dark chocolate (60% to 70% cacao)
- 1/2 cup heavy cream
- 1 cup (115 g) confectioners’ sugar, sifted
- 1 tablespoon (or more) whole milk
- 1/2 teaspoon corn syrup (optional)
- 1/2 teaspoon pure vanilla extract
- White gel food coloring
- A piping bag with a small round tip
Instructions
- Step 1: Arrange a rack in the center of your oven and preheat to 350°F. Line an 8″ x 8″ metal baking pan with parchment paper, leaving an overhang on two opposite sides, then grease the parchment with cooking spray.
- Step 2: Prepare the brownie mix in a large bowl according to the box directions. Pour batter into the prepared pan and bake as directed. Allow brownies to cool completely.
- Step 3: Place chopped chocolate in a medium heatproof bowl. Heat the heavy cream in a small saucepan over medium heat until bubbles form around the edges, about 3 minutes. Pour the hot cream over the chocolate and let sit for 2 minutes, then whisk until smooth to create ganache.
- Step 4: Spread the ganache evenly over the cooled brownies. Refrigerate for about 30 minutes until the ganache is set.
- Step 5: Using the parchment paper overhang, lift the brownies out of the pan and transfer to a cutting board. Trim off any rounded edges, then cut the brownies into 16 squares, approximately 1 1/2″ by 1 1/2″ each.
- Step 6: In a medium bowl, whisk the confectioners’ sugar, whole milk, corn syrup (if using), and vanilla extract vigorously. Add more milk if needed until you achieve a thick but pourable icing consistency.
- Step 7: Mix in a drop of white gel food coloring and stir until fully combined. Add more coloring as desired to reach your preferred shade.
- Step 8: Transfer the icing to a piping bag fitted with a small round tip. Hold the bag vertically and gently squeeze with consistent pressure to drizzle or pipe lines forming ribbon shapes around each brownie to resemble presents.
Tips & Variations
- For a more festive look, use different colors of gel food coloring to create multi-colored ribbons on your brownies.
- If you prefer a richer ganache, use a mix of dark and milk chocolate for a smoother finish.
- To make cleanup easier, refrigerate the brownies on a wire rack over a baking sheet so excess ganache drips off and can be reused.
Storage
Store the brownies in an airtight container in the refrigerator for up to 5 days. Bring to room temperature before serving for the best texture. Reheat slightly in the microwave if you prefer them warm, but take care not to melt the icing decorations.
How to Serve
Serve this delicious recipe with your favorite sides.
FAQs
Can I use homemade brownies instead of a mix?
Absolutely! You can use your favorite homemade brownie recipe. Just allow the brownies to cool completely before adding the ganache and decorating.
What if I don’t have a piping bag?
You can use a small resealable plastic bag and snip off a tiny corner to pipe the icing ribbons. This works well in place of a traditional piping bag.
PrintChristmas Present Brownies Recipe
These Christmas Present Brownies are a festive holiday treat featuring rich, fudgy brownies topped with a smooth chocolate ganache and decorated with colorful icing to resemble wrapped presents. Perfect for holiday gatherings, these brownies combine easy-to-make brownie mix with a luscious ganache and playful piped decorations for a fun and delicious dessert.
- Prep Time: 20 minutes
- Cook Time: 30 minutes
- Total Time: 50 minutes
- Yield: 16 brownies 1x
- Category: Dessert
- Method: Baking
- Cuisine: American
Ingredients
Brownies
- Cooking spray
- 1 (15.25-oz.) box brownie mix, plus ingredients called for on box
Chocolate Ganache
- 1 cup (170 g) chopped dark chocolate (60% to 70% cacao)
- 1/2 cup heavy cream
Decorating Icing
- 1 cup (115 g) confectioners’ sugar, sifted
- 1 tablespoon (or more) whole milk
- 1/2 teaspoon corn syrup (optional)
- 1/2 teaspoon pure vanilla extract
- White gel food coloring
- A piping bag, a small round tip
Instructions
- Prepare the Oven and Pan: Arrange a rack in the center of the oven and preheat to 350°F. Line an 8″ x 8″ metal baking pan with parchment paper, leaving an overhang on two opposite sides for easy removal. Grease the parchment paper with cooking spray to prevent sticking.
- Make and Bake Brownies: In a large bowl, prepare the brownie mix according to the box directions, including any required additional ingredients. Pour the batter into the prepared pan and bake as directed on the box. Once baked, allow the brownies to cool completely in the pan.
- Prepare Chocolate Ganache: Place chopped dark chocolate in a medium heatproof bowl. In a small saucepan, heat the heavy cream over medium heat until bubbles form around the edges, about 3 minutes. Pour the hot cream over the chocolate and let it sit for 2 minutes, then whisk gently until smooth and glossy.
- Apply Ganache to Brownies: Spread the chocolate ganache evenly over the cooled brownies. Refrigerate the brownies for about 30 minutes or until the ganache is set and firm.
- Cut Brownies Into Squares: Using the parchment paper overhang, lift the brownies out of the pan and transfer to a cutting board. Trim off any rounded edges for clean lines. Cut the brownies into 16 equal squares, approximately 1 1/2 inches by 1 1/2 inches in size.
- Make Decorating Icing: In a medium bowl, whisk the sifted confectioners’ sugar, milk, corn syrup (if using), and vanilla extract vigorously. Add more milk if necessary to achieve a thick but pourable consistency suitable for piping.
- Add Color to Icing: Add a drop of white gel food coloring to the icing and stir well. Increase the amount of food coloring to reach the desired color intensity.
- Pipe Decorations: Transfer the icing to a piping bag fitted with a small round tip. Hold the piping bag vertically over each brownie square and gently squeeze with consistent pressure to drizzle or pipe ribbon shapes and lines that resemble present bows and wrapping.
Notes
- Use parchment paper with overhang for easy removal of brownies from the pan.
- If you prefer a smoother ganache, use a fine whisk and ensure the chocolate is fully melted before spreading.
- Corn syrup in the icing helps add shine and stability but is optional and can be omitted.
- Adjust the food coloring quantity incrementally to avoid overly vibrant or runny icing.
- These brownies can be stored in an airtight container refrigerated for up to 5 days.
Keywords: Christmas brownies, holiday brownies, chocolate ganache brownies, decorated brownies, festive brownies, Christmas dessert