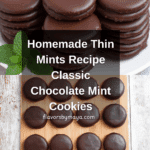
Homemade Thin Mints Girl Scout Cookies Recipe
If you’ve ever wished to recreate the magic of the iconic Girl Scout treat right in your own kitchen, you’re in for a real delight with this recipe for Homemade Thin Mints Girl Scout Cookies. These cookies bring together rich, chocolatey goodness with refreshing peppermint in an irresistibly thin and crispy bite. Perfectly balanced and coated in a luscious mint-infused chocolate layer, these cookies will quickly become your new favorite snack to share with friends or savor quietly with a cup of tea. Making Homemade Thin Mints Girl Scout Cookies is easier than you might think, and the satisfaction of biting into one fresh from your oven is beyond compare.

Ingredients You’ll Need
Gathering these simple yet essential ingredients is the first step toward that perfect cookie. Each component plays a vital role, from creating the tender, minty dough to the smooth chocolate coating that makes these cookies shine.
- Unsalted butter, ¾ cup: Room temperature butter helps create the creamy base that makes the dough tender and rich.
- Sugar, 1 cup: Adds sweetness and contributes to the light texture of the cookies.
- Large egg, 1: Binds the ingredients and helps with the cookie’s structure.
- Vanilla bean paste, 1 teaspoon: Adds warm depth and enhances the overall flavor.
- Peppermint extract, ¼ teaspoon + ½ teaspoon: Infuses the dough and chocolate coating with that refreshing minty kick.
- All-purpose flour, 1½ cups: The backbone of the cookie, it gives the dough its structure and thickness.
- Cocoa powder, ¾ cup: Brings a rich chocolate flavor that is balanced by the mint.
- Baking powder, 1 teaspoon: Helps the cookies hold their shape without rising too much.
- Salt, ⅛ teaspoon: Enhances all the flavors and balances sweetness.
- Semi-sweet chocolate chips, 14 ounces: Melted and combined with peppermint, this makes the luscious mint chocolate coating.
- Vegetable oil, 1 tablespoon: Keeps the melted chocolate smooth and glossy for coating.
How to Make Homemade Thin Mints Girl Scout Cookies
Step 1: Prepare the Cookie Dough
Begin by preheating your oven to 350°F so it’s ready when your dough is perfectly chilled. Using a large bowl and an electric mixer, beat the softened butter and sugar together until the mixture becomes creamy and light—don’t be shy about giving this step a good, thorough mix to get that lovely fluffy texture. Then add the egg, vanilla bean paste, and the first ¼ teaspoon of peppermint extract; mix until everything is smoothly combined.
Step 2: Combine Dry Ingredients
In another bowl, sift together the flour, cocoa powder, baking powder, and salt. Whisk them to ensure an even blend of all the dry ingredients. This step prevents clumps and will give the dough a uniform chocolatey color and flavor.
Step 3: Bring the Dough Together
Gradually add the dry mixture to your wet ingredients, mixing with your electric mixer a little at a time until the dough is fully combined. The dough should become thick and chocolatey, ready for shaping.
Step 4: Roll and Chill the Dough
Lay out a large sheet of parchment paper on a flat surface and place half of the dough on it. Cover with another piece of parchment and roll it out to about ¼-inch thickness. Repeat with the other half. Refrigerate both dough sheets for at least two hours to make cutting easier and keep the cookies thin and crisp.
Step 5: Cut and Bake
Remove one chilled dough sheet at a time and use a 2-inch round cookie cutter to press out 28 circles. Transfer them to parchment-lined cookie sheets, spacing them just enough because they won’t spread much. Bake each sheet for about eight minutes at 350ºF until the cookies look set but not dry. Let them cool for five minutes on the sheet before transferring to a rack to cool completely.
Step 6: Prepare the Chocolate Mint Coating
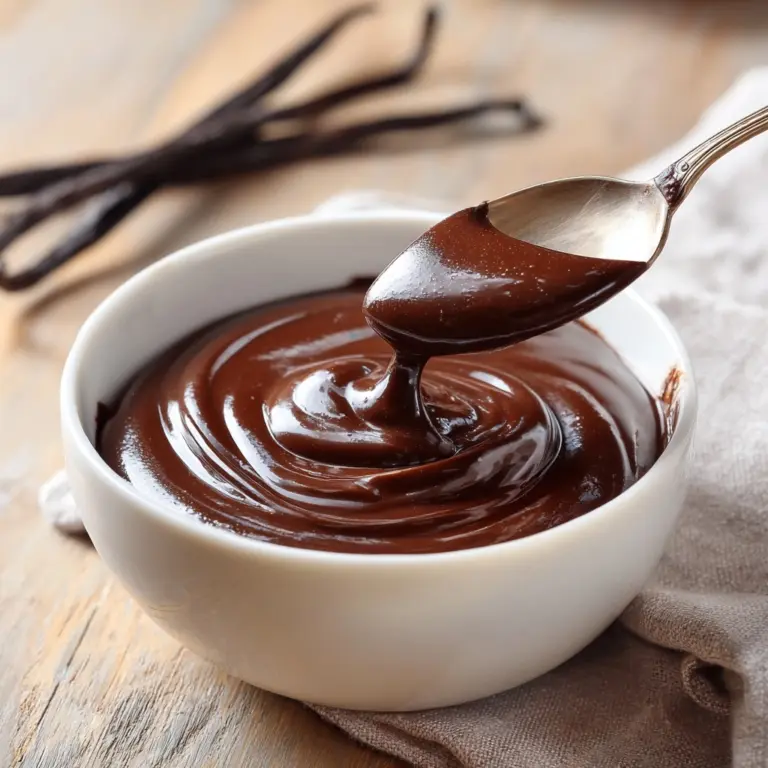
Once your cookies are fully cooled, it’s time for that iconic coating. Place the semi-sweet chocolate chips in a microwave-safe bowl and melt them in 30-second bursts, stirring thoroughly each time to prevent burning. Stir in the remaining peppermint extract and the vegetable oil to create a smooth, glossy finish.
Step 7: Coat the Cookies
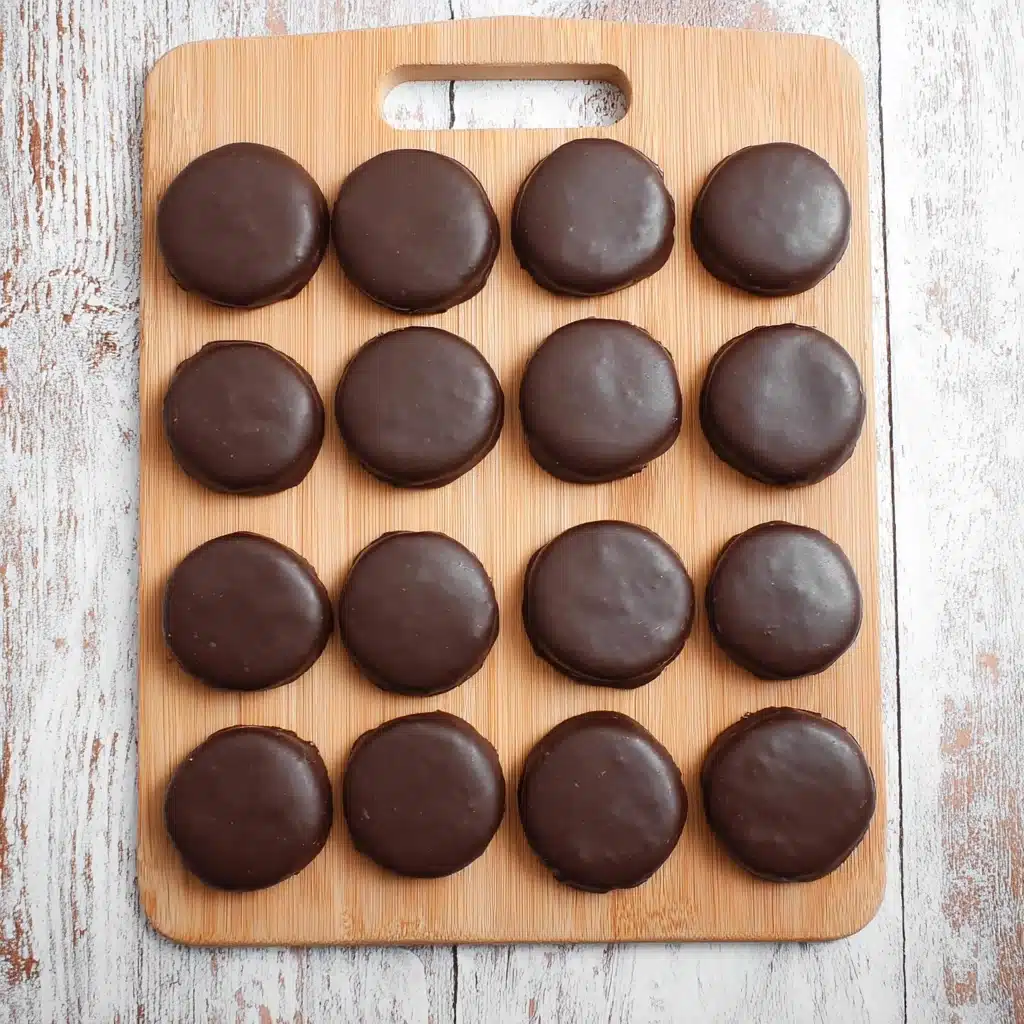
Dunk each cookie fully into the melted chocolate, ensuring it’s evenly coated. Place the dipped cookies on fresh parchment paper to cool and harden. Once set, these Homemade Thin Mints Girl Scout Cookies are ready to enjoy!
How to Serve Homemade Thin Mints Girl Scout Cookies
Garnishes
While these cookies shine on their own, you can add a sprinkle of crushed candy canes on top of the wet chocolate for festive flair or lightly dust some finely grated dark chocolate for an extra layer of indulgence. These simple garnishes add a bit of texture and visual appeal perfect for special occasions.
Side Dishes
Serve your Homemade Thin Mints Girl Scout Cookies alongside a tall glass of cold milk or a frothy cappuccino for classic pairing. For a grown-up twist, enjoy them with a peppermint mocha or a refreshing minty herbal tea that complements the cookie’s flavors beautifully.
Creative Ways to Present
Elevate your presentation by arranging the cookies in a decorative tin or stacking them next to a bouquet of fresh mint leaves for a vibrant contrast. You could also create cookie sandwich treats by spreading a thin layer of mint chocolate ganache between two cookies for a fun and decadent twist.
Make Ahead and Storage
Storing Leftovers
Keep your Homemade Thin Mints Girl Scout Cookies fresh by storing them in an airtight container at room temperature. They will maintain their crispness and flavor for up to a week, perfect for nibbling whenever a mint-chocolate craving hits.
Freezing
If you want to enjoy these cookies later, they freeze wonderfully. Place them in a single layer on a baking sheet to freeze initially, then transfer them to a zipper bag or airtight container. Frozen cookies will last for up to three months and thaw quickly at room temperature without losing any texture or flavor.
Reheating
Because these cookies are best enjoyed crisp and cool, reheating is generally unnecessary. However, if you prefer them slightly warm, place them in a warm oven (about 300°F) for just a few minutes, but be careful not to melt the chocolate coating.
FAQs
Can I use different types of chocolate chips for the coating?
Absolutely! While semi-sweet chocolate is traditional, you can experiment with dark or even white chocolate for a unique flavor, just be sure to adjust the peppermint extract to balance sweetness.
Is peppermint extract necessary, or can I substitute it?
Peppermint extract is key to capturing that classic Thin Mints flavor. While you could try spearmint extract or mint oil, these may alter the taste significantly, so use them cautiously.
Can I make the dough ahead of time?
Yes! The dough can be prepared and rolled out ahead of time, then refrigerated for up to two days before baking. This actually develops the flavor and makes cutting the cookies easier.
What if my cookies spread too much while baking?
If your cookies spread, the dough might have been too warm or the thickness uneven. Chilling the dough thoroughly and rolling it to an even ¼-inch thickness helps keep the cookies perfectly thin and crisp.
How do I achieve the perfect thin crisp texture?
The combination of chilling the dough, rolling thin, and baking for just the right amount of time ensures your Homemade Thin Mints Girl Scout Cookies come out with their signature crunch and snap.
Final Thoughts
There’s something truly special about mixing up a batch of Homemade Thin Mints Girl Scout Cookies—they’re nostalgic, flavorful, and surprisingly simple to make. Whether you’re reliving fond memories or discovering this classic for the first time, these cookies are sure to bring smiles all around. I can’t wait for you to try this recipe and experience the magic of that minty, chocolatey crunch fresh from your own kitchen!
PrintHomemade Thin Mints Girl Scout Cookies Recipe

These Homemade Thin Mints Girl Scout Cookies are a perfect replica of the classic favorite, featuring rich chocolate cookies infused with peppermint, dipped in a smooth chocolate mint coating. Crispy, refreshing, and ideal for any occasion, these cookies bring the beloved flavor of Thin Mints right to your kitchen.
- Prep Time: 20 minutes
- Cook Time: 8 minutes per batch (approx. 16 minutes total)
- Total Time: 2 hours 40 minutes (including chilling)
- Yield: Approximately 56 cookies 1x
- Category: Dessert, Snack
- Method: Baking, Dipping
- Cuisine: American
- Diet: Vegetarian
Ingredients
For the Chocolate Mint Cookies
- ¾ cup unsalted butter, room temperature
- 1 cup sugar
- 1 large egg
- 1 teaspoon vanilla bean paste
- ¼ teaspoon peppermint extract
- 1½ cups all-purpose flour
- ¾ cup cocoa powder
- 1 teaspoon baking powder
- ⅛ teaspoon salt
For the Chocolate Mint Coating
- 14 ounces semi-sweet chocolate chips
- 1 tablespoon vegetable oil
- ½ teaspoon peppermint extract
Instructions
- Preheat Oven: Preheat your oven to 350°F (175°C) to prepare for baking the cookies.
- Cream Butter and Sugar: In a large bowl, beat the room temperature butter and sugar together with an electric mixer until the mixture is creamy and light. You can’t overbeat here as it ensures a fluffy texture.
- Add Wet Ingredients: Beat in the egg, vanilla bean paste, and ¼ teaspoon peppermint extract until combined thoroughly.
- Combine Dry Ingredients: In a separate large bowl, sift together the all-purpose flour, cocoa powder, baking powder, and salt. Whisk the mixture to blend evenly.
- Mix Dough: Gradually add the dry ingredients to the wet mixture, beating until fully incorporated and smooth dough forms.
- Roll Out Dough: Cover a large flat surface with parchment paper. Divide the dough in half and place one half on the parchment. Top with another parchment paper sheet and roll out to about ¼-inch thickness. Repeat with the other half.
- Chill Dough: Keep the dough between parchment sheets and refrigerate for at least two hours to firm up.
- Cut Cookies: Remove one dough half at a time from the fridge. Using a 2-inch round cookie cutter, cut 28 circles from each half, rerolling scraps as needed to use all dough. Place cookies on a parchment-lined baking sheet, spacing them lightly.
- Bake: Bake the cookies in the preheated oven for 8 minutes or until fully cooked but still soft. Let them cool on the sheet for 5 minutes before transferring to a wire rack to cool completely.
- Melt Chocolate: Once cooled, place the semi-sweet chocolate chips in a microwave-safe bowl. Microwave in 30-second intervals, stirring thoroughly after each interval, until the chocolate is fully melted and smooth.
- Add Peppermint and Oil: Stir in ½ teaspoon peppermint extract and 1 tablespoon vegetable oil into the melted chocolate to enhance flavor and texture.
- Coat Cookies: Fully submerge each cooled cookie into the chocolate mixture. Place the dipped cookies on a clean sheet of parchment paper to allow the chocolate coating to harden and cool completely.
Notes
- Ensure butter is at room temperature for easy creaming and better texture.
- Use vanilla bean paste instead of extract for an intensified vanilla flavor and speckled appearance.
- Chilling the dough is essential to prevent spreading and helps achieve thin, crisp cookies.
- Microwave the chocolate carefully, stirring frequently to avoid burning.
- Cookies should be kept in an airtight container at room temperature for up to one week or refrigerated for longer freshness.
Nutrition
- Serving Size: 1 cookie
- Calories: 110 kcal
- Sugar: 9 g
- Sodium: 35 mg
- Fat: 7 g
- Saturated Fat: 4 g
- Unsaturated Fat: 2.5 g
- Trans Fat: 0 g
- Carbohydrates: 12 g
- Fiber: 1.5 g
- Protein: 1 g
- Cholesterol: 15 mg
Keywords: Thin Mints, Girl Scout Cookies, homemade Thin Mints, chocolate mint cookies, peppermint cookies, holiday cookies, chocolate dipped cookies
