Copycat Little Debbie Zebra Cakes Recipe
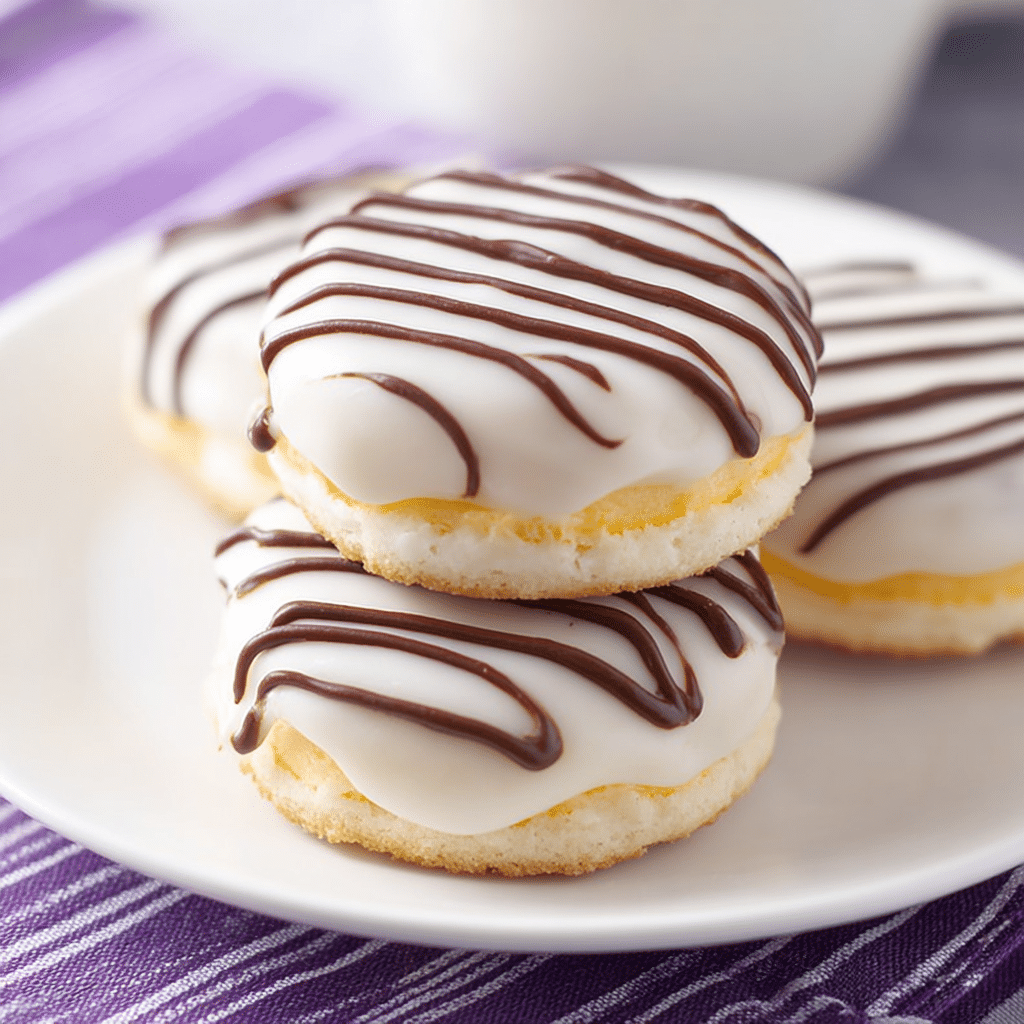
If you have a sweet tooth and a soft spot for nostalgic treats, you are going to absolutely adore this Copycat Little Debbie Zebra Cakes recipe. These delightful miniature cakes boast a tender yellow sponge wrapped around a luscious buttercream filling, all coated in a smooth vanilla almond bark with signature dark chocolate stripes on top. They are just the right size for snacking, perfectly balanced in flavors and textures, and incredibly fun to make at home. Whether you’re craving a childhood favorite or looking to impress friends with a fancy but approachable dessert, these Copycat Little Debbie Zebra Cakes are sure to become an instant classic in your kitchen.
Ingredients You’ll Need
Making these zebra cakes might look impressive, but you’ll be surprised at how simple and essential the ingredients are. Each one plays a crucial role, from the fluffy texture of the yellow cake to the creamy smoothness of the buttercream and the perfectly sweet, slightly firm coating on the outside.
- Yellow cake mix (1 box, 15 ounces): This is the base of your cakes, bringing the perfect soft and moist crumb every time.
- Milk (3/4 cup): Adds richness and moisture to the cake batter.
- Unsalted butter (1/2 cup melted + 1/2 cup softened): Helps create the tender crumb as melted butter in the batter and makes the buttercream silky and luscious when softened.
- Vanilla extract (2 tsp total): Elevates the flavor, giving the cake and filling that classic sweet aroma.
- Eggs (3 whole + 1 yolk): Provide structure and extra moisture to the cake.
- Powdered sugar (3 cups): The magic ingredient to sweeten and thicken the buttercream to the perfect consistency.
- Milk (3 tbsp for buttercream): Makes the buttercream smooth and spreadable.
- Vanilla almond bark (24 ounces): A must for coating the cake sandwiches, adding a subtle vanilla flavor and creating that signature glossy finish.
- Semi-sweet chocolate chips (1/2 cup): Melted for the classic zebra stripes that give these cakes their iconic look.
How to Make Copycat Little Debbie Zebra Cakes
Step 1: Bake the Yellow Cake
Start by preheating your oven to 350 degrees Fahrenheit to get things warming up just right. In a large mixing bowl, combine the yellow cake mix, milk, melted butter, vanilla extract, the three whole eggs, plus the extra egg yolk. Mix thoroughly until the batter is completely smooth and free of lumps—this ensures a delicate crumb. Line a 9×13-inch baking dish with parchment paper and spray it lightly with non-stick cooking spray to make removal easy. Pour the batter evenly into the pan and bake for 25 to 30 minutes, or until a toothpick inserted in the center comes out clean. Remove from the oven and let it cool for 15 minutes.
Step 2: Cool and Freeze the Cake
Once slightly cooled, it’s time for a clever bit of cake prep. Place another piece of parchment paper on a tray and carefully lift the cake out of the pan by the parchment edges. Flip the cake upside down onto your tray’s parchment sheet. Then, place the baking dish back on top of the cake and apply slight pressure—this helps flatten the cake for even layers. Let it cool fully this way, then pop it into the freezer for an hour. Freezing makes it easier to slice perfect rounds for your zebra cakes later!
Step 3: Whip Up the Buttercream Filling
While the cake chills, get your buttercream ready. In a large bowl, beat the softened butter with an electric mixer until it’s fluffy and lighter in color—this is key for a spreadable, melt-in-your-mouth filling. Add the vanilla extract and gradually beat in the powdered sugar one cup at a time, making sure it’s fully incorporated before the next addition. Keep beating for 3 to 5 minutes, then add the milk and mix again until smooth and creamy. Transfer your buttercream into a large zip-top bag and snip a small corner off for easy piping.
Step 4: Cut and Assemble the Cake Sandwiches
Bring the cake out from the freezer and use a 3-inch cookie cutter or a straight-edged cup to cut out perfect rounds. Slice each cake round in half horizontally to create “sandwiches.” Pipe a generous ring of buttercream along the edge of the bottom half, then place the top piece back on and press gently to secure. Place the assembled cakes back on the parchment-lined tray and stash them in the freezer while you move on to coating.
Step 5: Coat and Decorate the Zebra Cakes
Melt the vanilla almond bark in 30-second bursts in the microwave, stirring in between, until smooth. In a small separate bowl, melt the semi-sweet chocolate chips similarly to prepare the drizzle. Grab a cake sandwich from the freezer, hold it gently with your thumb underneath and index finger on top, then dip and rotate it in the melted almond bark to coat the sides evenly. Place the coated cake back on the parchment paper and quickly top it with a spoonful of almond bark to cover the top, smoothing it lightly for an even finish. Using the chocolate in your piping bag, create the iconic zebra stripes by drawing wavy lines across the top. Let them harden at room temperature before indulging!
How to Serve Copycat Little Debbie Zebra Cakes
Garnishes
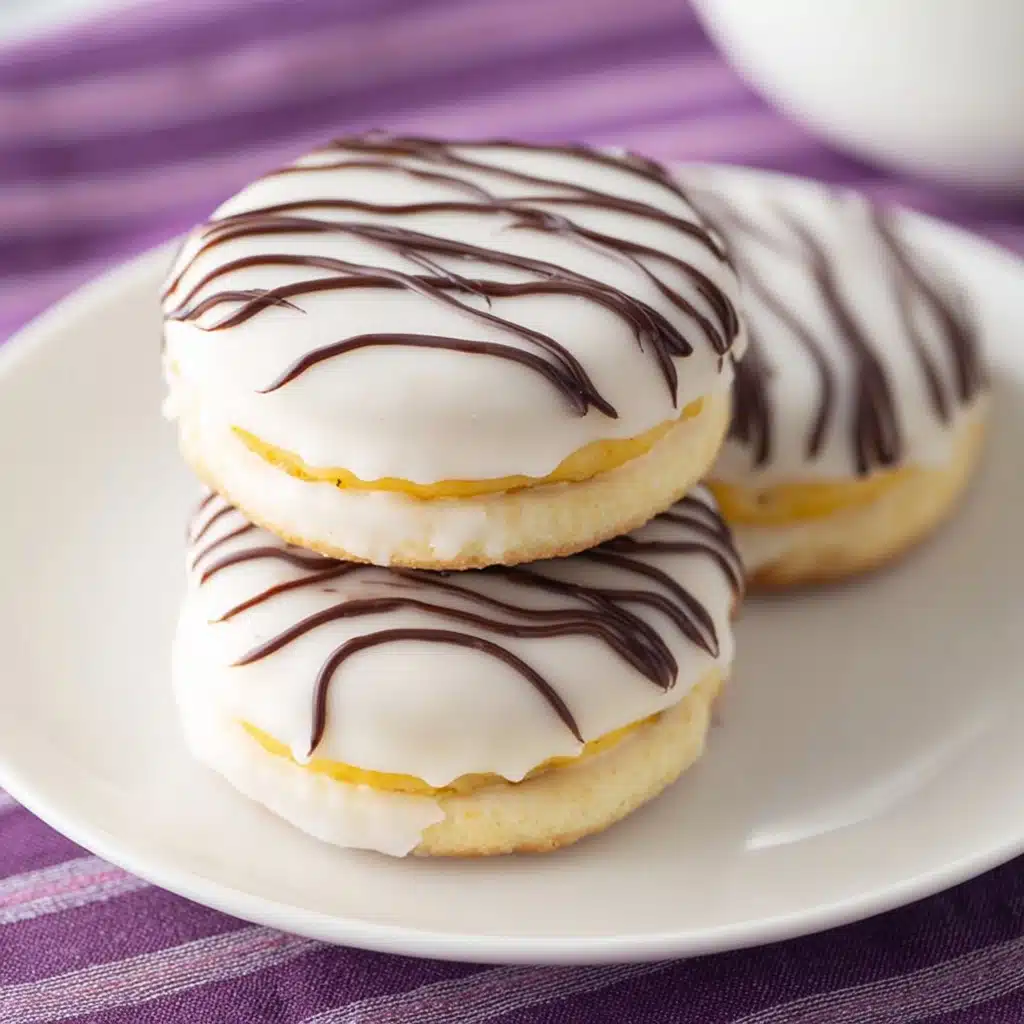
These zebra cakes are stunning all on their own, but a touch of creativity with garnishes can truly elevate the presentation. Consider adding a sprinkle of edible gold dust or finely chopped toasted nuts around the edges for a sophisticated touch. Fresh berries served alongside add a pop of juicy freshness and beautiful color to the plate, complementing the sweetness of the little cakes perfectly.
Side Dishes
Pair these sweet treats with a light and refreshing side to balance the richness. A simple fruit salad or a chilled glass of milk works wonders. If you’re serving a crowd, mini fruit skewers or a bowl of mixed nuts can provide a nice savory counterpoint to the creamy, sweet cakes.
Creative Ways to Present
For a party or dessert table, try stacking the Copycat Little Debbie Zebra Cakes on a tiered stand for a dazzling display. You can also place each cake in a decorative cupcake liner or individual paper cups to make serving easy and mess-free. Drizzle some extra melted chocolate over the display plate, and you’ve got an inviting setup everyone will want to dig into!
Make Ahead and Storage
Storing Leftovers
If you have any of these gems left over (though that might be hard!), store them in an airtight container in the fridge. They can stay fresh for up to four days. Just be sure to keep them separated with parchment paper to prevent sticking and maintain their lovely appearance.
Freezing
These zebra cakes freeze beautifully, making them an excellent make-ahead dessert. Place them in a single layer in a freezer-safe container or zip-top bag with parchment paper between layers to avoid sticking. They can be frozen for up to two months without losing their wonderful taste and texture.
Reheating
When you’re ready to enjoy your frozen zebra cakes, thaw them in the refrigerator overnight. Because of the coating, it’s best not to microwave them to prevent the chocolate from melting unevenly, but room temperature thawing maintains their beautiful finish with no fuss. They’re perfect just as they are once softened slightly.
FAQs
Can I make these zebra cakes gluten-free?
Absolutely! Simply substitute the yellow cake mix for a gluten-free version and double-check the other ingredients for gluten content. The texture might vary slightly, but the flavor will still be fantastic.
Do I have to use almond bark for the coating?
Almond bark is great for ease and flavor, but you can substitute white chocolate chips or candy melts if you prefer. Just be sure to melt them gently to keep the smooth texture.
How long do Copycat Little Debbie Zebra Cakes last once assembled?
Stored properly in an airtight container in the fridge, these cakes stay fresh for about four days. They’re best enjoyed within this timeframe for optimal taste and texture.
Can I use homemade cake instead of the boxed mix?
You totally can! A homemade yellow cake recipe will add a personal touch. Just make sure it’s dense enough to hold together well when sliced and frozen.
Is there a way to make the buttercream filling less sweet?
Yes, you can tweak the amount of powdered sugar slightly or add a small pinch of salt to balance the sweetness. Experiment until it matches your palate perfectly!
Final Thoughts
Now that you have the recipe and the inside scoop on these irresistible Copycat Little Debbie Zebra Cakes, it’s time to gather your ingredients and start baking! These charming little cakes are not only a nostalgic delight but also a wonderful way to impress friends, brighten up any occasion, or simply treat yourself to something sweet and special. Trust me, once you try making these at home, you’ll wonder how you ever lived without them. Happy baking and even happier snacking!
PrintCopycat Little Debbie Zebra Cakes Recipe
This Copycat Little Debbie Zebra Cakes recipe recreates the beloved snack cake featuring moist yellow cake rounds sandwiched with fluffy buttercream filling, coated in white chocolate and decorated with signature chocolate zebra stripes. Enjoy a homemade version of this nostalgic treat with simple ingredients and straightforward steps.
- Prep Time: 20 minutes
- Cook Time: 30 minutes
- Total Time: 1 hour 50 minutes
- Yield: 12 zebra cakes 1x
- Category: Snack, Dessert
- Method: Baking, Freezing, Dipping
- Cuisine: American
- Diet: Vegetarian
Ingredients
Cake
- 1 box yellow cake mix (15 ounce box)
- 3/4 cup milk
- 1/2 cup unsalted butter, melted
- 1 tsp vanilla extract
- 3 eggs
- 1 egg yolk
Buttercream Filling
- 1/2 cup unsalted butter, softened to room temperature
- 1 tsp vanilla extract
- 3 cups powdered sugar
- 3 tbsp milk
Coating
- 24 oz vanilla almond bark
- 1/2 cup semi-sweet chocolate chips
Instructions
- Cake Preparation: Preheat your oven to 350°F (175°C). In a large mixing bowl, combine the yellow cake mix, milk, melted butter, vanilla extract, 3 eggs, and the egg yolk. Mix well until the batter is smooth and no lumps remain. Line a 9×13 inch baking dish with parchment paper and spray the paper with non-stick cooking spray. Pour the batter evenly into the prepared dish.
- Bake the Cake: Bake the cake for 25-30 minutes, or until a toothpick inserted into the center comes out clean. Once done, let the cake cool for 15 minutes. Then, place another piece of parchment paper on a tray, carefully lift the cake out using the edges of the parchment paper, and invert the cake onto the new parchment paper. Place the baking dish on top of the cake and gently press down to keep it flat while it cools completely. After cooling, place the cake in the freezer for 1 hour to firm up.
- Make the Buttercream Filling: In a large bowl, beat the softened butter with an electric mixer until light and fluffy. Add the vanilla extract. Gradually add the powdered sugar, one cup at a time, beating well between additions. After all sugar is incorporated, add the 3 tablespoons of milk and beat again until smooth and slightly fluffy. Transfer the buttercream to a large zip-top bag, seal, and cut a small corner off for piping.
- Assemble Cake Sandwiches: Remove the cake from the freezer and cut it into 3-inch circles using a cookie cutter or straight-edged cup. Slice each circle in half horizontally. Pipe a circle of buttercream onto the flat side of one half, then place the other half on top, gently pressing to form a sandwich. Place the assembled cakes on a parchment-lined tray and return them to the freezer while you prepare the coating.
- Melt Coating Ingredients: In a microwave-safe bowl, melt the vanilla almond bark in 30-second increments, stirring between each, until fully melted. In a separate small bowl, melt the semi-sweet chocolate chips similarly and stir until smooth. Transfer the melted chocolate to a small zip-top bag and cut a tiny hole in the corner for piping.
- Coat the Cakes: Remove the cake sandwiches from the freezer. Holding each with a thumb on the bottom and index finger on top, dip the sides into the melted almond bark, twisting to coat all sides evenly. Place the coated cakes back on the parchment paper. Use a spoon to drizzle a little almond bark over the top of each cake and gently smooth if needed. Let the coating harden slightly.
- Decorate with Zebra Stripes: Pipe chocolate stripes or wavy lines over the tops of the coated cakes to mimic zebra stripes. Allow the chocolate to set completely. Once hardened, your homemade zebra cakes are ready to serve and enjoy!
Notes
- You can use a cookie cutter or a straight-edged glass to cut the cake into perfect circles.
- Ensure the butter for the buttercream is softened to room temperature to get a smooth texture.
- Using parchment paper makes transferring the cake easier and prevents sticking.
- Freeze time helps the cakes hold their shape during coating.
- If you don’t have almond bark, white candy melts are a good substitute.
- Store the finished zebra cakes in an airtight container in the refrigerator for up to 5 days.
- For a dairy-free version, substitute butter and milk with plant-based alternatives and ensure vegan white chocolate coating.
Nutrition
- Serving Size: 1 zebra cake (approx. 75g)
- Calories: 320 kcal
- Sugar: 30 g
- Sodium: 120 mg
- Fat: 18 g
- Saturated Fat: 10 g
- Unsaturated Fat: 7 g
- Trans Fat: 0 g
- Carbohydrates: 36 g
- Fiber: 0.5 g
- Protein: 3 g
- Cholesterol: 65 mg
Keywords: Copycat Little Debbie Zebra Cakes, zebra cakes recipe, homemade zebra cakes, buttercream filling snack cake, almond bark coated cakes


