Soft Dinner Rolls Recipe
Introduction
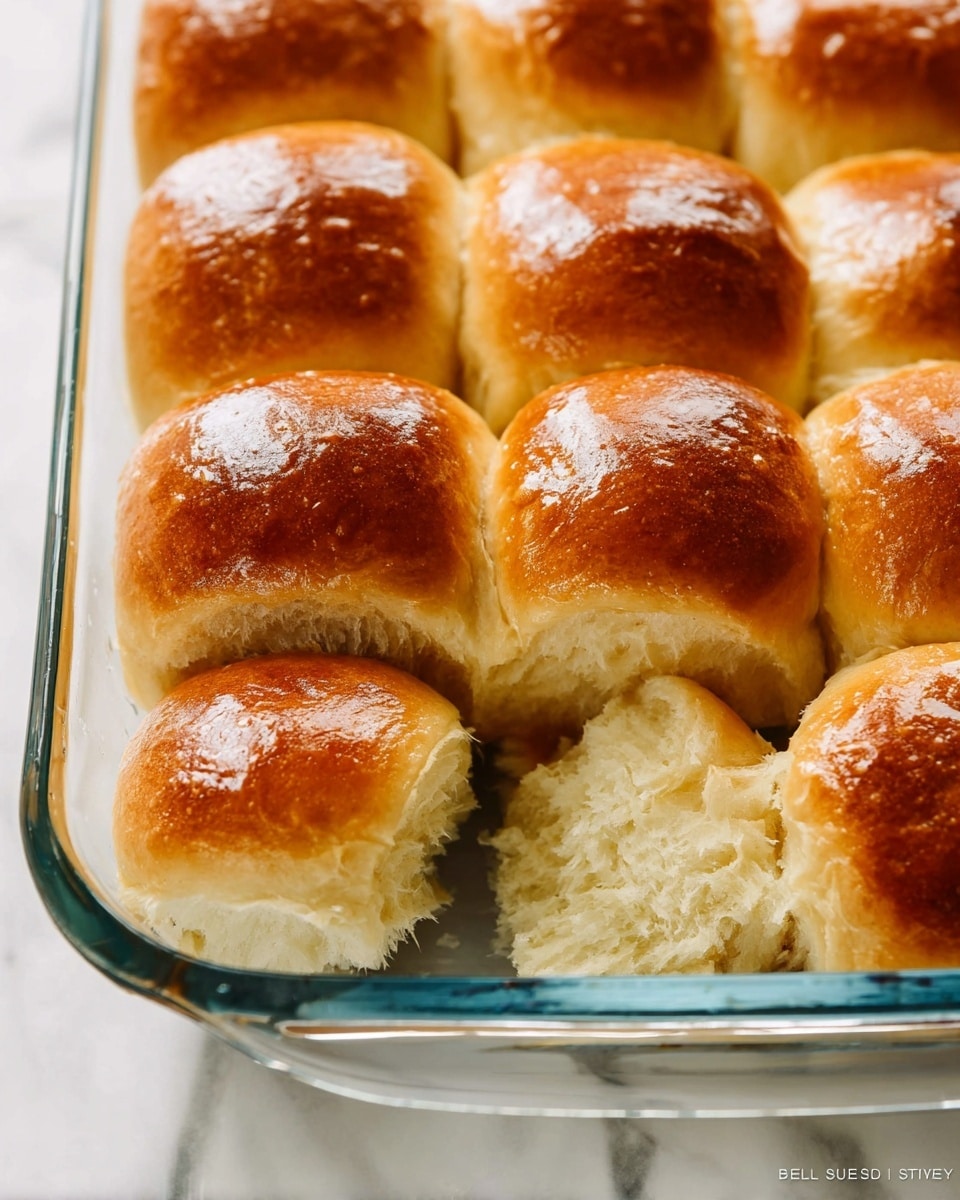
Soft dinner rolls are a classic and comforting addition to any meal. These fluffy, buttery rolls have a tender crumb and a golden crust, perfect for sopping up sauces or enjoying with butter. They are simple to make and sure to impress your family or guests.
Ingredients
- 1 cup (240ml) whole milk, warmed to about 110°F (43°C)
- 2 and 1/4 teaspoons Platinum Yeast from Red Star instant yeast (1 standard packet)
- 2 Tablespoons granulated sugar, divided
- 1 large egg
- 1/4 cup (4 Tbsp; 56g) unsalted butter, softened to room temperature and cut into 4 pieces
- 1 teaspoon salt
- 3 cups (390g) all-purpose flour or bread flour* (spooned & leveled)
- Optional topping: 2 Tablespoons (28g) melted unsalted butter mixed with 1 Tablespoon honey
Instructions
- Step 1: Whisk the warm milk, yeast, and 1 Tablespoon of sugar together in the bowl of your stand mixer. Cover and allow to sit for 5 minutes. If you don’t have a stand mixer, mix in a large bowl using a wooden spoon or silicone spatula.
- Step 2: Add the remaining sugar, egg, butter, salt, and 1 cup of flour. Mix on low speed for 30 seconds, scrape down the sides, then add the remaining flour. Beat on medium speed until the dough comes together and pulls away from the bowl sides, about 2 minutes. Add extra flour by tablespoon if dough is too wet but keep it soft and slightly sticky.
- Step 3: Knead the dough by continuing to beat in the mixer for 5 more minutes or knead by hand on a lightly floured surface for 5 minutes. If sticky, sprinkle teaspoons of flour as needed. The dough should be soft and slightly tacky but elastic. Perform the windowpane test to check readiness.
- Step 4: Lightly grease a large bowl with oil or nonstick spray. Place the dough in the bowl and turn to coat. Cover with foil, plastic wrap, or a towel and let rise in a warm spot for 1-2 hours until doubled in size.
- Step 5: Grease a 9×13 inch baking pan or two 9-inch pans. Punch down the dough and divide into 14-16 equal pieces. Shape each into a smooth ball and place in the pan.
- Step 6: Cover the rolls and let rise again until puffy, about 1 hour.
- Step 7: Preheat oven to 350°F (177°C) with the rack in a lower position.
- Step 8: Bake the rolls for 20-25 minutes until golden brown. Rotate the pan halfway through baking. Tent with foil if tops brown too fast.
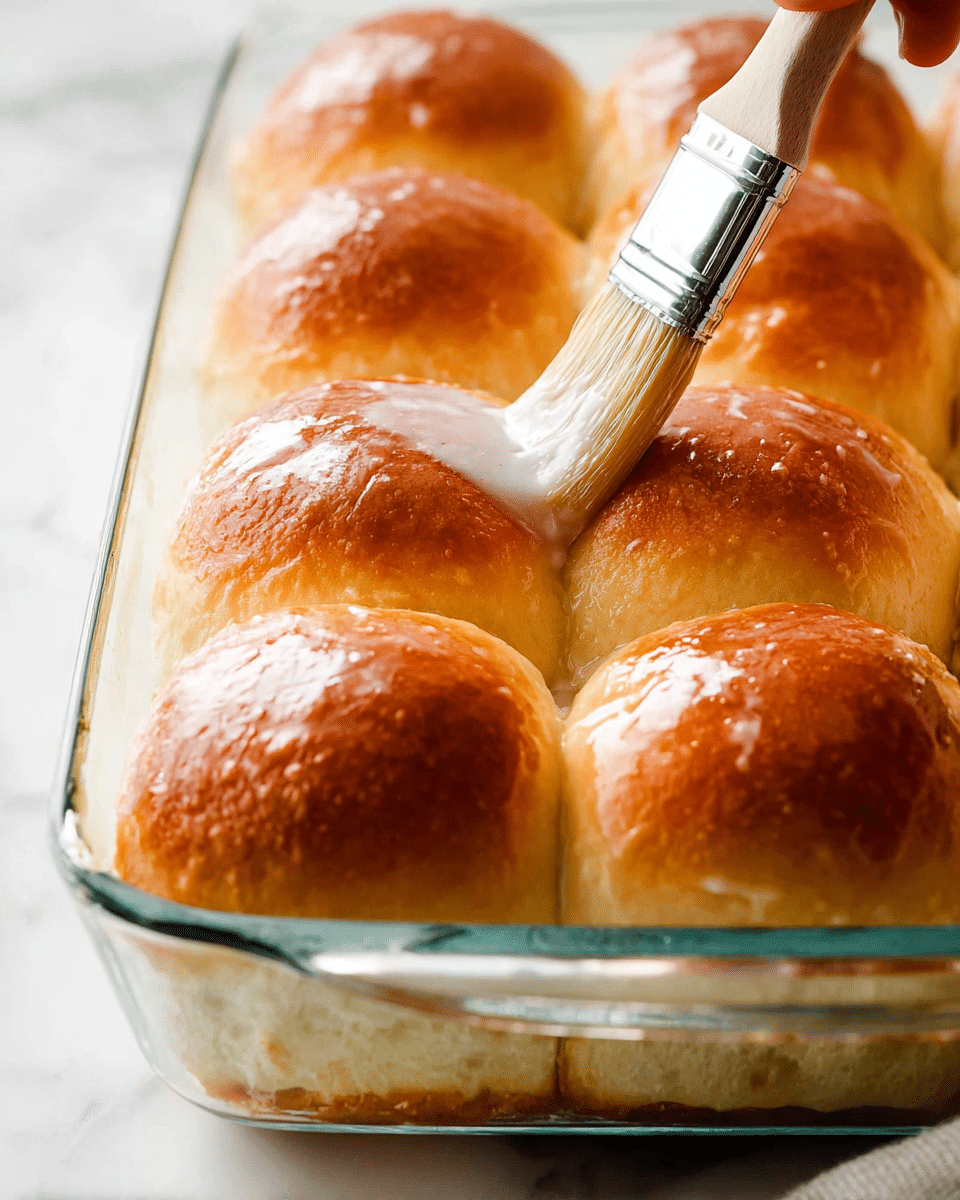
- Step 9: Brush the warm rolls with the optional honey butter topping and allow to cool a few minutes before serving.
Tips & Variations
- Use bread flour for chewier rolls or all-purpose flour for a softer texture.
- Substitute honey or maple syrup for sugar for a different subtle sweetness.
- Try adding fresh herbs or garlic to the dough for savory rolls.
- For a shiny crust, brush rolls with egg wash before baking instead of butter after baking.
Storage
Store leftover rolls tightly covered at room temperature for 2-3 days or refrigerate in an airtight container for up to 1 week. To reheat, warm rolls in a low oven or microwave briefly to restore softness.
How to Serve
Serve this delicious recipe with your favorite sides.
FAQs
Can I make these rolls without a stand mixer?
Yes, you can mix and knead the dough by hand with a wooden spoon or silicone spatula and then knead on a lightly floured surface. It will require more effort but works well.
How do I know when the dough has risen enough?
The dough should roughly double in size and feel puffy when touched. A good test is to gently poke the dough; if it slowly bounces back, it’s ready for the next step.
PrintSoft Dinner Rolls Recipe

These Soft Dinner Rolls are tender, fluffy, and perfect for any meal. Made with warm milk, instant yeast, butter, and a touch of sugar, these homemade rolls rise beautifully and bake to a golden brown. An optional honey butter glaze adds a sweet finishing touch. Ideal for family dinners or holiday gatherings, these dinner rolls are easy to make with simple ingredients and produce a delightful homemade touch to your table.
- Prep Time: 20 minutes
- Cook Time: 25 minutes
- Total Time: 2 hours 45 minutes
- Yield: 14–16 rolls 1x
- Category: Bread
- Method: Baking
- Cuisine: American
- Diet: Vegetarian
Ingredients
For the Dough
- 1 cup (240ml) whole milk, warmed to about 110°F (43°C)
- 2 1/4 teaspoons Platinum Yeast from Red Star instant yeast (1 standard packet)
- 2 Tablespoons granulated sugar, divided
- 1 large egg
- 1/4 cup (4 Tbsp; 56g) unsalted butter, softened to room temperature and cut into 4 pieces
- 1 teaspoon salt
- 3 cups (390g) all-purpose flour or bread flour (spooned & leveled)
Optional Topping
- 2 Tablespoons (28g) melted unsalted butter
- 1 Tablespoon honey
Instructions
- Prepare the dough: In the bowl of a stand mixer, whisk together the warm milk, yeast, and 1 tablespoon of sugar. Cover and allow it to sit for 5 minutes until frothy to activate the yeast.
- Mix ingredients: Add the remaining tablespoon of sugar, egg, softened butter, salt, and 1 cup of flour to the yeast mixture. Using the dough hook or paddle attachment, mix on low speed for 30 seconds. Scrape down the sides, then add the remaining flour. Beat on medium speed until the dough pulls away from the sides, about 2 minutes. If dough is too wet, add flour 1 tablespoon at a time until workable.
- Knead the dough: Continue kneading the dough in the mixer for 5 more minutes or knead by hand on a lightly floured surface for 5 minutes. The dough should be soft and slightly sticky but manageable. Perform the windowpane test to ensure proper gluten development; if dough stretches thin without tearing, it is ready.
- First rise: Lightly grease a large bowl with oil or nonstick spray. Place the kneaded dough inside, turning to coat with oil. Cover with foil, plastic wrap, or a clean kitchen towel. Let rise in a warm spot for 1-2 hours until doubled in size.
- Prepare baking pan: Grease a 9×13 inch baking pan (or two 9-inch square or round pans, or a cast iron skillet) for the rolls.
- Shape the rolls: Punch down the risen dough to release air. Divide into 14-16 equal pieces (roughly). Shape each piece into a smooth ball and place into the prepared pan, arranging evenly.
- Second rise: Cover the shaped rolls with foil, plastic wrap, or a clean towel. Allow to rise for about 1 hour until puffy.
- Preheat oven: Adjust the oven rack to a lower position and preheat to 350°F (177°C) to avoid over-browning the tops.
- Bake the rolls: Bake for 20-25 minutes until golden brown on top, rotating the pan halfway through baking. If the tops brown too quickly, tent gently with foil.
- Add topping and cool: Remove rolls from oven and brush with the optional mixture of melted butter and honey. Let the rolls cool for a few minutes before serving.
- Storage: Store leftover rolls tightly covered at room temperature for 2-3 days or refrigerate for up to 1 week.
Notes
- If you don’t have a stand mixer, mix by hand with a wooden spoon or silicone spatula, though it will require more effort.
- Adding flour gradually helps prevent a dough that’s too dry or too wet; the dough should be soft and slightly sticky.
- Using the windowpane test helps ensure the dough is kneaded enough for proper gluten development.
- The second rise is critical for fluffy rolls; don’t rush this step.
- Adjust oven rack to a lower position to prevent the tops from burning.
- Tent with foil during baking if rolls brown too quickly.
- These rolls freeze well; wrap tightly and freeze for up to 3 months. Thaw before warming.
Keywords: soft dinner rolls, homemade bread rolls, easy dinner rolls, yeast rolls, fluffy bread, soft bread rolls


