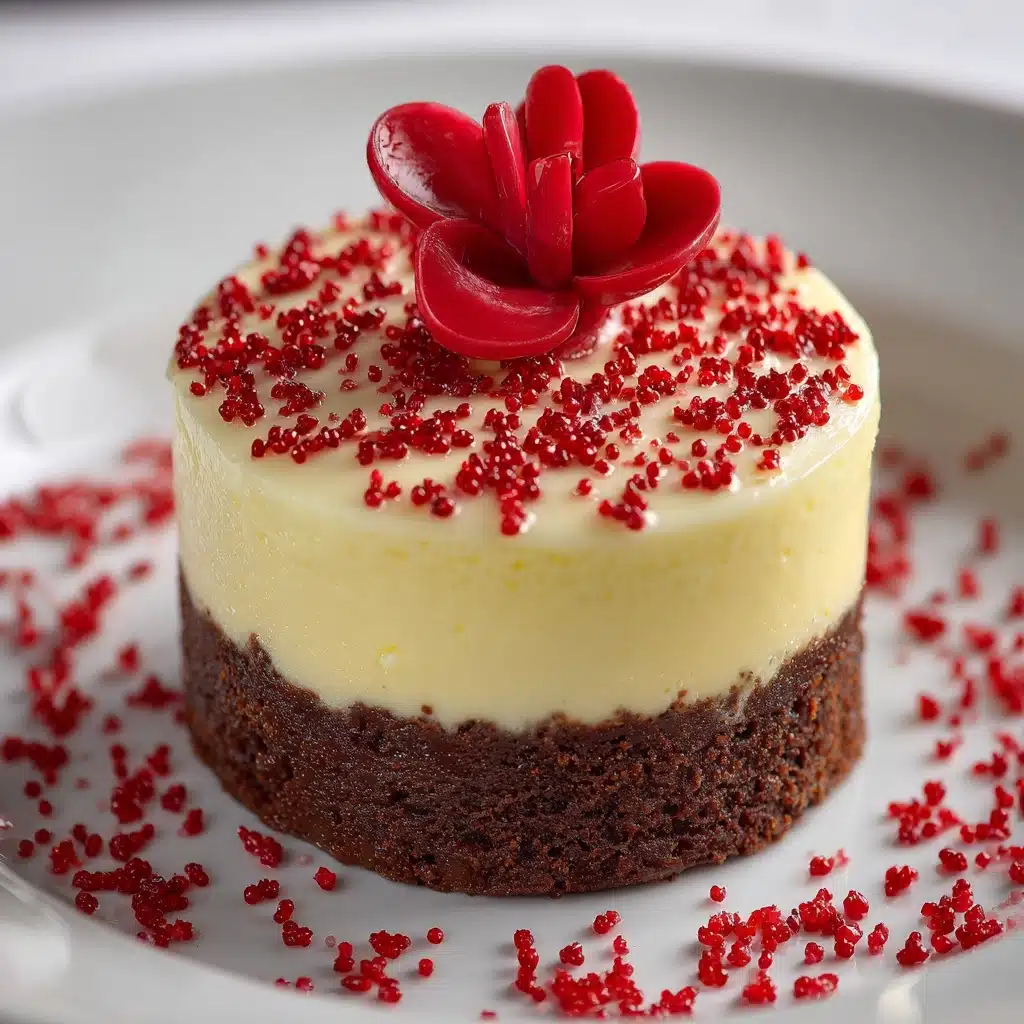
Red Velvet Cheesecake Brownies – Swirled, Fudgy, and Absolutely Irresistible
Imagine a dessert that’s not just a treat, but a showstopper: swirls of creamy cheesecake woven through luscious, strikingly red brownies with a subtle tang that makes every bite both decadent and memorable. These Red Velvet Cheesecake Brownies are swirled, fudgy, and Absolutely Irresistible, a hybrid bake that captures the romance of red velvet cake and the crave-worthiness of cheesecake. If you’re searching for something that’s as beautiful as it is delicious, you’ve just found your new favorite recipe!
Ingredients You’ll Need
This colorful dessert is refreshingly simple, yet each ingredient has its own special part to play in the magic. Gather everything below for flavors, textures, and colors that all truly shine together.
- Unsalted butter (1/2 cup, melted): Delivers richness and a moist, fudgy crumb that’s signature to brownies.
- Granulated sugar (1 cup, plus 1/3 cup for cheesecake): Sweetens both brownie and cheesecake layers and helps with that shiny top.
- Unsweetened cocoa powder (1/4 cup): Adds just the right touch of deep chocolate flavor to the red velvet base.
- Red food coloring (1 tablespoon): Brings the dramatic red color—you can use gel or liquid, whichever you’ve got!
- Vanilla extract (1 teaspoon for brownie, 1/2 teaspoon for cheesecake): Enhances both the chocolatey brownie and the creamy cheesecake layers.
- White vinegar (1/2 teaspoon): That’s the little secret for tang and an authentic “red velvet” flavor.
- Eggs (2 large, plus 1 yolk for cheesecake): Binds everything, gives lift, and adds that gorgeous chewy bite to brownies.
- All-purpose flour (3/4 cup): Just enough to hold it all together—keeping these super fudgy instead of cakey.
- Pinch of salt: Balances the sweetness and sharpens the flavors throughout.
- Cream cheese (8 oz, softened): The star of the cheesecake swirl—rich, creamy, and tangy.
How to Make Red Velvet Cheesecake Brownies – Swirled, Fudgy, and Absolutely Irresistible
Step 1: Preheat & Prep
Start by setting your oven to 350°F (175°C)—the perfect temp for getting gooey centers and gently golden edges. Line an 8×8 inch baking pan with parchment or give it a good greasing, which makes it so much easier to get those gorgeous, clean brownie squares out later (plus: almost zero pan scrubbing!).
Step 2: Make the Brownie Batter
In a medium bowl, whisk together the melted butter, sugar, cocoa powder, red food coloring, vanilla, and vinegar. Whisk in your eggs one at a time, mixing until just smooth and vibrant. Fold in the flour and salt gently—overmixing means tougher brownies, so stop as soon as it’s combined. Don’t forget to set aside about 1/4 cup of this batter; you’ll need it for those signature swirling marbled tops.
Step 3: Make the Cheesecake Layer
Grab a second bowl and mix together your softened cream cheese, sugar, egg yolk, and vanilla until totally smooth and creamy, looking like dreamy cheesecake batter. If it’s lumpy, keep mixing—no shortcuts here! The creaminess is what makes these brownies so rich and Absolutely Irresistible with every bite.
Step 4: Assemble & Swirl
Pour all of your remaining brownie batter into the prepared baking pan and spread it out. Then, gently pour the cheesecake mixture on top and smooth it out evenly. Dollop little spoonfuls of the reserved brownie batter over the cheesecake, then grab a toothpick or the tip of a knife and swirl it artfully. Aim for big, slow figure-eights; resist the urge to over-swirl, since that keeps your layers vivid and the look extra striking—and Absolutely Irresistible!
Step 5: Bake
Pop your masterpiece in the oven and bake for 30–35 minutes. The edges should look set, but you want the very center to stay just slightly jiggly; this means your brownies will be fudgy, not dry. Cooling in the pan (even chilling them in the fridge) helps make slicing a dream, and those perfect clean cuts show off all your beautiful swirls.
How to Serve Red Velvet Cheesecake Brownies – Swirled, Fudgy, and Absolutely Irresistible
Garnishes
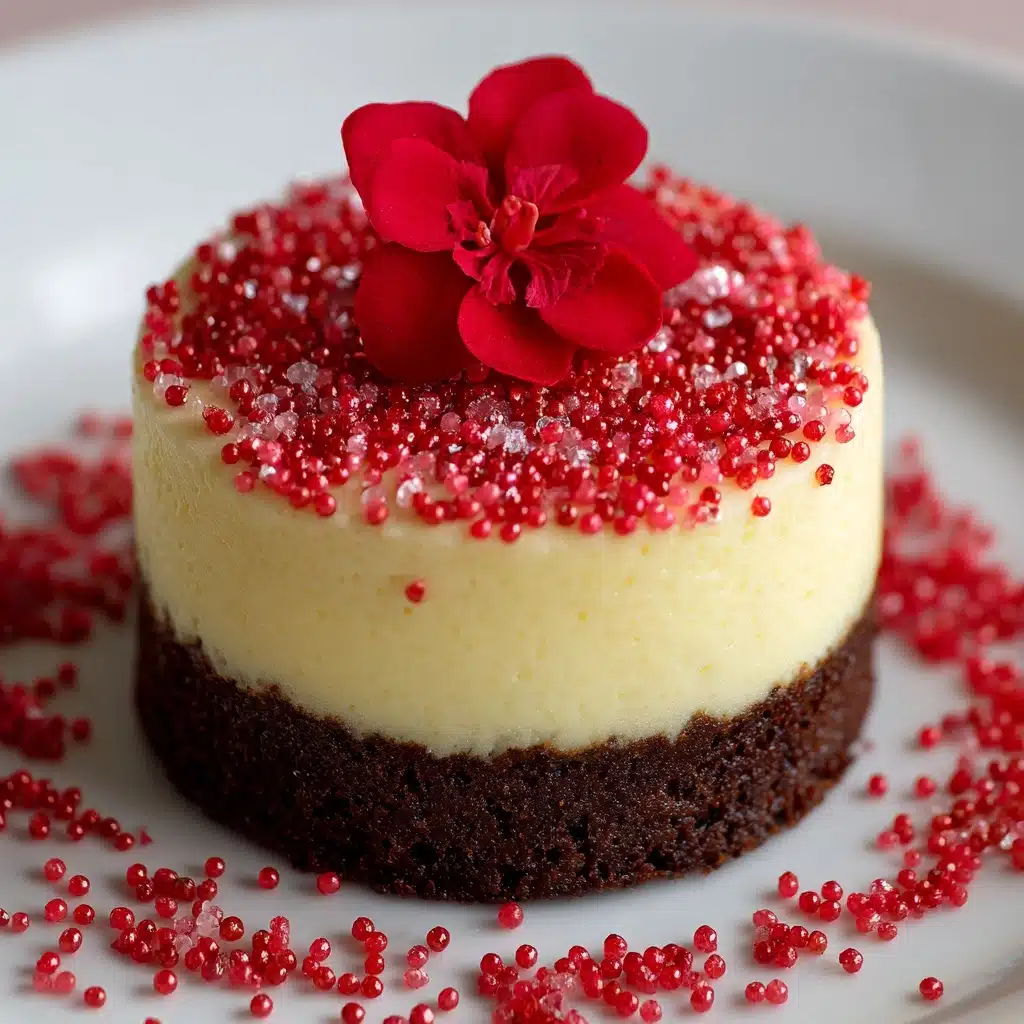
These brownies already look stunning swirled in ruby red and white, but you can dress them up even more! Try a dusting of powdered sugar, a handful of fresh berries for brightness, or a drizzle of melted chocolate over each square for an over-the-top finish that makes them truly and Absolutely Irresistible.
Side Dishes
If you want to take the experience to the next level, pair with a scoop of vanilla or cream cheese ice cream—the cool creaminess is a perfect contrast. As another bonus, a small cup of espresso or a mug of strong, hot coffee really brings out the tangy chocolatey notes and makes dessert time feel like a celebration every single time.
Creative Ways to Present
Hosting? Stack the brownies on a cake stand, interspersed with fresh strawberries for a pop of color. For gifts, wrap each square in parchment with a little ribbon for a personal touch. Or slice them into bite-sized bars and serve on a platter for parties; they’ll disappear in no time, leaving everyone raving about how these are swirled, fudgy, and Absolutely Irresistible!
Make Ahead and Storage
Storing Leftovers
Brownies this rich keep wonderfully! Store any leftovers in an airtight container in the fridge for up to five days—the flavors meld and the cheesecake stays creamy, so every bite remains just as fabulous and Absolutely Irresistible as day one.
Freezing
Want to save some for later? Freeze individual slices wrapped tightly in plastic wrap and placed in a zip-top bag or sealed container. They’ll keep for up to two months, so you can always have a little taste of something and Absolutely Irresistible in your freezer for dessert emergencies.
Reheating
If you love brownies slightly warm and gooey, just pop a slice in the microwave for 10–20 seconds. It brings back that fresh-baked taste and melts the cheesecake ever so slightly, making them once again rich, creamy, and Absolutely Irresistible with minimal effort.
FAQs
Can I double this recipe for a 9×13 pan?
Absolutely! Just double all the ingredients and bake in a 9×13 inch pan for 35–40 minutes. Keep an eye on the center, and remember—slightly underbaked is the secret to the fudgiest results.
What type of red food coloring works best?
Both liquid and gel food colorings work, but gel gives a much more vibrant red with less product. If you’re using liquid, make sure it’s a “no-taste” variety to avoid any bitterness, keeping the brownies flavorful and Absolutely Irresistible.
Can I use boxed brownie mix as a shortcut?
Yes, you can use your favorite brownie mix as the base: simply prepare as directed, add red food coloring and vinegar for that signature red velvet vibe, then continue with the cheesecake swirling as described—it’s an easy way to make things fast but still and Absolutely Irresistible!
Why white vinegar?
The vinegar reacts with cocoa powder to intensify the red color and subtly echoes traditional red velvet cake’s signature tang. You won’t taste the vinegar in the finished brownies—it just makes the flavor fuller and the color pop.
My swirl sank—how do I keep layers distinct?
If your cheesecake layer seems to disappear, make sure your cream cheese mixture isn’t too runny and dollop reserved brownie batter gently over the top. Swirl slowly and shallowly for those beautiful, distinct waves that look and taste Absolutely Irresistible.
Final Thoughts
There is something truly magical about the way creamy cheesecake ribbons blend with fudgy, tangy red velvet in every bite of these brownies. Whether you’re baking for family, friends, or just for yourself, Red Velvet Cheesecake Brownies are swirled, fudgy, and Absolutely Irresistible—trust me, you’re about to become obsessed! Happy baking!
PrintRed Velvet Cheesecake Brownies – Swirled, Fudgy, and Absolutely Irresistible

Indulge in the ultimate dessert experience with these decadent Red Velvet Cheesecake Brownies. A harmonious marriage of rich red velvet brownie and creamy cheesecake layers, these brownies are a true crowd-pleaser. Perfect for special occasions or whenever you’re craving a sweet treat that’s both fudgy and tangy.
- Prep Time: 20 minutes
- Cook Time: 30 minutes
- Total Time: 50 minutes
- Yield: 16 brownies 1x
- Category: Dessert
- Method: Baking
- Cuisine: American
- Diet: Vegetarian
Ingredients
For the Red Velvet Brownie Layer:
- 1/2 cup (1 stick) unsalted butter, melted
- 1 cup granulated sugar
- 1/4 cup unsweetened cocoa powder
- 1 tablespoon red food coloring
- 1 teaspoon vanilla extract
- 1/2 teaspoon white vinegar
- 2 large eggs
- 3/4 cup all-purpose flour
- Pinch of salt
For the Cheesecake Layer:
- 8 oz cream cheese, softened
- 1/3 cup granulated sugar
- 1 egg yolk
- 1/2 teaspoon vanilla extract
Instructions
- Step 1: Preheat & Prep – Preheat oven to 350°F (175°C) and line an 8×8 inch baking pan with parchment or grease it well.
- Step 2: Make the Brownie Batter – Whisk melted butter, sugar, cocoa powder, food coloring, vanilla, and vinegar. Add eggs one at a time, then mix in flour and salt. Reserve some batter, spread the rest in pan.
- Step 3: Make the Cheesecake Layer – Beat together cream cheese, sugar, egg yolk, and vanilla until smooth.
- Step 4: Assemble & Swirl – Pour cheesecake mixture over brownie batter, dollop reserved batter on top, swirl gently.
- Step 5: Bake – Bake for 30–35 minutes until set. Cool completely before slicing.
Notes
- For a cleaner cut, chill the brownies before slicing.
Nutrition
- Serving Size: 1 brownie
- Calories: 240
- Sugar: 18g
- Sodium: 160mg
- Fat: 15g
- Saturated Fat: 9g
- Unsaturated Fat: 5g
- Trans Fat: 0g
- Carbohydrates: 23g
- Fiber: 1g
- Protein: 4g
- Cholesterol: 75mg
Keywords: Red Velvet Cheesecake Brownies, Dessert Recipe, Cheesecake Brownies Recipe