Marshmallow Swirl Fudge Recipe
Introduction
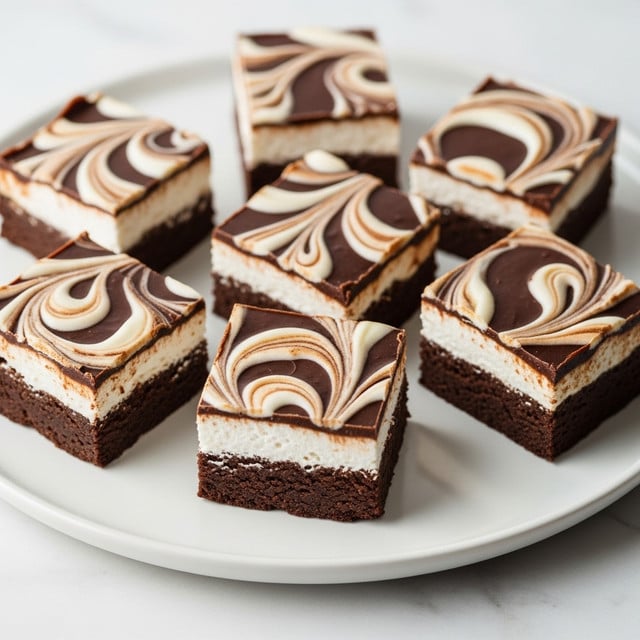
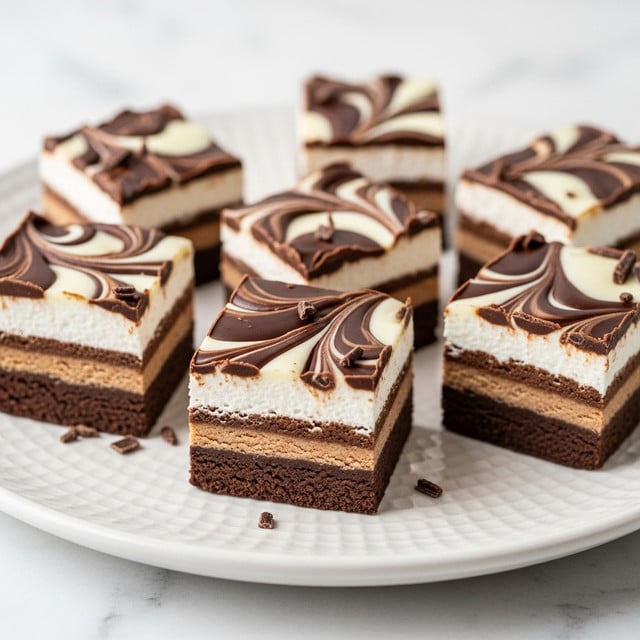
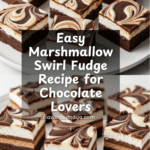
Indulge in the rich, silky goodness of this Irresistible Marshmallow Swirl Fudge. Combining smooth chocolate with soft, gooey marshmallow swirls, this treat is perfect for satisfying your sweet tooth with minimal effort.
Ingredients
- 2 cups (12 oz) semi-sweet chocolate chips
- 1 can (14 oz) sweetened condensed milk
- 2 tablespoons unsalted butter, melted
- 1 teaspoon pure vanilla extract
- ¼ teaspoon salt
- 1 cup marshmallow fluff (or marshmallow cream)
Instructions
- Step 1: Line an 8×8-inch baking dish with parchment paper, leaving extra paper hanging over the edges to easily lift out the fudge later.
- Step 2: In a medium saucepan over low heat, combine the chocolate chips, sweetened condensed milk, and melted butter. Stir constantly until everything melts and the mixture is smooth, about 3-5 minutes.
- Step 3: Remove the saucepan from heat and stir in the vanilla extract and salt until well combined.
- Step 4: Pour the chocolate mixture into the prepared baking dish, spreading it evenly with a spatula.
- Step 5: Drop spoonfuls of marshmallow fluff onto the warm chocolate. Use a knife to gently swirl the marshmallow into the fudge without fully mixing, creating a marbled effect.
- Step 6: Refrigerate for at least 2 hours or until the fudge is firm. Once set, lift the fudge out using the parchment paper, cut into squares, and serve.
Tips & Variations
- For added texture, sprinkle chopped nuts or crushed peppermint candy over the marshmallow before swirling.
- Use white chocolate chips instead of semi-sweet for a sweeter, creamier fudge.
- To make cutting easier, let the fudge sit at room temperature for a few minutes before slicing.
Storage
Store the fudge in an airtight container in the refrigerator for up to one week. For longer storage, freeze the fudge for up to 3 months, thawing in the refrigerator before serving. Bring to room temperature for a softer texture before enjoying.
How to Serve
Serve this delicious recipe with your favorite sides.
FAQs
Can I use mini marshmallows instead of marshmallow fluff?
Yes, but marshmallow fluff creates a smoother, more consistent swirl. Mini marshmallows may melt unevenly and affect the texture.
How do I prevent the fudge from becoming grainy?
Stir the chocolate mixture gently and constantly over low heat to melt everything evenly. Avoid overheating or boiling the mixture, which can cause graininess.
PrintMarshmallow Swirl Fudge Recipe

This Irresistible Marshmallow Swirl Fudge combines rich semi-sweet chocolate with creamy sweetened condensed milk and buttery goodness, beautifully accented by luscious swirls of gooey marshmallow fluff. Perfectly smooth and delightfully sweet, this no-bake fudge is an easy treat that sets up in the fridge and makes an impressive dessert or gift.
- Prep Time: 10 minutes
- Cook Time: 5 minutes
- Total Time: 2 hours 15 minutes
- Yield: 16 squares 1x
- Category: Dessert
- Method: Stovetop
- Cuisine: American
Ingredients
Fudge Base
- 2 cups (12 oz) semi-sweet chocolate chips
- 1 can (14 oz) sweetened condensed milk
- 2 tablespoons unsalted butter, melted
- 1 teaspoon pure vanilla extract
- ¼ teaspoon salt
Swirl
- 1 cup marshmallow fluff (or marshmallow cream)
Instructions
- Prepare the Baking Dish: Line an 8×8-inch baking dish with parchment paper, ensuring some paper extends over the edges. This will make it easier to lift out the fudge once set.
- Melt the Chocolate Mixture: In a medium saucepan over low heat, combine the semi-sweet chocolate chips, sweetened condensed milk, and melted butter. Stir constantly for 3-5 minutes until the mixture is completely smooth and melted. Remove from heat and mix in the vanilla extract and salt until well combined.
- Pour and Spread: Pour the melted chocolate mixture into the lined baking dish. Use a spatula to spread it evenly in the dish for an even thickness.
- Add Marshmallow Swirls: Drop spoonfuls of marshmallow fluff over the warm chocolate layer. With a knife, gently swirl the marshmallow into the chocolate to create marbled patterns without fully mixing it in; the idea is to have distinct swirls visible.
- Chill to Set: Place the dish in the refrigerator and chill for at least 2 hours or until firm enough to cut.
- Serve: Once set, use the extended parchment paper to lift the fudge out of the dish. Cut into squares and enjoy your creamy, swirled fudge treat.
Notes
- Use parchment paper with overhang for easy removal and clean edges.
- Be sure to stir constantly when melting chocolate to prevent scorching.
- Do not over-swirl the marshmallow to maintain distinct swirl patterns.
- Store fudge in an airtight container in the refrigerator for up to one week.
- Allow fudge to sit at room temperature for a few minutes before serving for a softer bite.
Keywords: marshmallow fudge, chocolate fudge recipe, easy fudge, no bake fudge, chocolate dessert, homemade fudge