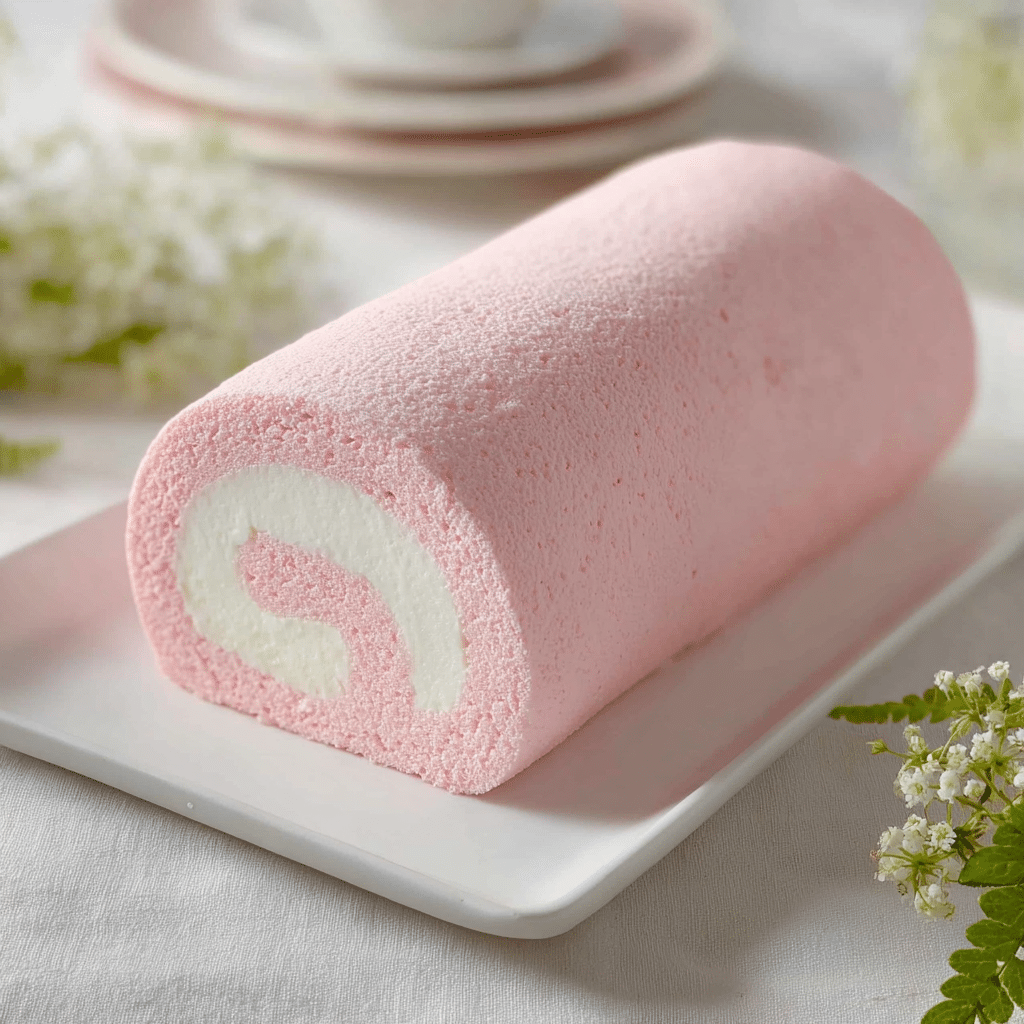
Japanese Cotton Candy Cake Roll Recipe
If you’ve ever dreamed of biting into a dessert so light and fluffy that it seems to melt like air, then you are going to adore the Japanese Cotton Candy Cake Roll. This delightful treat combines the silkiness of a delicate sponge cake with a luscious cotton candy whipped cream filling, creating an airy slice of happiness that feels like a whimsical cloud on your palate. Perfect for impressing guests or simply treating yourself to something truly special, this cake roll captures the essence of Japanese baking artistry with a fun and sweet twist.
Ingredients You’ll Need
Creating this Japanese Cotton Candy Cake Roll relies on ingredients that are simple yet carefully chosen to build the perfect texture, flavor, and color. Each component plays its own vital role—from the whipped egg whites that give the cake its lift to the cotton candy extract that brings the signature sweetness and whimsy.
- Heavy cream (1 cup, 36% M.F., chilled): Essential for creating the light, fluffy whipped cream filling.
- Granulated sugar (1 tbsp + 1 tsp, plus 55 g, plus 30 g): Sweetens the cake and cream while helping to stabilize meringue and whipped cream.
- Cotton candy extract (2 tsp total): The magical flavor that transforms this cake roll into something truly special and nostalgic.
- Unflavored gelatin powder (1 tsp): Adds stability to the whipped cream, ensuring it holds up beautifully in the cake roll.
- Water (4 tsp): Used to bloom the gelatin perfectly.
- Egg whites (6, room temperature): Whipped into a meringue, they give the cake its iconic cotton candy texture.
- Cream of tartar (1/4 tsp): Helps stabilize the egg whites for maximum volume.
- Gel color (your choice): Adds a playful and inviting hue to the meringue, enhancing the cotton candy theme.
- Whole fat milk (90 ml): Contributes to the cake’s tender crumb.
- Vegetable oil (20 ml): Keeps the cake moist without weighing it down.
- Cake flour (70 g): Provides a soft structure essential to a delicate sponge cake.
- Sea salt (1/4 tsp): Balances the sweetness and intensifies the cake’s flavors.
How to Make Japanese Cotton Candy Cake Roll
Step 1: Prepare Your Pan and Oven
Start by lining an 8 x 12-inch rectangular cake pan with a silicone baking mat or parchment paper designed for toaster-sized pans. This ensures your cake will release easily after baking. Preheat your oven to 325°F to guarantee even cooking.
Step 2: Mix the Wet and Dry Ingredients
Whisk together the first portion of your sugar with all the wet ingredients: whole milk, vegetable oil, and cotton candy extract. In a separate bowl, sift your dry ingredients—cake flour and sea salt—and combine. Make a well in the center of your dry mix and gradually incorporate the wet mixture until just combined. Remember, over-mixing is the enemy of tenderness here, so keep your strokes gentle.
Step 3: Whip the Egg Whites and Add Color
In a completely clean, non-plastic bowl, begin whipping your egg whites on low speed until bubbly, then add cream of tartar. Increase the speed steadily and gradually add the second portion of sugar, creating that perfect meringue with stiff peaks. This light and airy meringue is the secret weapon that gives your Japanese Cotton Candy Cake Roll its signature texture. Stir in your chosen gel color to make the cake visually stunning and true to its cotton candy inspiration.
Step 4: Fold Meringue Into Batter and Bake
Gently fold the meringue into your flour mixture in three additions, preserving as much air as possible. Pour this magical batter into your prepared pan and spread evenly. Tap the pan gently to release big air bubbles, then bake for 10-12 minutes or until a skewer inserted comes out clean and the cake springs back to the touch.
Step 5: Cool and Unmold
Let the cake cool in the pan for 5 minutes. Then, place a cooling rack over the pan, flip the cake onto the rack, and carefully remove the parchment or silicone sheet. This side will eventually be the top of your roll, so let it cool completely before moving to filling.
Step 6: Make the Cotton Candy Whipped Cream
For the cream filling, chill your mixing bowl, beaters, and heavy cream to get that perfect whip. Bloom the gelatin in water, then melt it gently in a warm water bath and allow it to cool slightly. Begin whipping the cream with sugar until it starts to thicken, then slowly add the cooled gelatin and cotton candy extract. Beat until stiff peaks form, but don’t go too far—nobody wants over-whipped cream here.
Step 7: Assemble and Roll Your Cake
Spread the sumptuous cotton candy whipped cream evenly across the cooled cake, placing a little extra cream on the edge that you’ll roll from to ensure a seamless spiral. Carefully roll up your cake from the short edge with the help of the parchment paper, then wrap it tightly in plastic wrap. Chill in the refrigerator to set the roll before slicing.
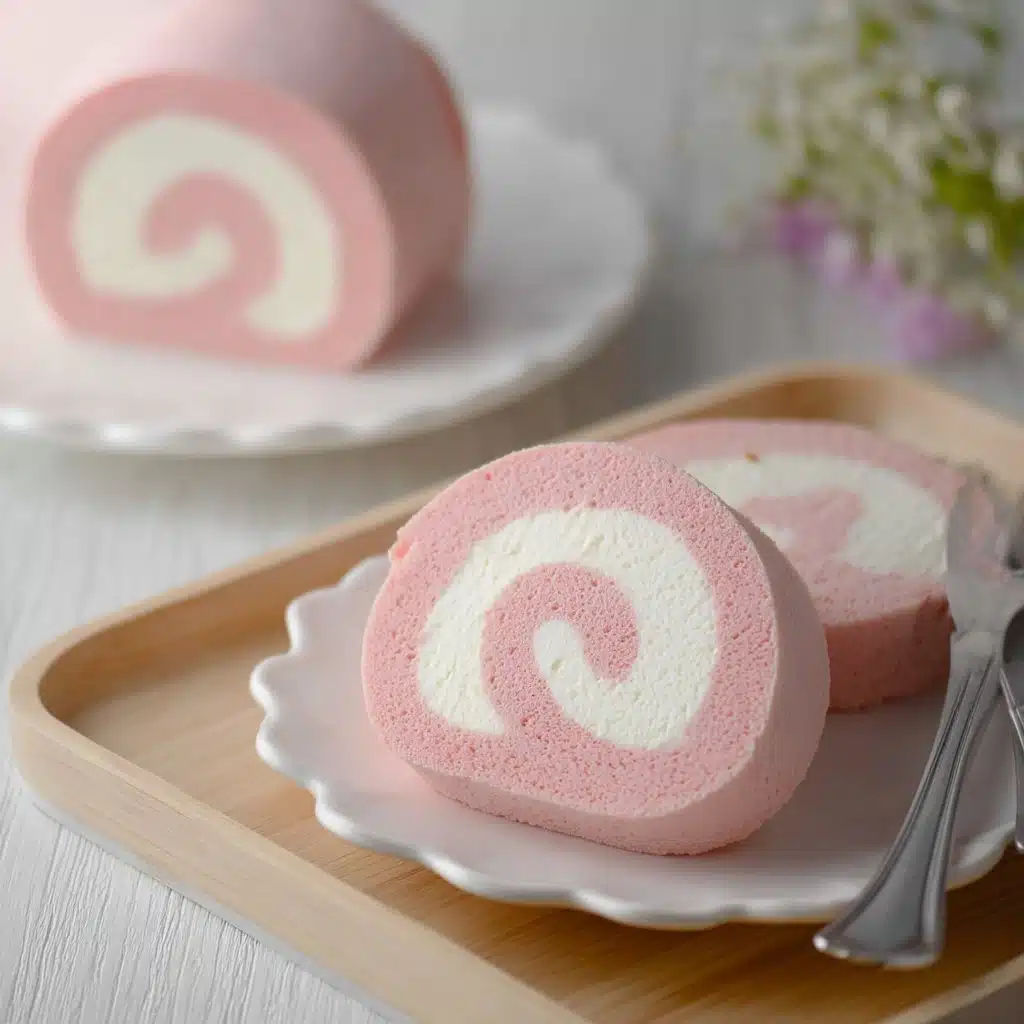
How to Serve Japanese Cotton Candy Cake Roll
Garnishes
A Japanese Cotton Candy Cake Roll is already a sight to behold, but a few delicate garnishes can enhance your presentation beautifully. Think fresh berries for a pop of color and tartness, a dusting of powdered sugar for that ethereal look, or delicate edible flowers that feel just as light and whimsical as the cake itself.
Side Dishes
This cake roll pairs wonderfully with a simple cup of matcha tea or a lightly brewed green tea, whose earthy notes contrast perfectly with the sweet cotton candy flavor. For fans of creamier pairings, a small scoop of vanilla bean ice cream adds richness without overpowering the lightness of the cake.
Creative Ways to Present
For a party or special occasion, try slicing the Japanese Cotton Candy Cake Roll into smaller bites and serving on an elegant platter with edible glitter or sprinkles that match the gel color you used. You could also pipe extra cotton candy whipped cream in pretty rosettes alongside each slice to delight your guests’ taste buds and eyes alike.
Make Ahead and Storage
Storing Leftovers
Leftover Japanese Cotton Candy Cake Roll can be stored in an airtight container in the refrigerator for up to 2-3 days. Keeping it chilled preserves the cream’s stability and the cake’s soft texture, ensuring each slice tastes just as heavenly as the first.
Freezing
Freezing is possible but best done with the cake unrolled, wrapped tightly in plastic wrap to avoid freezer burn. When you’re ready to enjoy it, thaw the cake slowly in the refrigerator overnight before spreading the whipped cream and rolling it fresh. This method keeps the cream fresh and prevents sogginess.
Reheating
This cake is best enjoyed chilled, so reheating is generally not recommended. If you prefer a slightly warmer slice, allow it to sit at room temperature for 10-15 minutes, which also helps to soften the whipped cream slightly without melting it entirely.
FAQs
What makes this cake roll “cotton candy”?
The magic lies in the cotton candy extract infused in both the cake batter and the whipped cream filling, recreating the sweet, nostalgic flavor of cotton candy in a wonderful, fluffy dessert format.
Can I use regular flour instead of cake flour?
While you can, cake flour is highly recommended for its lower protein content that yields a softer, lighter crumb which is essential for the pillowy texture of this cake roll.
Why do I need to bloom gelatin for the whipped cream?
Blooming gelatin in water before melting it ensures it dissolves smoothly without lumps, helping the whipped cream hold its shape longer once assembled in the cake roll.
How do I prevent the cake from cracking when rolling?
The key is to roll the cake while it’s still slightly warm but cooled enough to handle, using the parchment paper as support and applying gentle, even pressure to avoid cracks.
Can I make this cake roll without food coloring?
Absolutely! The cake roll tastes fantastic without color, but adding gel color enhances its whimsical appearance and highlights the cotton candy theme.
Final Thoughts
There’s something undeniably enchanting about crafting your own Japanese Cotton Candy Cake Roll—it’s like capturing a bit of childhood wonder and wrapping it into something delicious and refined. Whether you’re serving it as a special celebration treat or as a delightful surprise for yourself, this cake roll promises smiles with every tender, sweet bite. So grab your ingredients, roll up your sleeves, and prepare to fall in love with this irresistibly airy and charming dessert!
PrintJapanese Cotton Candy Cake Roll Recipe

A delicate and fluffy Japanese Cotton Candy Cake Roll featuring a soft sponge cake infused with cotton candy extract and layered with light, whipped cotton candy cream. This cake roll is airy, sweet, and visually appealing with optional gel color for a pastel touch, perfect for special occasions or an elegant dessert treat.
- Prep Time: 25 minutes
- Cook Time: 12 minutes
- Total Time: 37 minutes
- Yield: 8 servings 1x
- Category: Dessert, Cake
- Method: Baking, Whipping, Folding
- Cuisine: Japanese
- Diet: Vegetarian
Ingredients
For the Cake Batter
- 90 ml whole fat milk
- 20 ml vegetable oil
- 30 grams granulated sugar
- 1/2 teaspoon cotton candy extract
- 70 grams cake flour
- 1/4 teaspoon sea salt
For the Meringue
- 6 egg whites, room temperature
- 55 grams granulated sugar
- 1/4 teaspoon cream of tartar
- Gel color in desired colors
For the Cotton Candy Whipped Cream
- 1 cup heavy cream (36% M.F.), chilled
- 1 tablespoon + 1 teaspoon granulated sugar, divided
- 1 teaspoon cotton candy extract
- 1 teaspoon unflavored gelatin powder
- 4 teaspoon water
Instructions
- Prepare the Pan: Line an 8 X 12″ rectangular cake pan with a toaster-sized silicone baking mat or parchment paper for easy removal.
- Preheat Oven: Preheat your oven to 325°F (163°C) to create the ideal baking environment.
- Mix Wet Ingredients: In a small bowl, whisk together whole milk, vegetable oil, 30 grams sugar, and 1/2 teaspoon cotton candy extract until combined. Set aside.
- Mix Dry Ingredients: In a large mixing bowl, sift cake flour and sea salt together and stir to combine evenly.
- Combine Wet and Dry: Create a well in the center of the dry mix and pour in the wet ingredients. Gently stir until just incorporated to avoid over mixing, which can toughen the cake. Set aside.
- Start Meringue: In a clean, dry, non-plastic bowl, whip egg whites on low speed until frothy, then add cream of tartar to stabilize.
- Whip Meringue to Soft Peaks: Increase speed to medium until the egg whites become opaque and foam tightens. Gradually add 55 grams sugar a little at a time while whipping.
- Finish Meringue to Stiff Peaks: Increase speed to medium-high and whip until soft peaks form; add gel color of choice and continue whipping until stiff peaks are achieved.
- Fold Meringue into Batter: Gently fold the meringue into the wet flour mixture in three batches, preserving as much air as possible.
- Pour Batter: Pour the combined batter into the prepared cake pan and spread evenly with an angled spatula.
- Remove Air Pockets: Tap the pan gently on the counter to release any large air pockets.
- Bake Cake: Bake for 10-12 minutes or until a skewer inserted comes out clean and the cake springs back when lightly pressed.
- Cool Cake Briefly: Let the cake cool in the pan for 5 minutes to stabilize before removing.
- Invert Cake: Place a cooling rack over the cake pan and flip the cake onto it. Gently peel off the parchment paper from the cake’s surface.
- Prepare Cooling Surface: The inverted side will become the top, so let the cake rest on the cooling rack while preparing the whipped cream.
- Chill Cream Tools: Chill the beaters, mixing bowl, and heavy cream in the refrigerator to ensure optimal whipping.
- Bloom Gelatin: Sprinkle gelatin powder over 4 teaspoons of water in a heatproof cup and let it bloom for 5 minutes.
- Warm Gelatin: Place the cup over a simmering water bath until gelatin dissolves completely, then remove and cool to room temperature.
- Whip Cream and Sugar: Start whipping chilled cream and 1 tablespoon sugar on medium speed until tracks form on the cream.
- Add Gelatin and Flavor: Slowly pour the cooled gelatin between the whisk and bowl while continuing to whip, then add 1 teaspoon cotton candy extract.
- Finish Whipping Cream: Increase speed to medium-high and whip until stiff peaks form. Be careful not to over whip to avoid turning the cream grainy.
- Assemble Cake Roll: Immediately spread the whipped cotton candy cream evenly over the cooled cake, adding a bit extra on the side to be rolled first.
- Roll Cake: Starting from the short edge, carefully roll the cake using the parchment paper to help guide it without cracking.
- Chill to Set: Wrap the rolled cake tightly in plastic wrap and refrigerate to set before slicing.
- Trim and Serve: Before serving, trim off the edges for a cleaner presentation. Keep the cotton candy cake roll refrigerated in an airtight container for 2-3 days.
Notes
- Note 2: Use cake flour for a lighter, softer texture compared to all-purpose flour.
- Note 3: Vegetable oil adds moisture and tenderness to the sponge cake.
- Note 4: Cream of tartar helps stabilize the egg whites during meringue preparation.
- Note 5: Use heavy cream with 36% milk fat for best whipping results and stability.
- Note 6: Achieving the right peak stage in both the meringue and whipped cream is critical to texture—avoid over or under whipping.
- Note 7: Adding extra cream on the rolling edge helps prevent cracks while rolling.
Nutrition
- Serving Size: 1 slice (about 1/8 of the cake roll)
- Calories: 275
- Sugar: 18 g
- Sodium: 90 mg
- Fat: 18 g
- Saturated Fat: 10 g
- Unsaturated Fat: 6 g
- Trans Fat: 0 g
- Carbohydrates: 22 g
- Fiber: 0.5 g
- Protein: 4 g
- Cholesterol: 110 mg
Keywords: Japanese cotton candy cake roll, fluffy cake roll, cotton candy dessert, Japanese dessert, sponge cake roll

