Harvest Marble Chocolate Chip Cookies Recipe
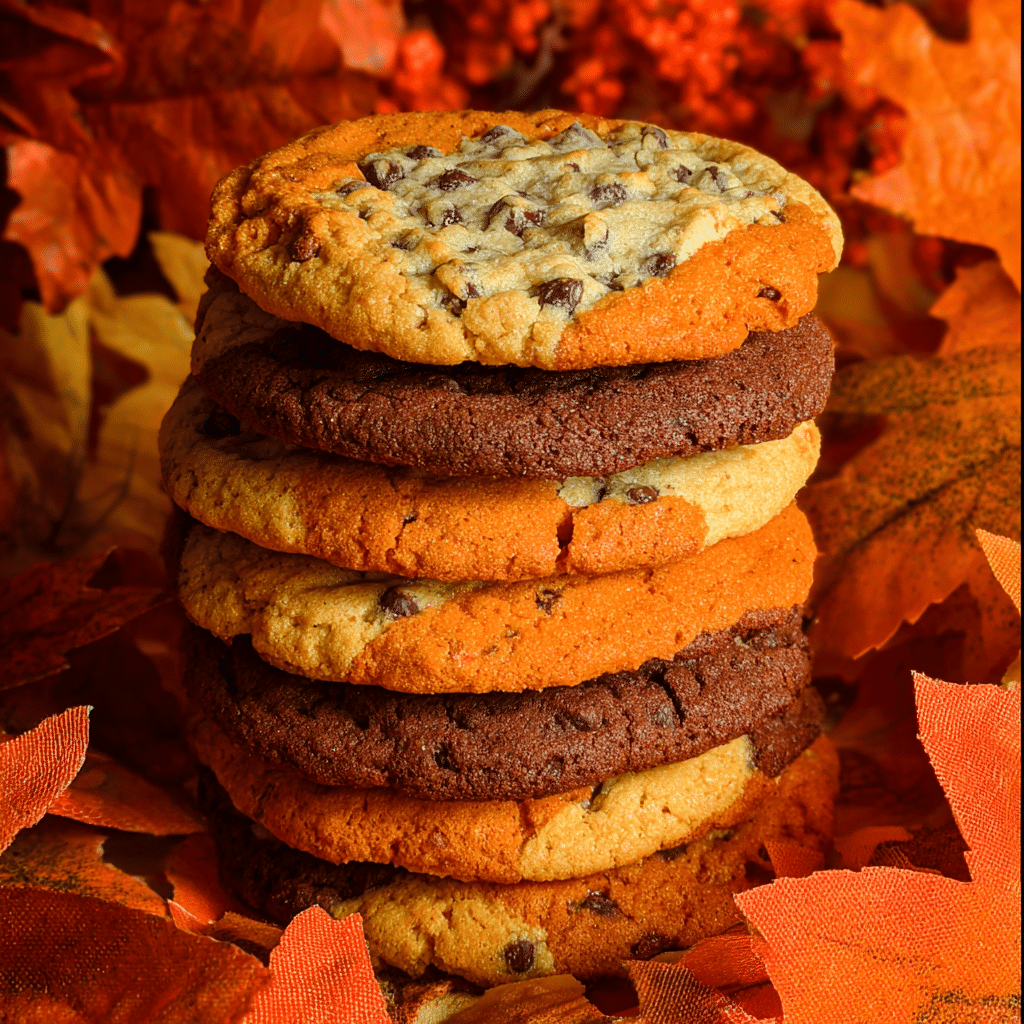
If you’re craving a cookie that’s as festive as it is delicious, you have to try these Harvest Marble Chocolate Chip Cookies. Combining buttery richness with classic chocolate chips and a beautiful marbled effect in warm autumn hues, this recipe brings a touch of harvest season magic to your baking. Each bite offers a perfect balance of soft texture and melty chocolate, plus the splash of orange and brown coloring makes these cookies just as fun to look at as they are to eat. Whether you’re gathering with family or just indulging in a cozy moment, these cookies might just become your new seasonal favorite.
Ingredients You’ll Need
These Harvest Marble Chocolate Chip Cookies rely on simple pantry staples that come together to deliver incredible flavor, texture, and visual appeal. Each ingredient plays a key role in making the dough silky, tender, and perfectly sweet, while also supporting the marbled design that makes these cookies stand out.
- Butter, softened to room temperature: Provides richness and moisture, ensuring your cookies stay soft and flavorful.
- Granulated sugar: Adds sweetness and helps with a slight crispness on the edges.
- Brown sugar: Contributes moisture and a subtle caramel note for depth in every bite.
- Large eggs: Bind the dough together and create structure while keeping it tender.
- Vanilla extract: Enhances all the other flavors with warm, aromatic notes.
- Baking soda: Acts as a leavening agent for that perfect rise and light texture.
- Salt: Balances the sweetness and heightens the chocolate flavor.
- All-purpose flour: Forms the base of the dough, giving the cookies their chewy body.
- Nestle Toll House chocolate chips: Classic chocolate morsels that melt beautifully and add bursts of chocolaty goodness.
- Food coloring (orange and brown): Bring the harvest theme to life with vibrant seasonal tones.
How to Make Harvest Marble Chocolate Chip Cookies
Step 1: Cream the Butter and Sugars
Start by softening your butter to room temperature so it blends effortlessly with the sugars. Use a mixer to cream together the butter, granulated sugar, and brown sugar until you see a light, fluffy mixture. This is the foundation for your cookie’s tender texture and sweetness, so give it a good whisk.
Step 2: Add Eggs and Vanilla
Next, crack in two large eggs and pour in the vanilla extract. Mix everything together until the batter turns pale and fluffy. The eggs help bind all the components and add moisture, while vanilla brings that irresistible warmth we all love in cookies.
Step 3: Incorporate Baking Soda and Salt
Sprinkle in the baking soda and salt, then mix to combine. These little ingredients do big work, making sure your cookies rise to perfect softness with just a hint of chew. The salt also lifts all the sweet and chocolate flavors brilliantly.
Step 4: Gradually Add the Flour
Now, add the all-purpose flour a little at a time, mixing just enough to bring the dough together. Overmixing can make cookies tough, so keep it gentle. Once the flour is totally incorporated, you’ll have a rich, buttery dough ready for its colorful transformation.
Step 5: Divide and Color the Dough
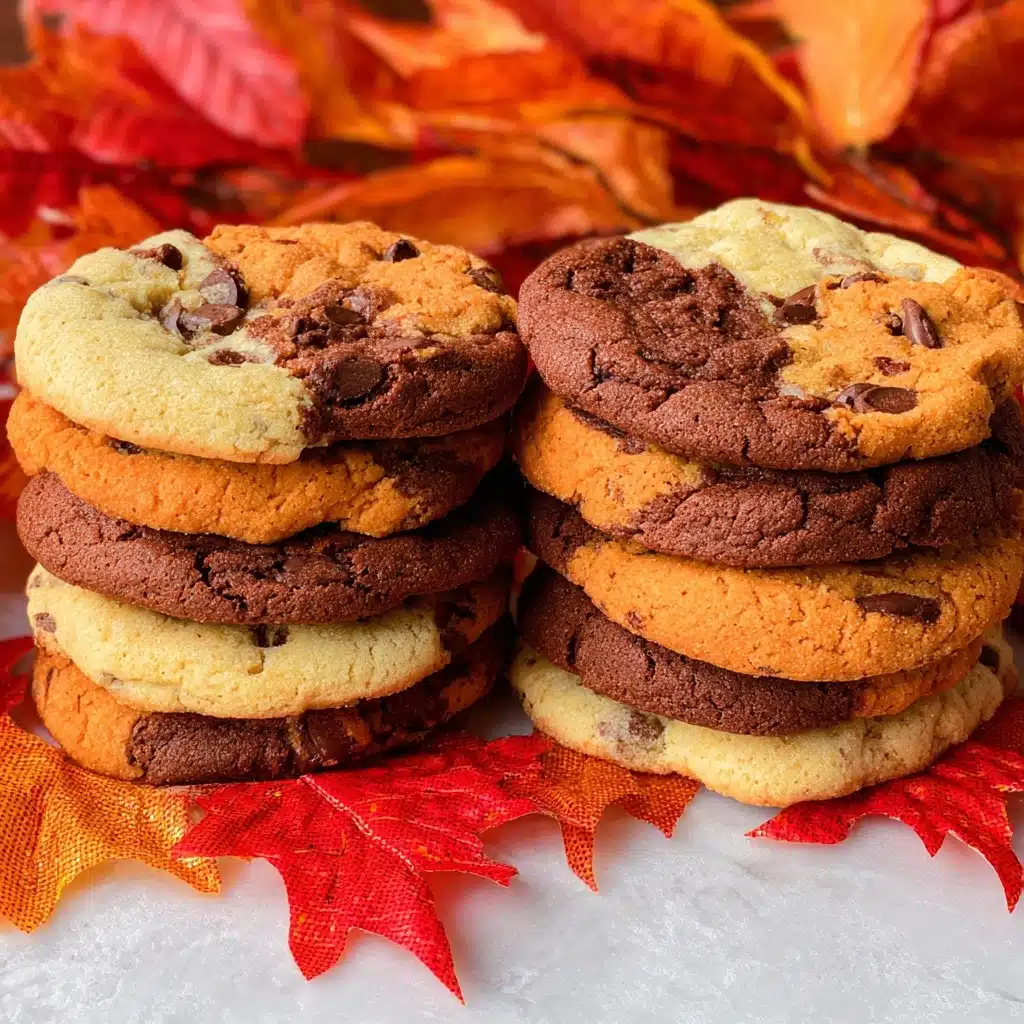
Separate the dough into three equal portions. Use orange food coloring on one portion and brown on another, leaving the third natural. This step is what makes these Harvest Marble Chocolate Chip Cookies so visually stunning and perfect for a seasonal treat.
Step 6: Add Chocolate Chips to Each Portion
Fold chocolate chips evenly into each of the three dough colors. The chocolate adds texture and melty pockets of sweetness that everyone will adore.
Step 7: Form and Bake the Cookie Balls
Create cookie dough balls by taking approximately 2 ounces from each colored dough and pressing them gently together to form a marbled effect. Place these beautiful dough balls on a cookie sheet and lightly press them down. Bake at 375 degrees Fahrenheit for 8 to 10 minutes, or until the edges turn a gorgeous golden brown. The smell alone will have you counting down the minutes!
How to Serve Harvest Marble Chocolate Chip Cookies
Garnishes
Once your cookies have cooled slightly, consider sprinkling a light dusting of powdered sugar for a soft, snowy look or a drizzle of melted white chocolate for extra sweetness and elegance. A few festive sprinkles can also highlight the harvest colors beautifully.
Side Dishes
These cookies pair wonderfully with a warm cup of spiced chai tea, a creamy latte, or a glass of cold milk to balance their sweetness. For a fall gathering, serve alongside a bowl of roasted nuts or a plate of fresh seasonal fruit to complete your snack spread.
Creative Ways to Present
To make your presentation pop, arrange the Harvest Marble Chocolate Chip Cookies on a rustic wooden board, nestled among autumn leaves or mini pumpkins for a holiday vibe. You can also stack them in a clear jar tied with a festive ribbon for a delightful edible gift.
Make Ahead and Storage
Storing Leftovers
Keep leftover cookies in an airtight container at room temperature for up to a week to maintain freshness and softness. Layer them between sheets of parchment paper to prevent sticking and preserve that beautiful marbled look.
Freezing
If you want to enjoy these sweet treats later, freeze the unbaked dough balls on a lined cookie sheet. Once solid, transfer them to a freezer bag, where they’ll last up to three months. You can also freeze fully baked cookies in an airtight container to enjoy whenever a craving strikes.
Reheating
Reheat your Harvest Marble Chocolate Chip Cookies briefly in a warm oven or microwave to bring back that fresh-baked softness and to let the chocolate chips melt back to gooey perfection. Just 10-15 seconds in the microwave usually does the trick!
FAQs
Can I use different types of food coloring?
Absolutely! Feel free to experiment with colors that suit your theme or season. Gel food coloring works best to keep your dough’s texture nice and consistent.
What if I don’t have Nestle Toll House chocolate chips?
Any good-quality chocolate chips or chunks will work perfectly. You can also try mini chips or even mix dark and milk chocolate for extra flavor dimension.
Can I make these cookies gluten-free?
Yes, substitute the all-purpose flour with a gluten-free flour blend designed for baking. Just be sure to check that your blend contains xanthan gum or another binding agent to keep the dough together.
How do I prevent the colors from blending too much?
Keep your dough portions chilled if they get warm during preparation, and gently press the colored dough ball together without overmixing. Chilling the dough before baking can also help maintain defined marbled patterns.
Can I add nuts or other mix-ins?
Of course! Chopped walnuts, pecans, or dried cranberries will add festive crunch and complement the chocolate perfectly. Just fold them in along with the chocolate chips before forming your dough balls.
Final Thoughts
You really can’t go wrong with these Harvest Marble Chocolate Chip Cookies when it comes to flavor, fun, and festivity. They’re a fantastic way to bring a little seasonal joy into your kitchen that’s guaranteed to delight family and friends. Give this recipe a whirl and watch it become a treasured go-to for every harvest celebration!
PrintHarvest Marble Chocolate Chip Cookies Recipe

Delight in the festive flavors of Harvest Marble Chocolate Chip Cookies, featuring a trio of colorful doughs—orange, brown, and classic white—swirled together to create a visually stunning and delicious treat. These soft, chewy cookies combine the timeless chocolate chip favorite with a fun autumn twist, perfect for holiday gatherings or cozy snacking.
- Prep Time: 20 minutes
- Cook Time: 10 minutes
- Total Time: 30 minutes
- Yield: 24 cookies 1x
- Category: Dessert
- Method: Baking
- Cuisine: American
- Diet: Vegetarian
Ingredients
Base Dough
- 1 cup Butter, softened to Room Temperature (Sweet Cream, Salted)
- 1 cup Granulated Sugar
- 1/2 cup Brown Sugar
- 2 Large Eggs
- 2 teaspoons Vanilla Extract
- 1 teaspoon Baking Soda
- 1/2 teaspoon Salt
- 2 3/4 cups All-Purpose Flour
Mix-ins and Color
- 1 Bag Nestle Toll House Chocolate Chips
- Orange Food Coloring
- Brown Food Coloring
Instructions
- Cream the Butter and Sugars: In a mixing bowl, use a mixer to cream together the softened butter, granulated sugar, and brown sugar until the mixture is light and fluffy, which will create a smooth base for your cookie dough.
- Add Eggs and Vanilla: Beat in the eggs one at a time along with the vanilla extract, mixing well after each addition to ensure the dough is rich and evenly flavored.
- Incorporate Baking Soda and Salt: Add the baking soda and salt to the mixture, stirring thoroughly to evenly distribute these leavening and flavor-enhancing agents.
- Mix in Flour: Gradually add the all-purpose flour to the wet ingredients in small portions, mixing after each addition until all flour is fully incorporated and a soft dough forms.
- Divide and Color Dough: Separate the cookie dough into three equal portions. Color one portion with orange food coloring and another with brown food coloring, leaving the third portion plain. Stir chocolate chips into each dough portion evenly.
- Form Marble Dough Balls: Combine small amounts (about 2 oz each) of orange, brown, and plain dough, gently blending them to create a marbled effect without fully mixing the colors together. Shape into balls and press slightly onto a cookie sheet to prepare for baking.
- Bake: Preheat your oven to 375°F (190°C). Bake the cookies for 8-10 minutes or until the edges are golden brown, ensuring a crisp exterior with a soft and chewy center.
- Cool and Serve: Allow the cookies to cool on the baking sheet for a few minutes before transferring them to a wire rack to finish cooling. Enjoy your festive harvest-themed chocolate chip cookies!
Notes
- For best results, ensure the butter is softened at room temperature for easy creaming with sugars.
- If you prefer, substitute the Nestle Toll House chocolate chips with any semi-sweet or dark chocolate chips for a different flavor profile.
- Use gel food coloring for more vibrant colors without altering the dough consistency.
- Chilling the shaped dough balls for 15-20 minutes before baking can help maintain their shape and enhance flavors.
- Store cookies in an airtight container at room temperature for up to one week or freeze for longer storage.
Nutrition
- Serving Size: 1 cookie
- Calories: 180
- Sugar: 12g
- Sodium: 120mg
- Fat: 9g
- Saturated Fat: 5g
- Unsaturated Fat: 3g
- Trans Fat: 0g
- Carbohydrates: 24g
- Fiber: 1g
- Protein: 2g
- Cholesterol: 30mg
Keywords: marble chocolate chip cookies, harvest cookies, fall cookies, colorful cookies, festive cookies, chocolate chip cookies
