Green Apple Monsters Recipe
Introduction
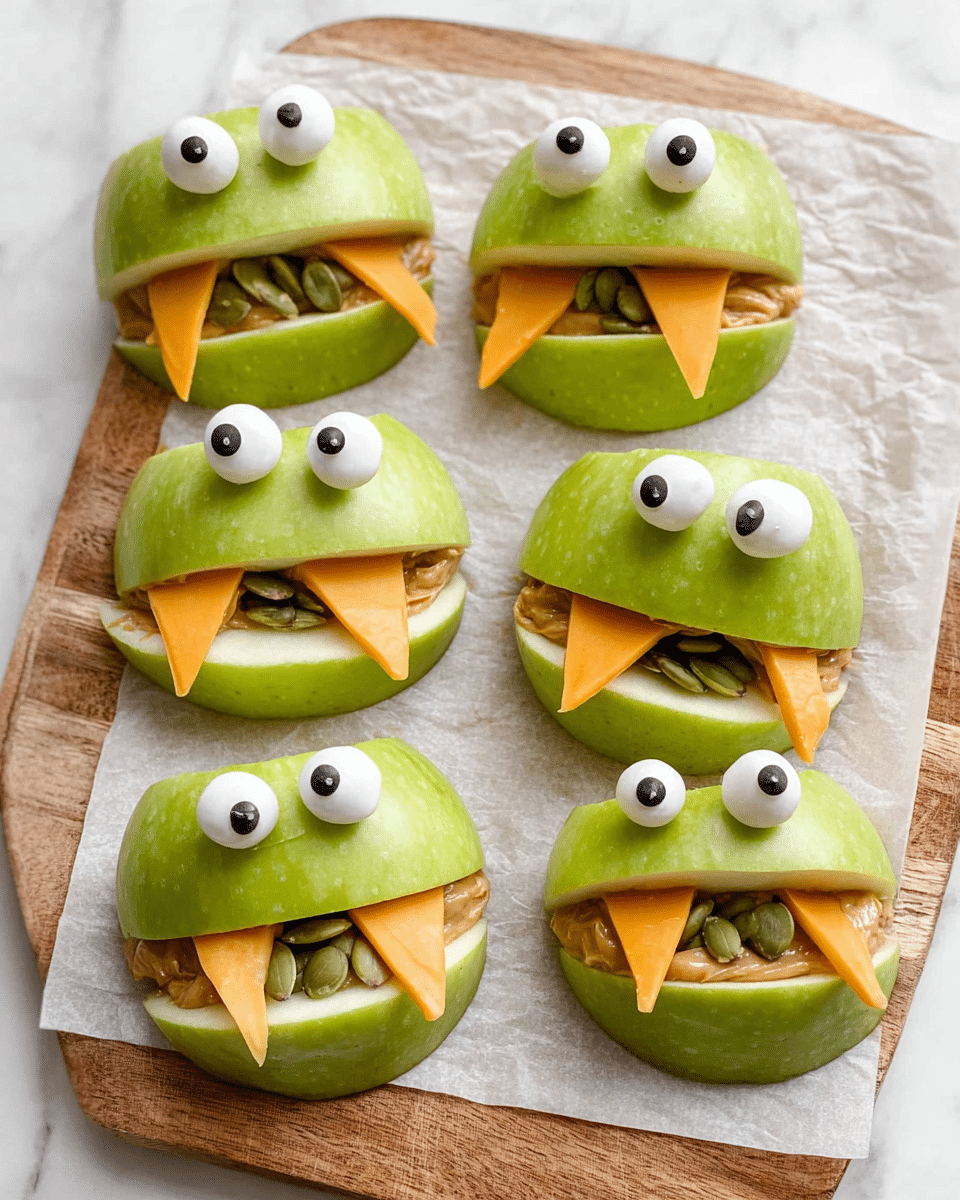
Green Apple Monsters are a fun and healthy snack perfect for kids and adults alike. Crisp green apples meet creamy peanut butter and cheesy details to create playful, monster-shaped treats that are as tasty as they are cute.
Ingredients
- 3 green apples
- 3 tablespoons creamy peanut butter
- 2 ounces sliced cheddar or Colby Jack cheese
- 2 tablespoons pumpkin or sunflower seeds
- 1 package candy eyes (about 20 pieces)
Instructions
- Step 1: Quarter the green apples and slice off the core and seeds. Carefully cut out a v-shape into the center of each apple quarter to create the monster’s mouth. Repeat with all pieces.
- Step 2: Spread a thin layer of peanut butter inside each monster mouth. Do this for all apple slices.
- Step 3: Press several pumpkin or sunflower seeds along the edge of the mouth to form teeth. Repeat with all apple slices.
- Step 4: Insert a triangular piece of cheese into each monster mouth.
- Step 5: Using the remaining peanut butter, spread a small amount onto the back of the candy eyes and stick them on top of the apple slices.
- Step 6: Serve immediately for the best texture and freshness!
Tips & Variations
- Use almond or sunflower seed butter as a peanut-free alternative.
- Try other types of cheese like mozzarella for a milder flavor.
- To keep apples from browning, sprinkle them lightly with lemon juice before assembling.
- Add small pieces of pretzel sticks as monster hair for extra fun.
Storage
Store the prepared apple monsters in an airtight container in the refrigerator for up to 24 hours. For best results, assemble just before serving to keep the apples crisp and prevent the peanut butter from drying out. If stored, apples might brown slightly but are still tasty. Enjoy chilled or at room temperature.
How to Serve
Serve this delicious recipe with your favorite sides.
FAQs
Can I use other types of apples for this recipe?
Yes, but green apples like Granny Smith work best because of their tartness and firm texture, which contrasts nicely with the peanut butter and cheese.
How can I make this snack nut-free?
Replace peanut butter with seed butters such as sunflower or pumpkin seed butter to keep it safe and delicious for those with nut allergies.
PrintGreen Apple Monsters Recipe

Create a fun and spooky snack with these Green Apple Monsters, featuring crisp green apple slices decorated with creamy peanut butter, crunchy seeds for teeth, cheesy mouths, and playful candy eyes. Perfect for Halloween or anytime you want a creative and healthy treat that kids will love.
- Prep Time: 10 minutes
- Cook Time: 0 minutes
- Total Time: 10 minutes
- Yield: 12 monster apple slices 1x
- Category: Snack
- Method: No-Cook
- Cuisine: American
- Diet: Vegetarian
Ingredients
Fruits
- 3 green apples
Spreads
- 3 tablespoons creamy peanut butter
Cheese
- 2 ounces sliced cheddar or Colby jack cheese
Seeds
- 2 tablespoons pumpkin or sunflower seeds
Decorations
- 1 package of candy eyes (approximately 20 pieces)
Instructions
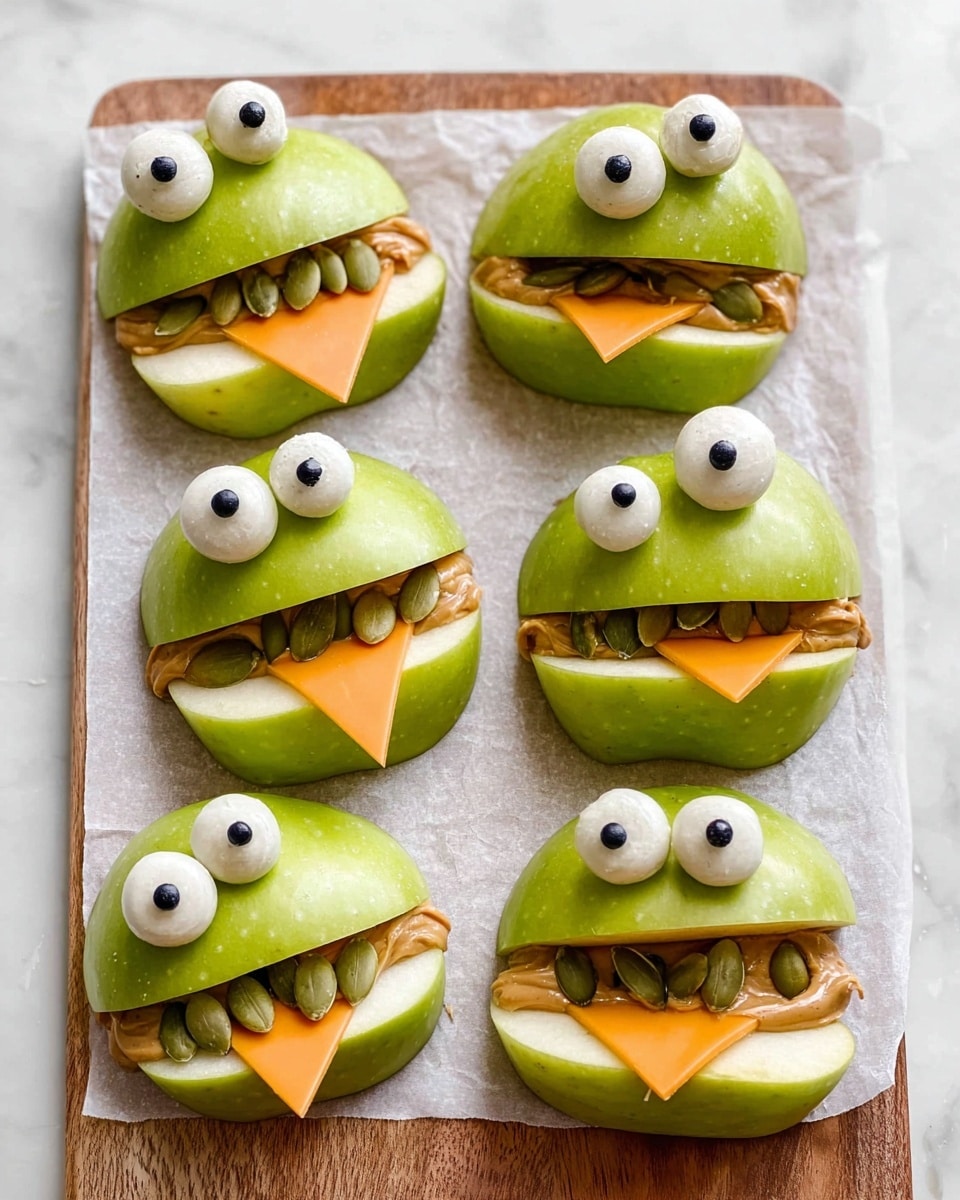
- Prepare the apples: Quarter the green apples and slice off the core and seeds. Carefully cut a v-shaped notch into the center of each apple quarter to create the mouth for the monster. Repeat this step for all apple pieces.
- Apply peanut butter: Spread a thin layer of creamy peanut butter inside the v-shaped mouth on each apple slice. This acts as the base to stick other ingredients in place.
- Attach teeth: Press several pumpkin or sunflower seeds along the edge of the peanut butter mouth to resemble monster teeth. Do this for each apple quarter.
- Add cheese mouthpiece: Place a small triangular piece of cheddar or Colby jack cheese into each peanut butter-lined mouth, adding a tasty and colorful detail.
- Attach eyes: Using a small dab of remaining peanut butter, stick candy eyes on top of each apple slice to complete the monster look.
- Serve: These spooky Green Apple Monsters are best served immediately to enjoy the fresh crispness of the apples and the crunch of the seeds.
Notes
- Use firm green apples like Granny Smith for the best texture and tartness.
- If allergic to peanuts, substitute peanut butter with sunflower seed butter or another nut-free spread.
- Candy eyes can be found at craft or baking stores, or online, often in the cake decorating section.
- Prepare just before serving to prevent apples from browning; optionally, toss cut apples in a little lemon juice if prepping ahead.
- For a less sweet version, choose unsweetened peanut butter and unsweetened candy eyes or omit them altogether.
Keywords: green apple monsters, fun snacks for kids, Halloween snacks, healthy snacks, peanut butter snacks, creative apple recipes


