Easy Pumpkin Cream Cheese Truffles Recipe
Introduction
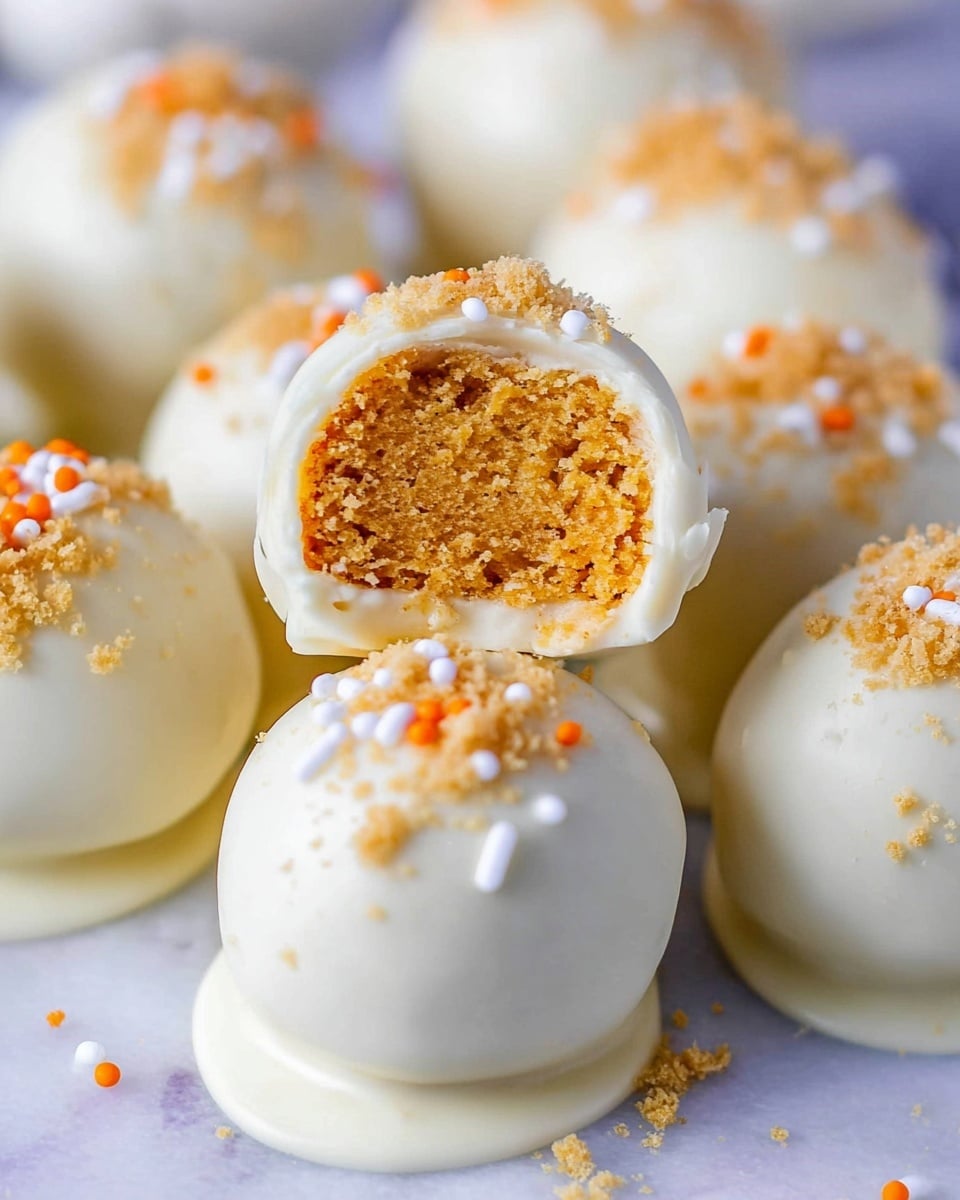
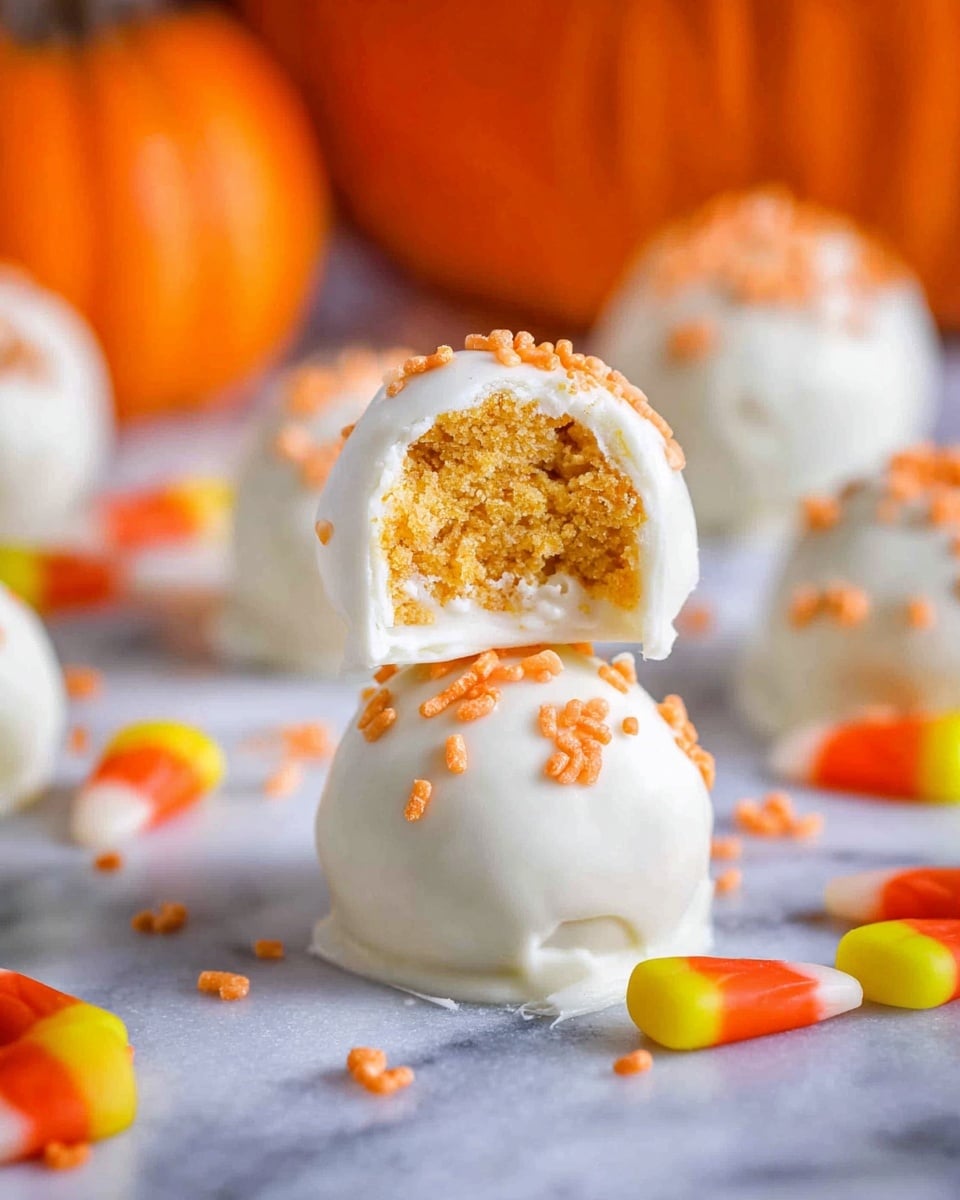
These easy pumpkin cream cheese truffles combine creamy pumpkin filling with a crisp white chocolate shell for a delightful fall treat. Perfectly spiced and simple to make, they’re an ideal sweet bite for gatherings or cozy nights in.
Ingredients
- 4 ounces cream cheese (room temperature)
- 3 tablespoons confectioners’ sugar
- 1/3 cup pumpkin purée
- 1 3/4 cups graham cracker crumbs (about 12 full sheet graham crackers)
- 1/2 teaspoon pumpkin pie spice
- 1/2 teaspoon ground cinnamon
- 10 ounces white chocolate bar (coarsely chopped or white chocolate chips or melts)
- Optional: Extra graham cracker crumbs, sprinkles, cinnamon, or candies like candy corn for decorating
Instructions
- Step 1: In a mixer, beat the cream cheese and confectioners’ sugar together until creamy. Add pumpkin purée and mix until combined.
- Step 2: Add graham cracker crumbs, pumpkin pie spice, and cinnamon. Mix on medium speed for 2 minutes until the mixture is thick and smooth.
- Step 3: Refrigerate the truffle mixture for at least 1 hour, up to 1 day, to allow it to firm up for rolling.
- Step 4: Line two large baking sheets with parchment paper.
- Step 5: Scoop the chilled mixture in generous teaspoon amounts and roll into 1-inch balls. Place on the prepared baking sheets and chill again for 30 minutes.
- Step 6: Melt the white chocolate in the microwave in 30-second increments, stirring between each, until smooth. Let it cool slightly before dipping.
- Step 7: Dip each chilled truffle ball into the melted chocolate. Lift out with a fork and slide off onto the parchment paper using a toothpick or another fork.
- Step 8: Immediately sprinkle with extra graham cracker crumbs, sprinkles, cinnamon, or candies as desired.
- Step 9: Refrigerate the coated truffles until the chocolate sets completely.
- Step 10: Bring truffles to room temperature before serving. They can sit out for a few hours during parties but keep refrigerated otherwise.
Tips & Variations
- For easier rolling, chill the mixture longer until very firm.
- Use flavored white chocolate or add a pinch of salt to balance the sweetness.
- Try rolling some truffles in cocoa powder or crushed nuts as an alternative coating.
- Make mini truffles by using a smaller scoop for bite-sized treats.
Storage
Store the truffles in an airtight container in the refrigerator for up to one week. Before serving, allow them to sit at room temperature for 15–20 minutes to soften slightly. Avoid storing at room temperature for extended periods to prevent melting.
How to Serve
Serve this delicious recipe with your favorite sides.
FAQs
Can I use canned pumpkin or fresh pumpkin purée?
You can use either canned pumpkin purée or homemade fresh pumpkin purée. Just make sure it’s well drained to avoid watery truffle mixture.
How long can I freeze these pumpkin truffles?
You can freeze the truffles for up to one month. Place them in a single layer on a baking sheet to freeze first, then transfer to a freezer-safe container. Thaw in the refrigerator before serving.
PrintEasy Pumpkin Cream Cheese Truffles Recipe

These Easy Pumpkin Cream Cheese Truffles feature a luscious blend of creamy cream cheese, seasonal pumpkin purée, and warm spices, all coated in smooth white chocolate. Perfectly bite-sized and festive, these no-bake truffles are ideal for fall gatherings, holiday parties, or any time you want a rich, indulgent treat with the flavors of pumpkin pie.
- Prep Time: 15 minutes
- Cook Time: 10 minutes (melting chocolate)
- Total Time: 1 hour 55 minutes
- Yield: About 24 truffles 1x
- Category: Dessert
- Method: No-Cook
- Cuisine: American
- Diet: Vegetarian
Ingredients
Truffle Filling
- 4 ounces cream cheese, room temperature
- 3 tablespoons confectioners’ sugar
- 1/3 cup pumpkin purée
- 1 3/4 cups graham cracker crumbs (about 12 full sheet graham crackers)
- 1/2 teaspoon pumpkin pie spice
- 1/2 teaspoon ground cinnamon
Chocolate Coating
- 10 ounces white chocolate bar, coarsely chopped (or white chocolate chips or melts)
- Optional: extra graham cracker crumbs, sprinkles, cinnamon, candy corn or other candies for decoration
Instructions
- Make the truffle filling: In a mixing bowl, beat the cream cheese and confectioners’ sugar together until creamy and smooth. Add the pumpkin purée and continue to beat until fully combined.
- Add dry ingredients: Mix in the graham cracker crumbs, pumpkin pie spice, and ground cinnamon on medium speed for about 2 minutes until the mixture is thick, smooth, and evenly incorporated.
- Chill the mixture: Transfer the truffle mixture to the refrigerator and chill for at least 1 hour, or up to 1 day. Chilling firms the mixture, making it easier to shape into balls.
- Prepare for shaping: Line two large baking sheets with parchment paper and set aside.
- Shape the truffles: Use a small cookie scoop or teaspoon to scoop out the chilled mixture and roll into 1-inch balls. Place them on the prepared baking sheets and refrigerate for an additional 30 minutes to firm up.
- Melt the chocolate: Approximately 5 minutes before removing the truffles from the refrigerator, melt the white chocolate in the microwave in 30-second intervals, stirring well between each, until completely smooth. Let it cool slightly to avoid melting the truffles on contact.
- Dip the truffles: Remove the chilled truffles from the refrigerator and dip each ball one at a time into the melted white chocolate. Use a fork to lift each truffle out of the chocolate, then slide it off onto the parchment-lined baking sheet with a toothpick or another fork.
- Decorate: Immediately sprinkle the dipped truffles with extra graham cracker crumbs, sprinkles, cinnamon, or candies as desired before the chocolate sets.
- Set and chill: Place the dipped truffles in the refrigerator and allow the chocolate coating to set completely before serving.
- Serve: Bring the truffles to room temperature before serving for best texture and flavor. They can sit out for a few hours at parties but should be stored refrigerated otherwise.
Notes
- Make sure the cream cheese is at room temperature for easy mixing and smooth texture.
- The truffle filling needs to be well chilled so it holds its shape during dipping.
- You can substitute the white chocolate with dark or milk chocolate if preferred.
- Use a small cookie scoop for uniform truffle sizes and easier rolling.
- Store truffles in an airtight container in the refrigerator for up to 1 week.
- Allow truffles to come to room temperature before eating for the best flavor and mouthfeel.
- Optional decorative toppings add a festive touch and texture contrast.
Keywords: pumpkin truffles, cream cheese truffles, no bake dessert, fall dessert, pumpkin recipe, white chocolate truffles, holiday treats