Easy Mini Strawberry Cheesecake Bites Recipe
Introduction
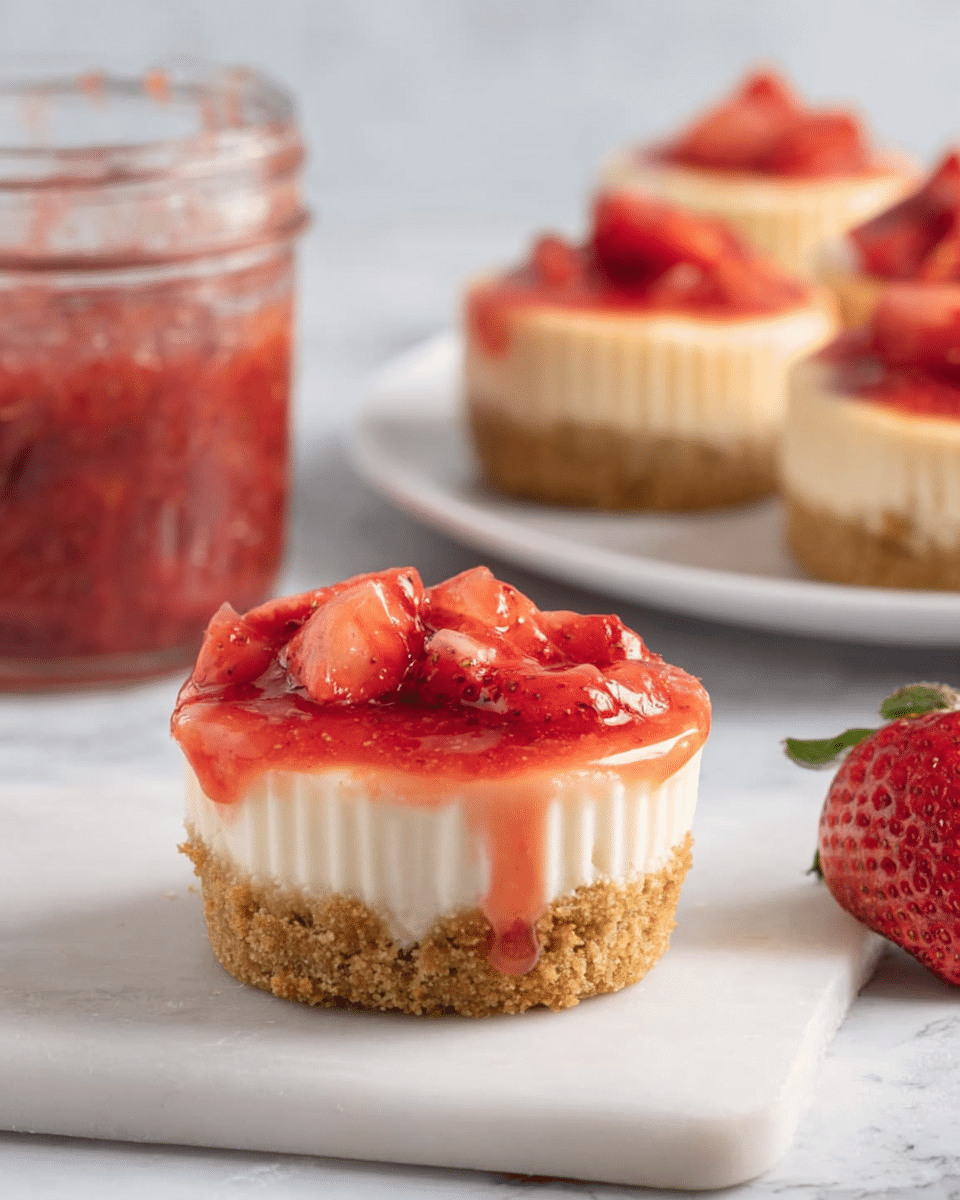
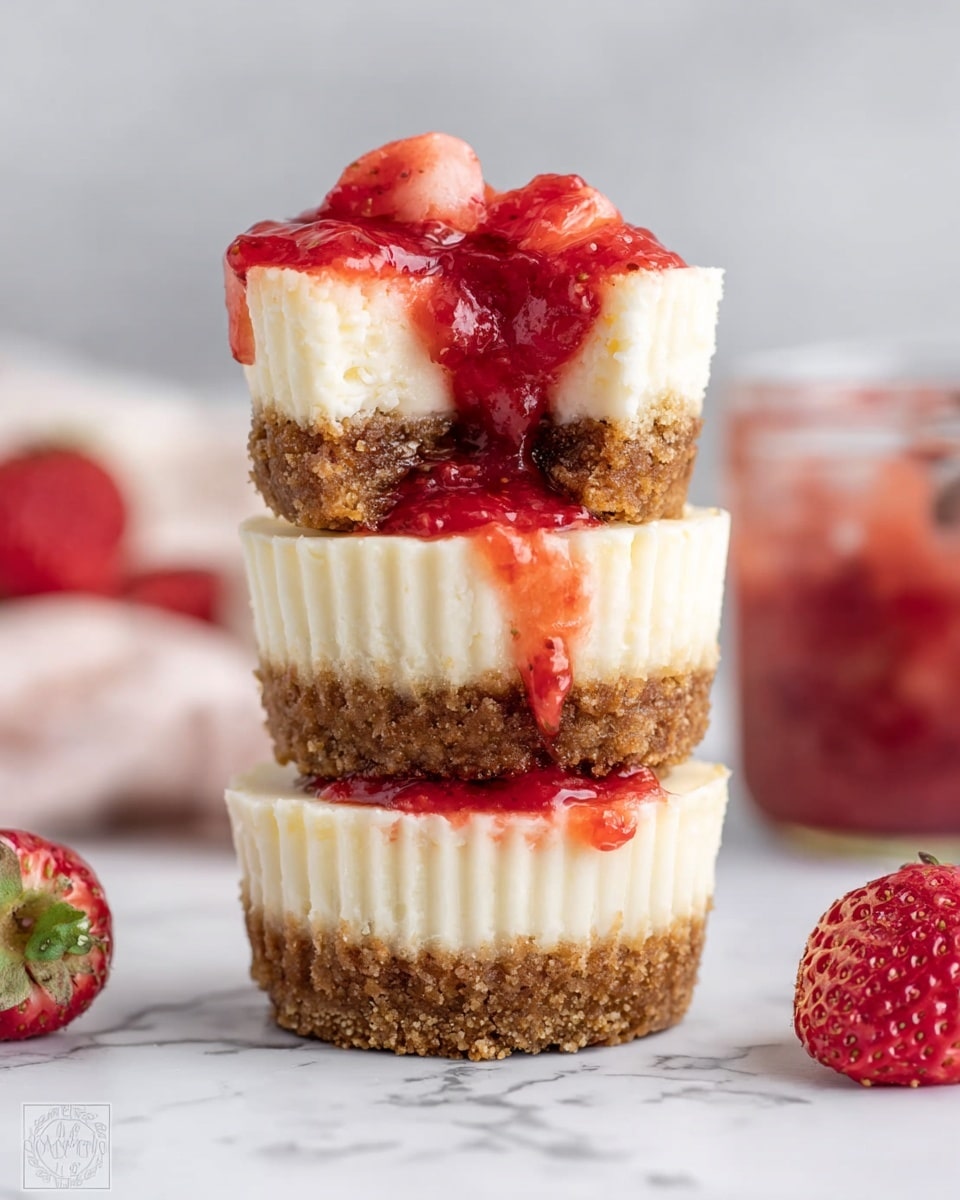
These Easy Mini Strawberry Cheesecake Bites are a delightful treat that’s perfect for any occasion. With a buttery graham cracker crust and a creamy cheesecake filling topped with a sweet strawberry sauce, they are sure to impress your guests or satisfy your sweet tooth.
Ingredients
- 3/4 cups graham cracker crumbs (see notes)
- 3 tablespoons brown sugar
- 3 tablespoons butter, melted
- 1/4 teaspoon cinnamon
- 8 ounces cream cheese, room temperature
- 1 large egg, room temperature
- 1/4 cup sugar
- 1 teaspoon corn starch
- 1/4 cup heavy cream
- 1 teaspoon vanilla extract
- 3 tablespoons Greek yogurt or sour cream
- 1 and 1/2 cups strawberries, diced
- 1 tablespoon sugar
Instructions
- Step 1: Preheat the oven to 350 degrees Fahrenheit and line a cupcake tin with paper liners.
- Step 2: In a small bowl, mix the graham cracker crumbs, brown sugar, melted butter, and cinnamon until combined.
- Step 3: Divide the graham cracker mixture evenly among the paper liners, pressing firmly into the bottom to form the crust.
- Step 4: Bake the crusts in the preheated oven for a few minutes until set. Remove and allow to cool while preparing the filling.
- Step 5: In a large bowl, beat the softened cream cheese with a mixer until light and fluffy.
- Step 6: Add the egg, sugar, cornstarch, heavy cream, vanilla extract, and Greek yogurt. Beat until the mixture is smooth and lump-free.
- Step 7: Use a cookie scoop or measuring cup to portion the cheesecake batter over each crust in the cupcake tin.
- Step 8: Bake for 15-16 minutes. The cheesecakes may still jiggle slightly but will firm up as they cool.
- Step 9: Chill the cheesecakes at room temperature for 1 hour. Then remove from the tin and store in an airtight container for at least 3 hours or overnight.
- Step 10: For the strawberry topping, combine the diced strawberries and 1 tablespoon sugar in a small saucepan over medium heat. As they heat and release juice, mash the berries slightly with a fork.
- Step 11: Let the mixture boil for about 5 minutes until it thickens. Turn off the heat and allow to cool.
- Step 12: Serve the strawberry sauce alongside the mini cheesecakes or spoon it over each bite before serving.
Tips & Variations
- Use crushed digestive biscuits instead of graham crackers for a slightly different crust flavor.
- For extra richness, substitute sour cream for the Greek yogurt in the filling.
- Top the cheesecakes with fresh strawberries instead of the cooked sauce for a fresher taste.
- If you prefer, add a tablespoon of lemon zest to the filling for a bright citrus note.
Storage
Store the mini cheesecakes in an airtight container in the refrigerator for up to 3 days. Keep the strawberry topping separate until ready to serve. Reheat is not recommended; serve chilled for best texture and flavor.
How to Serve
Serve this delicious recipe with your favorite sides.
FAQs
Can I make these cheesecakes ahead of time?
Yes, these mini cheesecakes can be made a day ahead and kept refrigerated. The flavors meld nicely, especially if you prepare the strawberry sauce beforehand as well.
What if I don’t have a cupcake tin?
You can use any small baking dish or muffin tin, but paper liners help with easy removal. If not using liners, grease the cups well to prevent sticking.
PrintEasy Mini Strawberry Cheesecake Bites Recipe

These Easy Mini Strawberry Cheesecake Bites are a delightful and convenient dessert that combines a buttery graham cracker crust with a creamy cheesecake filling, topped with a fresh and slightly sweetened strawberry sauce. Perfect for parties or a special treat, these bite-sized cheesecakes are simple to make and deliciously satisfying.
- Prep Time: 15 minutes
- Cook Time: 20 minutes
- Total Time: 4 hours 35 minutes
- Yield: 12 mini cheesecake bites 1x
- Category: Dessert
- Method: Baking
- Cuisine: American
- Diet: Vegetarian
Ingredients
Crust
- 3/4 cups graham cracker crumbs
- 3 tablespoons brown sugar
- 3 tablespoons butter, melted
- 1/4 teaspoon cinnamon
Cheesecake Filling
- 8 ounces cream cheese, room temperature
- 1 large egg, room temperature
- 1/4 cup sugar
- 1 teaspoon corn starch
- 1/4 cup heavy cream
- 1 teaspoon vanilla extract
- 3 tablespoons Greek yogurt or sour cream
Strawberry Topping
- 1 and 1/2 cups strawberries, diced
- 1 tablespoon sugar
Instructions
- Preheat and Prepare: Preheat the oven to 350 degrees Fahrenheit. Line a cupcake tin with paper liners to prepare for the crust.
- Make the Crust: In a small bowl, combine graham cracker crumbs, brown sugar, melted butter, and cinnamon. Divide this mixture evenly into the cupcake liners, pressing firmly to form the crust base. Bake the crust in the preheated oven for 5 minutes, then remove and allow to cool while preparing the filling.
- Prepare the Cheesecake Filling: In a large bowl, beat the room temperature cream cheese using a hand or stand mixer until light and fluffy. Add the egg, sugar, cornstarch, heavy cream, vanilla extract, and Greek yogurt or sour cream. Mix just until the batter is smooth and free of lumps.
- Assemble and Bake: Portion out the cheesecake batter evenly into the cupcake tin over the cooled crusts using a cookie scoop or measuring cup. Bake for 15-16 minutes; the cheesecakes may appear slightly jiggly but will firm up as they cool.
- Cool and Chill: Allow the cheesecakes to cool at room temperature for 1 hour. Then remove them from the cupcake tin and store them in an airtight container to chill in the refrigerator for at least 3 hours or overnight for best texture.
- Make the Strawberry Topping: In a small saucepan over medium heat, combine diced strawberries and sugar. As they heat, use a fork to gently mash the strawberries and coax out their juices. After about 5 minutes, when the mixture begins to boil, turn off the heat and let it cool and thicken.
- Serve: Pour the cooled strawberry sauce into a serving dish and serve alongside or on top of the mini cheesecake bites for a fresh, fruity finish.
Notes
- Room temperature ingredients like cream cheese and egg help to create a smooth cheesecake batter without lumps.
- Pressing the crust firmly into the cupcake liners ensures a stable base for each mini cheesecake.
- The jiggly texture after baking is normal; the cheesecakes will firm up during chilling.
- You can substitute sour cream for Greek yogurt if preferred.
- Strawberry topping can be served warm or chilled depending on preference.
- Store cheesecakes in an airtight container in the refrigerator for up to 3 days.
Keywords: mini cheesecake bites, strawberry cheesecake, easy cheesecake recipe, graham cracker crust, dessert, mini desserts
