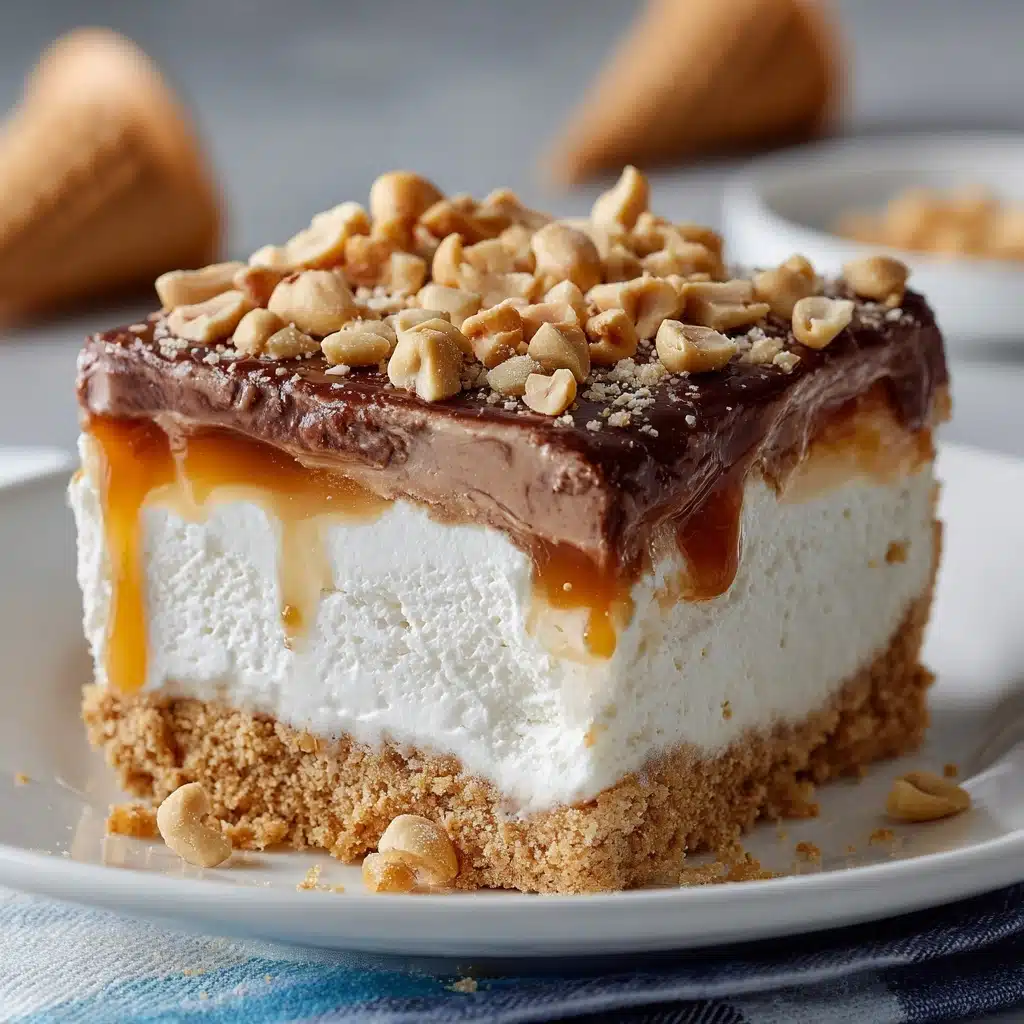
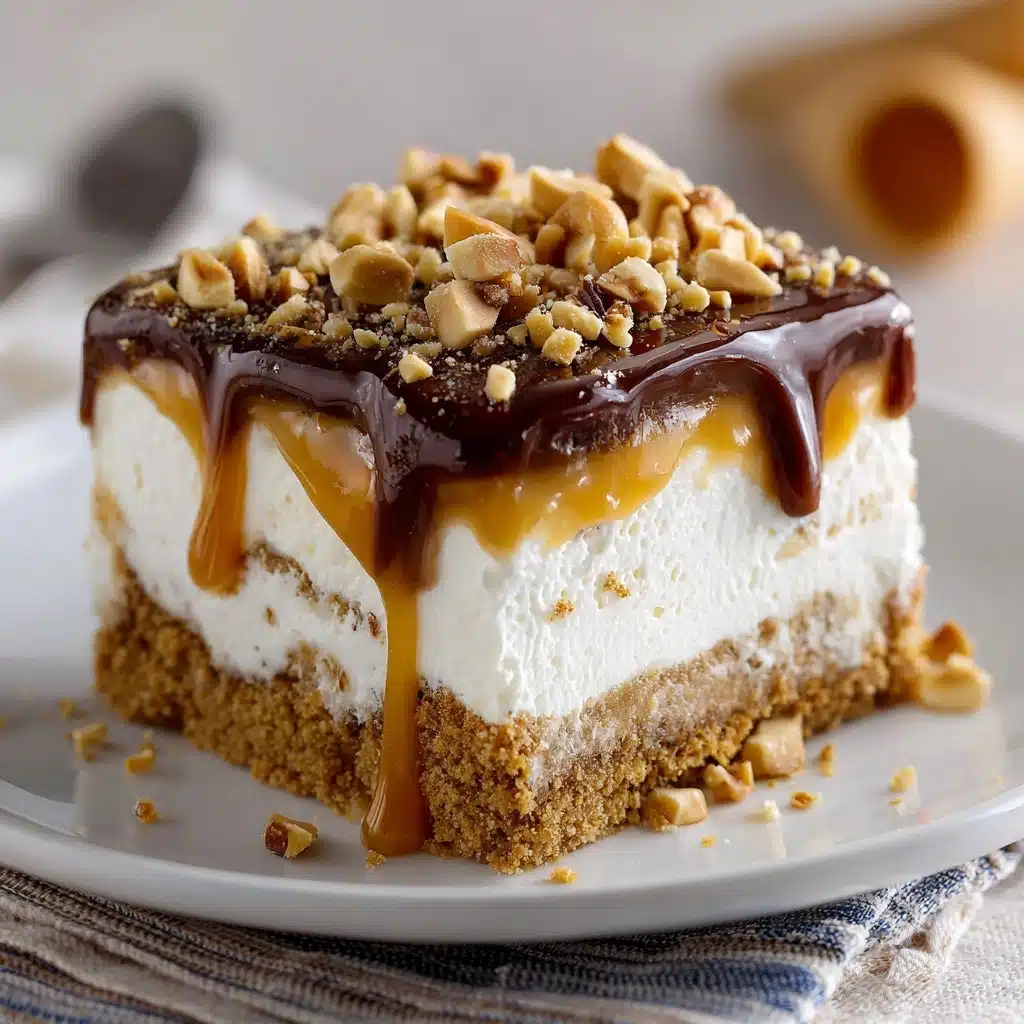
Drumstick Ice Cream Cake Recipe
If you’ve ever found yourself craving the nostalgia of childhood summer days, the irresistible crunch of a classic ice cream cone, and the magic that only a homemade dessert can bring, this Drumstick Ice Cream Cake is your golden ticket. Picture layers of crisp sugar cone crust, ribbons of fudgy chocolate and salted caramel, and mountains of creamy vanilla ice cream, all finished off with crunchy roasted peanuts. Every bite delivers that iconic drumstick experience, but reimagined as a show-stopping cake perfect for any celebration or family gathering!
Ingredients You’ll Need
The beauty of this Drumstick Ice Cream Cake is found in its simplicity. Each ingredient is carefully chosen to mirror the bold flavors and textures of the original ice cream treat while transforming it into a stunning layered dessert everyone will adore.
- Crushed Sugar Cones: The secret to the signature crunchy base, lending irresistible texture and that unmistakable toasty flavor.
- Unsalted Butter (Melted): Binds the crumbs and creates a rich, golden crust that’s easy to slice.
- Chocolate Fudge Magic Shell: Smooth, snappy chocolate that instantly hardens for that classic “crunch” with every bite.
- Vanilla Ice Cream (Edy’s recommended): Creamy, cold, and lusciously sweet — it forms the bulk of the layers, echoing the classic drumstick core.
- Salted Caramel Sauce (Mrs. Richard’s suggested): Sweet and a little salty, it adds depth and gooey decadence between the icy layers.
- Dry Roasted Peanuts (Chopped): The finishing touch for crunch and nutty, savory contrast on top.
How to Make Drumstick Ice Cream Cake
Step 1: Pulse Sugar Cones into Crumbs
Start with a food processor and add your sugar cones, breaking them up just enough so everything fits snugly. Pulse for about 30 seconds to a minute — you want fine, even crumbs with a bit of texture (think breadcrumbs, not sand). This will be the handcrafted foundation for every delicious bite!
Step 2: Combine Crumbs with Butter
With the processor running, slowly drizzle in the melted butter. Watch the crumbs transform, soaking up that buttery goodness. Stop as soon as the mixture holds together when pressed — don’t overmix, because a bit of texture is key for the best Drumstick Ice Cream Cake base!
Step 3: Form and Chill the Crust
Press the buttery sugar cone mixture evenly into a 9×13 freezer-safe dish to create a uniform crust. Aim for a layer that’s compact but not packed too densely. Pop the dish in your freezer while you prep the chocolate magic shell for that signature drumstick touch.
Step 4: Add the First Layer of Chocolate Fudge Magic Shell
Pour one bottle of chocolate fudge magic shell over the chilled crust. Use an offset spatula to gently spread it out into a thin, glossy layer. This will set up into a crackly, chocolatey delight once it freezes, just like those classic cones.
Step 5: Freeze the Crust and Chocolate Layer
Slide your dish back into the freezer for about 15 to 20 minutes. This rest lets the crust and chocolate magic shell set up perfectly, preventing any mushiness when you add the remaining decadent layers.
Step 6: Soften Vanilla Ice Cream
While everything is chilling, set one tub of vanilla ice cream out at room temperature for several minutes. Give it a stir in a large bowl until it’s creamy and spreadable — you want a texture that’s easy to smooth but not runny.
Step 7: Spread the First Ice Cream Layer
Working quickly, dollop and spread that softened vanilla ice cream over the cold chocolate layer using a spatula for a smooth finish. Even it out as best as you can; then refreeze the pan for 30 minutes so the cake keeps its beautiful layers.
Step 8: Pour and Spread Salted Caramel Sauce
Next, take your caramel sauce and pour it over the chilled ice cream, spreading it into an even, sticky layer. Cover as much of the ice cream surface as possible before it starts to melt. Another short trip to the freezer — about 15 to 20 minutes — ensures crisp, clean layers.
Step 9: Soften More Vanilla Ice Cream
Repeat the softening process with your second container of vanilla ice cream. Set it out while the caramel layer is freezing, and stir it until smooth and spreadable for easy layering.
Step 10: Add the Second Ice Cream Layer
Spread this batch of softened vanilla ice cream over that chilled caramel layer, smoothing everything out to cover completely. This double layer of ice cream mimics the thick, creamy heart of the original treat. Back into the freezer it goes for another 30 minutes!
Step 11: Let the Cake Firm Up
Once the second ice cream layer has firmed, you’re ready for the grand finale. The Drumstick Ice Cream Cake is coming together — your patience is about to be richly rewarded!
Step 12: Finish with More Chocolate Magic Shell
Move quickly for this step! Pour the remaining two bottles of chocolate fudge magic shell right over the top, using a spatula to spread evenly if needed. The cold ice cream will instantly harden the chocolate, creating the iconic crunchy topping you know and love.
Step 13: Sprinkle on Chopped Peanuts
Without delay, scatter the dry roasted, chopped peanuts over the wet chocolate layer so they stick before it hardens completely. These little nuggets are not just decorative — they add incredible crunch and authentic drumstick flavor.
Step 14: Freeze Completely
Return your Drumstick Ice Cream Cake to the freezer one final time, for at least 8 hours or (ideally) overnight. This deep freeze is crucial; it ensures perfectly defined layers and makes slicing a breeze.
How to Serve Drumstick Ice Cream Cake
Garnishes
Before serving, add some flair! Extra drizzles of magic shell, more chopped peanuts, or even a squirt of whipped cream can take each slice over the top. A few maraschino cherries or a light dusting of sea salt can add pop and contrast, making your Drumstick Ice Cream Cake the star of the dessert table.
Side Dishes
While this cake shines on its own, pairing slices with bowls of fresh berries or a little espresso creates a lovely balance. The cold, creamy cake goes especially well with tart raspberries, strawberries, or even a scoop of tangy sorbet for a fun twist.
Creative Ways to Present
Cut into traditional squares, or use a round cutter to create “mini drumsticks” on a stick. Serving on a platter lined with sugar cones or chocolate-dipped strawberries amps up the nostalgia. For parties, let guests top their own slices with extra magic shell, caramel, or nuts for a custom treat.
Make Ahead and Storage
Storing Leftovers
Wrap your Drumstick Ice Cream Cake tightly with plastic wrap or aluminum foil and store it in the freezer. For best taste and texture, enjoy within one week, though we doubt it will last that long once everyone gets a taste!
Freezing
This cake is designed for the freezer and can be assembled up to several days in advance. Just make sure it’s tightly sealed to prevent freezer burn. For ultimate quality, consume within two weeks of assembly.
Reheating
No need to reheat, but if your Drumstick Ice Cream Cake is extra firm, let it sit on the counter for 10 to 15 minutes before slicing. This will help you get clean, sharp pieces and prevent crumbling.
FAQs
Can I use a different ice cream flavor?
Absolutely! While classic vanilla keeps things true to the traditional drumstick vibe, chocolate, caramel swirl, or even coffee ice cream can add a fun twist. Just make sure to choose a dense, good-quality ice cream for the most satisfying layers.
Is there an alternative to chocolate fudge magic shell?
If you can’t find magic shell, you can make your own by melting chocolate chips with a touch of coconut oil. Once poured over cold ice cream, it will harden similarly!
Can I make Drumstick Ice Cream Cake lactose-free?
Yes! Swap in your favorite lactose-free or dairy-free ice cream and check for dairy-free chocolate shell and caramel sauce options. Plenty of brands offer great alternatives these days, so nobody has to miss out.
How long does the cake need to freeze before serving?
A minimum of 8 hours ensures neat, defined layers and easy slicing, but overnight is best if you want the cake to hold up perfectly at your celebration.
Do I need a food processor for the sugar cone base?
While a food processor makes for speedy, even crumbs, you can use a zip-top bag and rolling pin to crush the cones by hand. Just aim for a coarse, sandy texture with no large pieces for the best crust.
Final Thoughts
I can’t wait for you to make this Drumstick Ice Cream Cake and see just how much joy it brings to your kitchen. It’s a nostalgic, crowd-pleasing treat that’s every bit as fun to make as it is to eat. Give it a try for your next special gathering and watch it become everyone’s new favorite dessert!
PrintDrumstick Ice Cream Cake Recipe

Indulge in the deliciousness of a Drumstick Ice Cream Cake, featuring layers of sugar cone crumbs, chocolate fudge magic shell, vanilla ice cream, salted caramel sauce, and chopped peanuts. This frozen treat is perfect for any occasion.
- Prep Time: 30 minutes
- Total Time: 9 hours
- Yield: 12 servings 1x
- Category: Dessert
- Method: Freezing
- Cuisine: American
- Diet: Vegetarian
Ingredients
Sugar Cone Crust:
- 3 cups coarsely crushed sugar cones (from 18 cones)
- ½ cup unsalted butter, melted
Layers:
- 3 bottles (7.25 ounces each) chocolate fudge magic shell
- 3 quart containers vanilla ice cream (Edy’s brand used)
- 16.6 ounces salted caramel sauce (Mrs. Richard’s brand used)
- ½ cup dry roasted peanuts, chopped
Instructions
- Sugar Cone Crust: Add sugar cones to a food processor and pulse until coarse crumbs. Slowly mix in melted butter. Press into a 9×13 dish.
- Layering: Pour 1 bottle of chocolate fudge magic shell over crust. Spread softened vanilla ice cream over shell. Freeze. Add salted caramel sauce, freeze. Add second layer of softened vanilla ice cream, freeze. Pour remaining magic shell over ice cream, top with chopped peanuts. Freeze for 8 hours or overnight.
Nutrition
- Serving Size: 1 slice
- Calories: 480
- Sugar: 30g
- Sodium: 270mg
- Fat: 28g
- Saturated Fat: 15g
- Unsaturated Fat: 10g
- Trans Fat: 0g
- Carbohydrates: 50g
- Fiber: 2g
- Protein: 6g
- Cholesterol: 45mg
Keywords: Drumstick Ice Cream Cake, Ice Cream Cake Recipe, Frozen Dessert, Summer Treat, Vanilla Ice Cream Cake
