Cheesy Roasted Cauliflower Recipe
Introduction
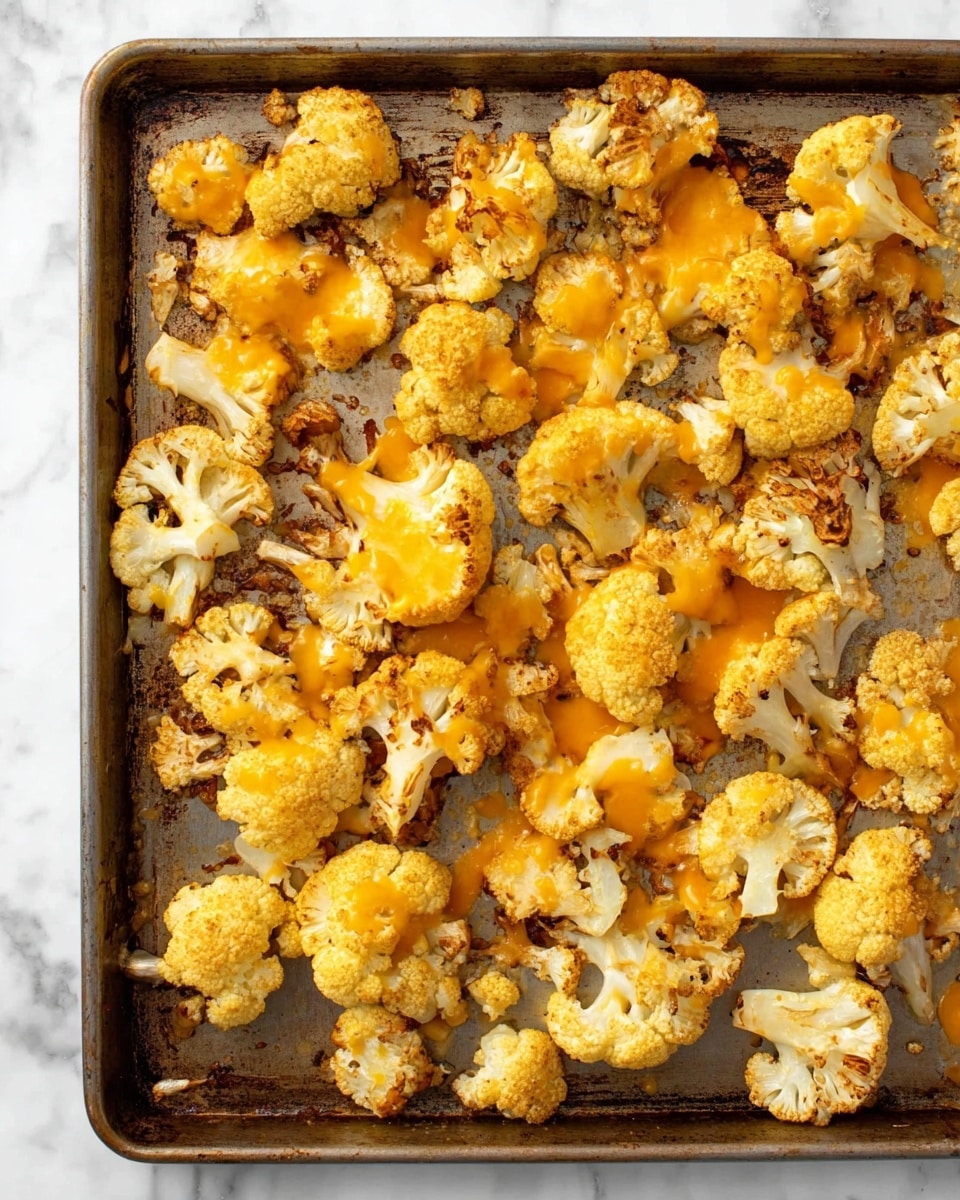
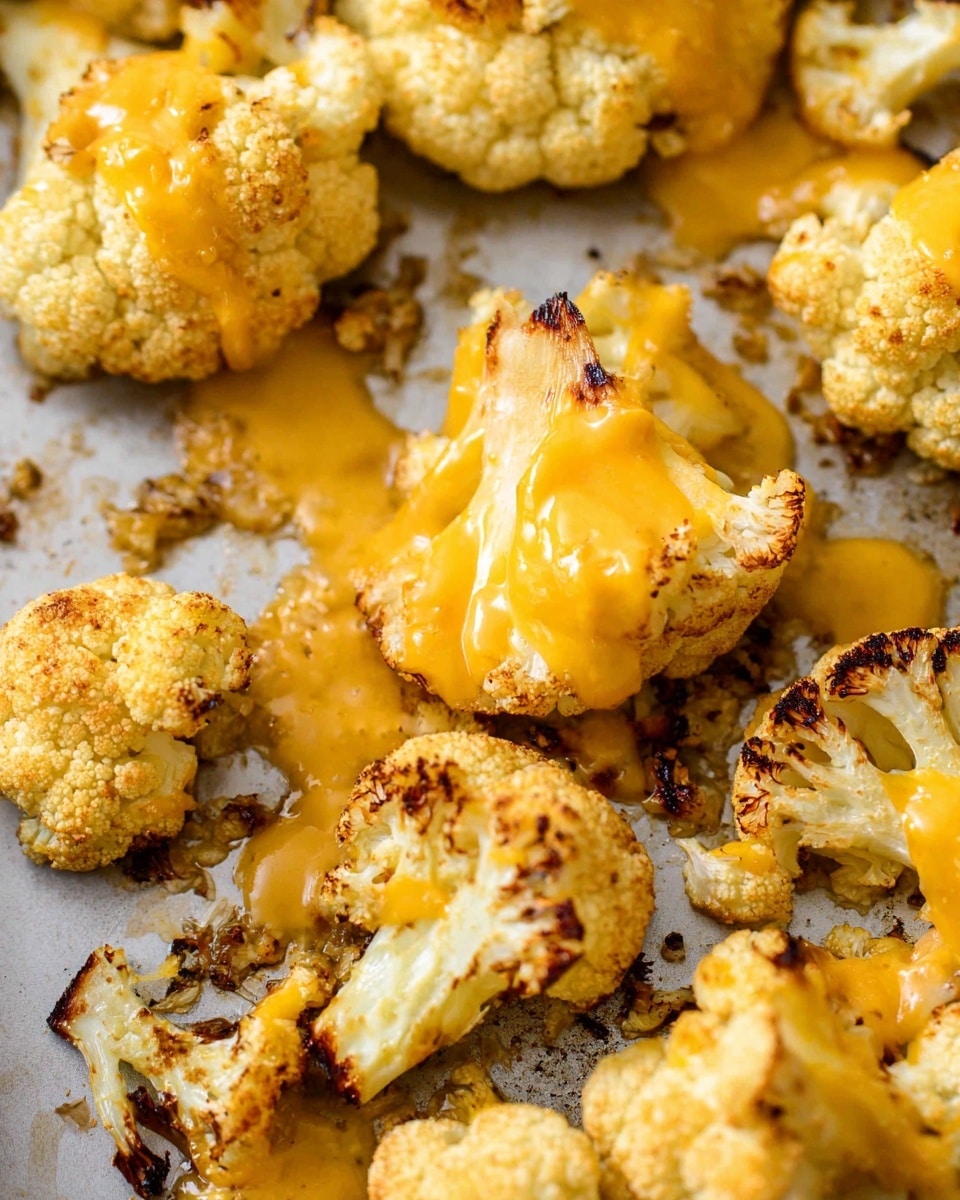
Cheesy roasted cauliflower is a delicious and simple side dish that turns a humble vegetable into a flavorful treat. With a crispy, golden edge and melted sharp cheddar, it’s perfect for any meal. This recipe is easy to prepare and sure to please both kids and adults alike.
Ingredients
- 1 head of cauliflower (cut into small similar sized florets)
- ½ teaspoon salt
- ½ teaspoon onion powder
- ½ teaspoon garlic powder
- 2 tablespoons olive oil
- 1 cup sharp cheddar cheese (freshly grated)
Instructions
- Step 1: Preheat the oven to 400 degrees Fahrenheit.
- Step 2: Cut the cauliflower into small florets of similar size for even cooking.
- Step 3: In a mixing bowl, toss the cauliflower with salt, onion powder, garlic powder, and olive oil until well coated.
- Step 4: Spread the cauliflower florets in an even layer on a baking sheet.
- Step 5: Roast in the oven for 20 minutes.
- Step 6: Flip and stir the cauliflower with a spatula to ensure even roasting.
- Step 7: Return to the oven and roast for an additional 5 minutes until tender and browned on the edges.
- Step 8: Flip the cauliflower again and sprinkle the freshly grated sharp cheddar cheese evenly over the top.
- Step 9: Roast for 5 more minutes until the cheese is melted and crispy around the edges.
Tips & Variations
- Use Parmesan or Gruyère for a different cheese flavor and texture.
- Adding a pinch of smoked paprika or chili flakes before roasting adds a nice smoky or spicy kick.
- Make sure florets are similar in size for evenly cooked cauliflower.
- Serve immediately to enjoy the crispiness of the melted cheese.
Storage
Store leftover cheesy roasted cauliflower in an airtight container in the refrigerator for up to 3 days. Reheat gently in a baking dish at 350 degrees Fahrenheit until warm to keep the cheese from becoming rubbery, or microwave briefly but note the texture may soften.
How to Serve
Serve this delicious recipe with your favorite sides.
FAQs
Can I use frozen cauliflower for this recipe?
Frozen cauliflower can be used, but it may release more moisture and become softer. Be sure to pat it dry before tossing with spices and oil, and consider shortening the roasting time slightly.
What can I serve with cheesy roasted cauliflower?
This dish pairs well with grilled meats, roasted chicken, or alongside a grain like quinoa or rice for a complete meal. It also works great as a vegetarian main when served with a fresh salad.
PrintCheesy Roasted Cauliflower Recipe

A simple and delicious recipe for Cheesy Roasted Cauliflower, featuring tender roasted cauliflower florets seasoned with garlic, onion powder, and salt, then topped with melted sharp cheddar cheese for a flavorful and satisfying side dish.
- Prep Time: 10 minutes
- Cook Time: 30 minutes
- Total Time: 40 minutes
- Yield: 4 servings 1x
- Category: Side Dish
- Method: Baking
- Cuisine: American
- Diet: Vegetarian
Ingredients
Cauliflower
- 1 head of cauliflower, cut into small similar sized florets
Seasoning
- ½ teaspoon salt
- ½ teaspoon onion powder
- ½ teaspoon garlic powder
- 2 tablespoons olive oil
Topping
- 1 cup sharp cheddar cheese, freshly grated
Instructions
- Preheat oven: Preheat your oven to 400 degrees Fahrenheit to prepare for roasting the cauliflower.
- Prepare cauliflower florets: Cut the cauliflower into small florets of similar size to ensure even cooking.
- Season cauliflower: Place the cauliflower florets into a mixing bowl and add salt, onion powder, garlic powder, and olive oil. Toss well to coat all pieces evenly.
- Arrange on baking sheet: Spread the seasoned cauliflower florets evenly on a baking sheet in a single layer to promote roasting.
- Initial roasting: Roast the cauliflower in the preheated oven at 400°F for 20 minutes, allowing them to start tenderizing and browning.
- Flip the cauliflower: Use a spatula to flip and stir the florets, ensuring even exposure to heat for uniform roasting.
- Continue roasting: Return the baking sheet to the oven and roast for an additional 5 minutes until tender and browned around the edges.
- Add cheese topping: Flip the cauliflower once more, then sprinkle the freshly grated sharp cheddar cheese evenly over the florets.
- Melt cheese: Roast for a final 5 minutes until the cheese has melted and developed crispy edges, creating a cheesy crust.
Notes
- Ensure florets are cut to similar size for even roasting.
- Toss florets well with oil and seasonings to maximize flavor.
- You can substitute sharp cheddar with other melts well cheeses like mozzarella or gouda.
- For extra crispiness, broil for 1-2 minutes at the end but watch carefully to avoid burning.
- Serve immediately for the best texture and flavor.
Keywords: Cheesy Roasted Cauliflower, roasted cauliflower, cheesy cauliflower, side dish, vegetarian recipe, baked cauliflower, sharp cheddar cauliflower


