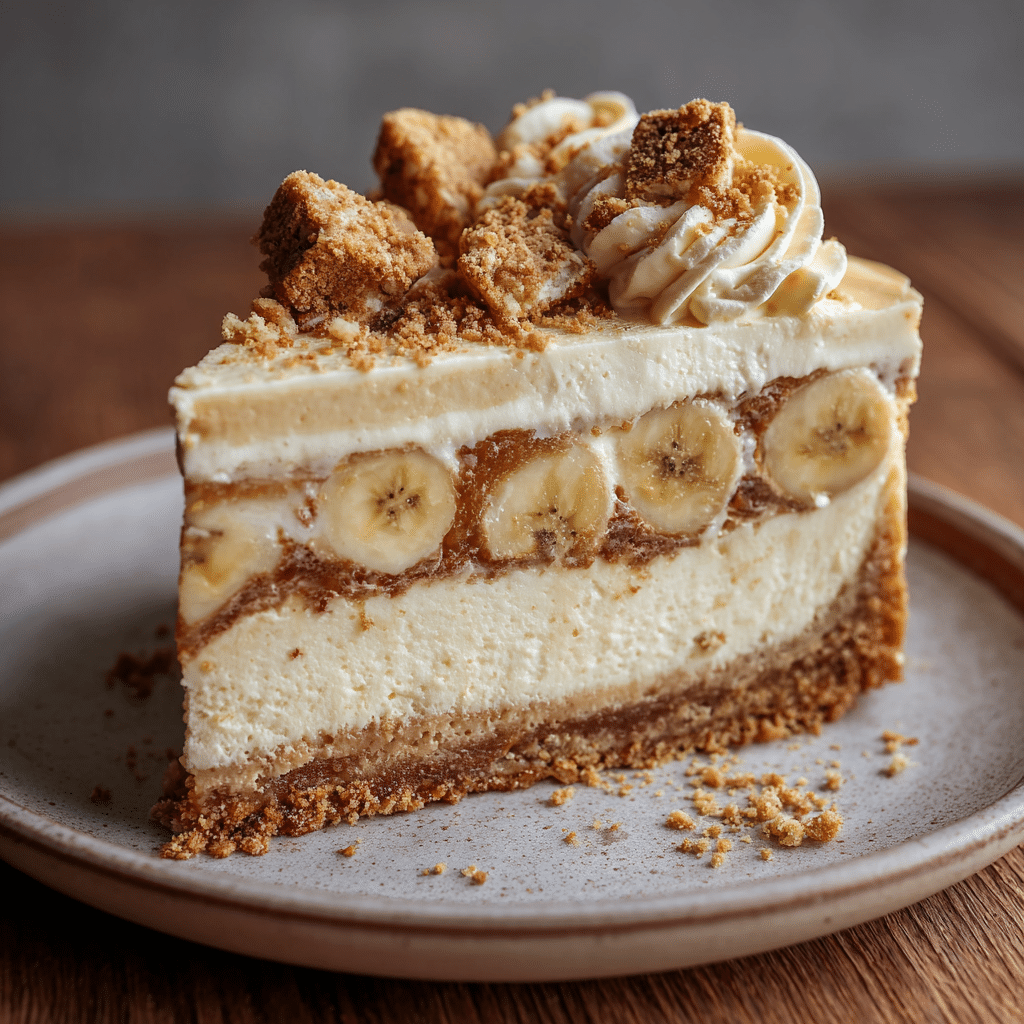
Banana Pudding Cheesecake Recipe
Imagine the dreamy marriage of two Southern classics: creamy cheesecake and nostalgic banana pudding, all baked together into a show-stopping Banana Pudding Cheesecake. Every bite combines glossy, rich cheesecake, familiar vanilla pudding sweetness, and those irresistible layers of Nilla Wafers and banana slices. Whether you’re baking for a summer potluck, a birthday, or just because you need something special, this is a dessert you—and your lucky friends—won’t soon forget.
Ingredients You’ll Need
This Banana Pudding Cheesecake keeps it simple but packs in big flavor. Each ingredient has a starring role, creating a dessert that tastes homemade and pure comfort. Let’s break down what you’ll need and why it matters.
- Nilla Wafers: These classic cookies form both the crust and a signature crunchy layer, bringing unmistakable banana pudding vibes.
- Brown sugar (packed): Light or dark brown sugar gives the crust a toasty, caramelized depth.
- Unsalted butter (melted): Butter pulls the crust together, adding richness and a subtle, nutty flavor after baking.
- Cream cheese (room temperature): The backbone of your cheesecake: use full-fat for the best silky texture.
- White granulated sugar: Just enough to sweeten the filling without overpowering the bananas.
- Pure vanilla extract: Vanilla lifts all the flavors and adds warmth in both the cheesecake and the pudding topping.
- Bananas (mashed and sliced): Mashed bananas infuse the cheesecake with real fruit flavor, while sliced bananas create an authentic banana pudding layer.
- Sour cream (room temperature): A little tang balances out all that sweetness and makes the filling extra creamy.
- Heavy cream (room temperature and cold): Cream keeps things luscious in the cheesecake, then whips up beautifully for the pudding topping.
- Large eggs (room temperature): Eggs help set the cheesecake, binding everything gently so it’s still soft and dreamy.
- Crushed Nilla Wafers: Scattered in the center and on top, these bring the party vibes—crunch, nostalgia, everything.
- Instant vanilla pudding (3.4 oz package): Makes for an easy, deeply flavorful pudding whip without extra cooking.
- Milk (cold): Mixes with the pudding powder to create that classic, wobbly-sweet layer.
- Crushed Nilla Wafers (for decorating): The finishing touch—scatter on top for crunch and a little bit of drama.
How to Make Banana Pudding Cheesecake
Step 1: Prepare the Nilla Wafer Crust
Start by preheating your oven to 325°F. Generously spray a 9-inch springform pan with nonstick spray, then line the bottom with parchment paper and spritz it again. Use a food processor or blender to blitz the Nilla Wafers into fine crumbs, then toss them with brown sugar and melted butter. Pour this golden, buttery mix into your pan. Press the crumbs tightly into the bottom and halfway up the sides—try using the bottom of a measuring cup for a super-smooth, even crust. Bake for 11 minutes, just until set and fragrant. Let it cool while you make the filling.
Step 2: Whip Up the Cheesecake Layer
In the bowl of a stand mixer, beat the cream cheese and white sugar on high speed for a full two minutes until light and fluffy—don’t rush this, since it gives that signature silky texture. Scrape down the bowl, then add mashed bananas, vanilla, sour cream, and room-temperature heavy cream. Beat on medium until just combined. It’s normal (and totally okay) if the batter is a little lumpy from the bananas! Lastly, gently mix in the eggs one at a time, keeping the speed on low to avoid over-mixing. This helps your Banana Pudding Cheesecake stay luxuriously soft.
Step 3: Layer and Assemble
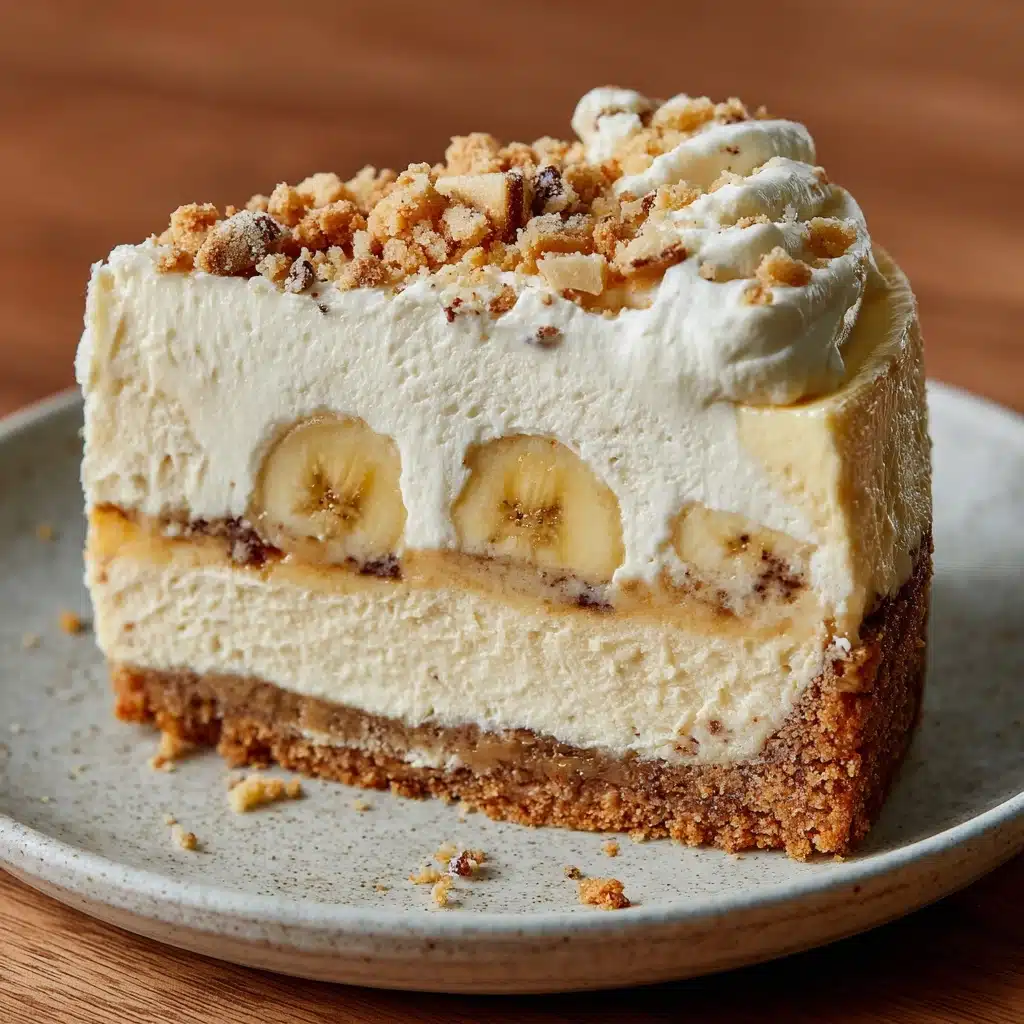
Pour half the cheesecake batter onto the prepared crust. Arrange the sliced bananas evenly across the top, then generously sprinkle over a cup of crushed Nilla Wafers for added texture. Pour the remaining cheesecake batter on top, smoothing the surface out with a spatula. These layers are where the magic happens—you get a creamy cheesecake in every bite, plus pops of banana and cookie crunch.
Step 4: Bake the Cheesecake in a Water Bath
For that classic, smooth look (no cracks!), a water bath is key. You have two waterproofing options: place your springform pan inside a 10-inch cake pan, then set all of that in a large roasting pan and fill halfway up with hot water. Or, double-wrap your springform pan in foil and set it directly in the roasting pan—just fill halfway with hot water and keep an eye out for leaks. Carefully slide everything into the oven and bake for 80 to 90 minutes. You’re looking for set edges and a center that jiggles slightly if you gently shake the pan.
Step 5: Cool and Chill
Once baked, turn off the oven, crack the door, and let your Banana Pudding Cheesecake cool inside for 30 minutes—this gentle cooling helps prevent cracks. Remove the pan from the water, then let it cool completely at room temperature on a rack. Finally, cover and refrigerate at least 6 hours, or better yet, overnight. Patience is everything here for that perfect slice!
Step 6: Make the Whipped Vanilla Pudding Topping
Whisk the instant vanilla pudding mix together with cold milk in a large bowl, beating for about two minutes. Pop it in the fridge while you whip a cup of cold heavy cream and that extra splash of vanilla until stiff peaks form. Gently fold the whipped cream into the thickened pudding, taking care to keep things airy. This topping is the secret to dreamy, cloud-like bliss.
Step 7: Decorate and Serve
Release your chilled cheesecake from the springform pan and carefully peel away the parchment. Pile the whipped pudding topping onto the cheesecake, spreading nearly to the edges. Finish with a generous flourish of crushed Nilla Wafers on top—now it’s as pretty as it is delicious. Slice, serve, and prepare for applause!
How to Serve Banana Pudding Cheesecake
Garnishes
When it comes to garnishing your Banana Pudding Cheesecake, keep it playful and abundant! A big sprinkle of crushed Nilla Wafers is a must, adding crunch and nostalgia atop the creamy pudding layer. Fresh banana slices laid in a decorative pattern look stunning but remember to add them just before serving to prevent browning. For extra flair, a few dollops of homemade whipped cream and maybe a drizzle of caramel sauce will make every slice feel like a celebration.
Side Dishes
Let your cheesecake shine by pairing it with simple, fresh sides. A bowl of mixed berries brings a tart pop that cuts through the richness. Serve with strong, hot coffee or iced espresso for a grown-up contrast. If you’re feeling extra fancy, a spoonful of tangy lemon or raspberry sorbet on the side brightens everything up.
Creative Ways to Present
Transformation time! Try serving Banana Pudding Cheesecake in individual mason jars for portable picnics or parties—just layer mini crusts, filling, and pudding. For a wow factor, pipe the pudding topping in big swirls, or use a ring of sliced bananas around the edge. You can even turn leftovers into parfaits with whipped cream and extra cookies for a fun twist on the classic.
Make Ahead and Storage
Storing Leftovers
If you’re lucky enough to have leftovers, cover the cheesecake tightly with plastic wrap or store in an airtight container. It will keep beautifully in the fridge for up to five days; just remember, the longer it sits, the softer the bananas and cookies become—which some people absolutely love!
Freezing
Banana Pudding Cheesecake freezes surprisingly well. Wrap slices individually in plastic wrap and foil, then freeze for up to two months. To thaw, simply move a slice to the fridge overnight. If you’re freezing before adding the pudding topping, wait to pile that on until after it’s thawed for best texture.
Reheating
You definitely don’t want to heat your cheesecake—these flavors are at their best chilled or cool! For the silkiest texture, let slices sit at room temperature for 10 to 15 minutes before serving if they’re coming directly from the fridge.
FAQs
Can I make Banana Pudding Cheesecake ahead of time?
Absolutely! This dessert is actually even better when made a day in advance, as the flavors have time to mingle. Just wait to add the pudding topping and crushed cookies until right before serving for prettiest results.
Do I really need to use a water bath?
If you want that ultra-smooth, crack-free top, a water bath is your best friend. It gently cooks the cheesecake and helps create a soft, creamy texture—worth the extra step, promise!
Can I use store-bought whipped topping instead of homemade?
While homemade whipped cream folded into the pudding yields the lightest, freshest topping, you can absolutely use your favorite whipped topping (like Cool Whip) in a pinch. Just know it may be a little sweeter and fluffier.
What if I don’t have instant pudding mix?
If you can’t find instant pudding, try making a simple vanilla custard or use a thick pastry cream instead. The flavor and texture will change a bit, but you’ll still have a delicious finish.
Can I use very ripe bananas?
Yes, and you should! The riper the bananas, the sweeter and more pronounced their flavor will be in the cheesecake layer. Brown spots mean extra banana goodness.
Final Thoughts
There’s just something irresistible about Banana Pudding Cheesecake—maybe it’s the retro charm, maybe it’s the creamy, cookie-layered goodness, or maybe it’s just how happy it makes everyone who tries it. If you’re in the mood for a special treat, this one’s unforgettable. Go on, gather your ingredients, and experience this dessert magic for yourself!
PrintBanana Pudding Cheesecake Recipe

Indulge in the decadent fusion of banana pudding and cheesecake with this heavenly dessert recipe. Creamy cheesecake meets luscious banana filling, all nestled on a crunchy Nilla Wafer crust and topped with a fluffy vanilla pudding layer. A true delight for banana dessert lovers!
- Prep Time: 30 minutes
- Cook Time: 90 minutes
- Total Time: 7 hours
- Yield: 1 9-inch cheesecake 1x
- Category: Dessert
- Method: Baking
- Cuisine: American
- Diet: Vegetarian
Ingredients
Nilla Wafer Crust
- 1 box Nilla Wafers
- 2 TBSP Brown sugar (packed light or dark)
- 1/2 cup Unsalted butter (melted)
Banana Cheesecake
- 24 oz Cream cheese (room temperature)
- 3/4 cup White granulated sugar
- 1 tsp Pure vanilla extract
- 2 Bananas (mashed)
- 1/2 cup Sour cream (room temperature)
- 1/4 cup Heavy cream (room temperature)
- 4 Large eggs (room temperature)
- 1 cup Crushed Nilla wafers
- 2 Bananas (sliced thinly)
Whipped Vanilla Pudding
- 1 package Instant vanilla pudding (3.4 oz)
- 1 cups Milk (cold)
- 1 tsp Pure vanilla extract
- 1 cup Heavy cream (cold)
- Crushed Nilla Wafers (for decorating)
Instructions
- Nilla Wafer Crust – Preheat the oven to 325℉. Spray a 9-inch springform pan with baking nonstick spray. Blend Nilla Wafers into a fine crumb. Mix with brown sugar and melted butter. Press into the pan and bake for 11 minutes.
- Banana Cheesecake – Beat cream cheese and sugar, add mashed bananas, vanilla, sour cream, and heavy cream. Mix in eggs. Layer batter over crust with bananas and Nilla Wafers. Bake in a water bath for 80-90 minutes.
- Whipped Vanilla Pudding – Beat instant pudding with milk, chill. Whip cream, fold into chilled pudding. Spread over chilled cheesecake. Decorate with Nilla Wafers.
Notes
- For best results, ensure all dairy ingredients are at room temperature.
- The water bath method helps prevent cracks in the cheesecake.
- Chill the cheesecake thoroughly for optimal texture.
Nutrition
- Serving Size: 1 slice
- Calories: 380
- Sugar: 24g
- Sodium: 280mg
- Fat: 25g
- Saturated Fat: 14g
- Unsaturated Fat: 8g
- Trans Fat: 0g
- Carbohydrates: 33g
- Fiber: 1g
- Protein: 6g
- Cholesterol: 120mg
Keywords: Banana Pudding Cheesecake, Dessert Recipe, Banana Cheesecake, Nilla Wafer Crust, Whipped Vanilla Pudding