Baked Salmon Sushi Cups Recipe
Introduction
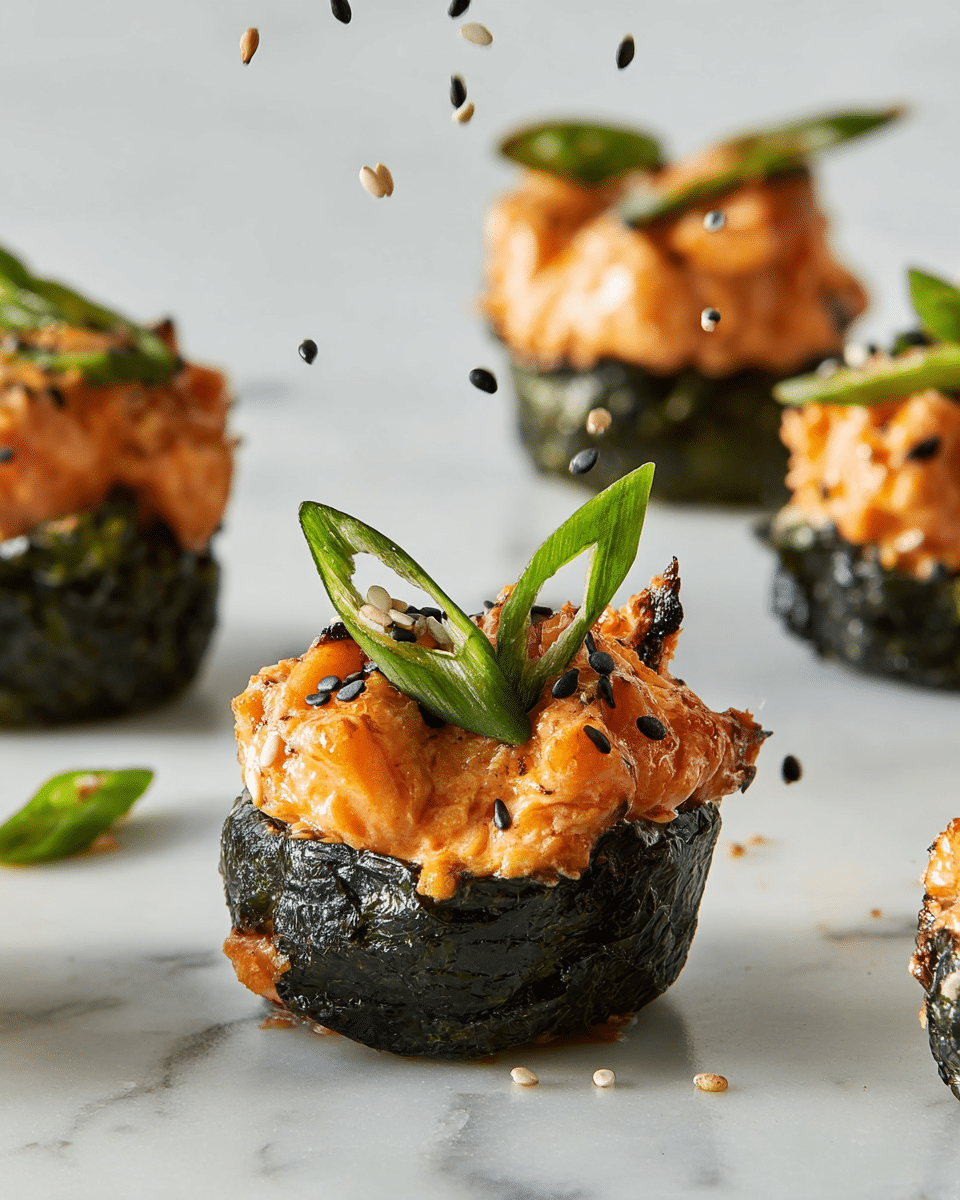
Baked Salmon Sushi Cups offer a delightful twist on traditional sushi, combining tender salmon and flavorful toppings in convenient, bite-sized servings. Perfect for parties or a fun weeknight meal, these cups are both visually appealing and delicious.
Ingredients
- Cooking spray
- 2 cups cooked sushi rice
- 3 nori sheets, quartered
- 1 (1 1/2-lb.) skinless salmon fillet, cut into 1/2″ cubes
- 2 scallions, thinly sliced, plus more for serving
- 1 teaspoon toasted sesame oil
- 4 tablespoons Japanese mayonnaise (such as Kewpie), divided
- 2 1/4 teaspoons sriracha, divided
- Kosher salt
- 2 teaspoons black and white sesame seeds
Instructions
- Step 1: Arrange a rack in the upper third of the oven and preheat to 400°F. Lightly coat a standard 12-cup muffin tin with cooking spray.
- Step 2: Scoop 1 heaping tablespoon of sushi rice into the center of each piece of nori. Transfer the nori pieces to the prepared muffin tin with the rice side up. Using a spoon, gently press the rice into an even layer at the bottom of each cup.
- Step 3: In a large bowl, combine salmon cubes, sliced scallions, toasted sesame oil, 2 tablespoons Japanese mayonnaise, 2 teaspoons sriracha, and 1/4 teaspoon kosher salt. Toss gently until well mixed.
- Step 4: Divide the salmon mixture evenly among the muffin cups, placing about 1/4 cup on top of the rice in each cup.
- Step 5: Bake the sushi cups until the salmon is nearly cooked through, about 11 minutes.
- Step 6: Turn on the broiler and broil the cups, watching carefully, until the salmon tops are charred in spots and fully cooked, approximately 2 to 4 minutes. Remove and let cool for 5 minutes.
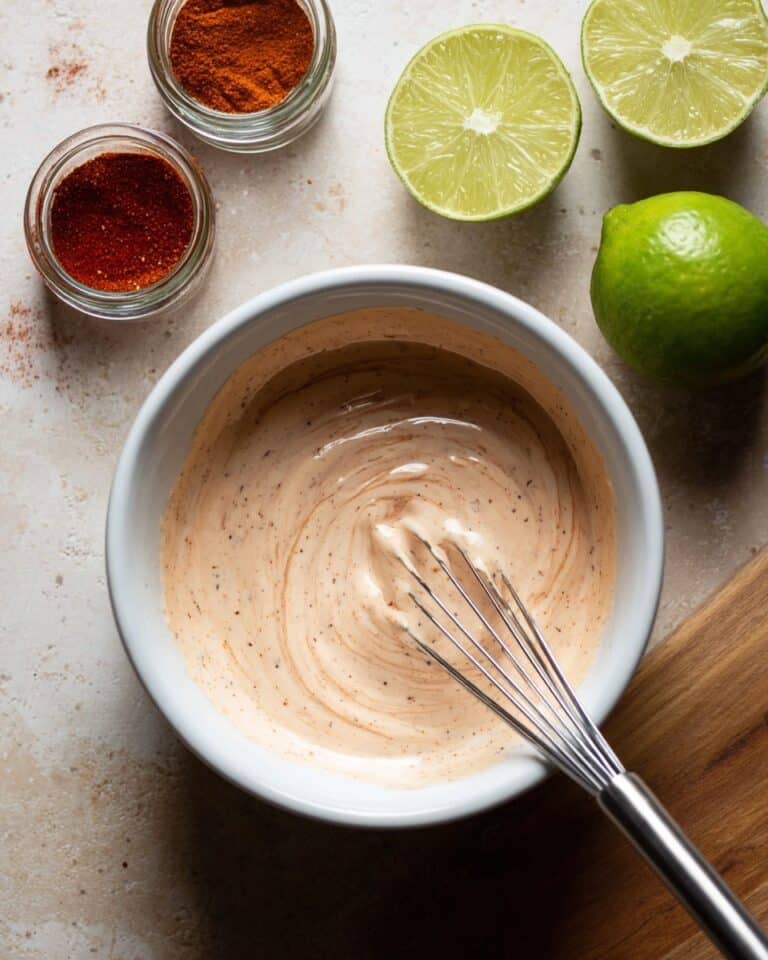
- Step 7: Meanwhile, mix the remaining 2 tablespoons Japanese mayonnaise with 1/4 teaspoon sriracha in a small bowl.
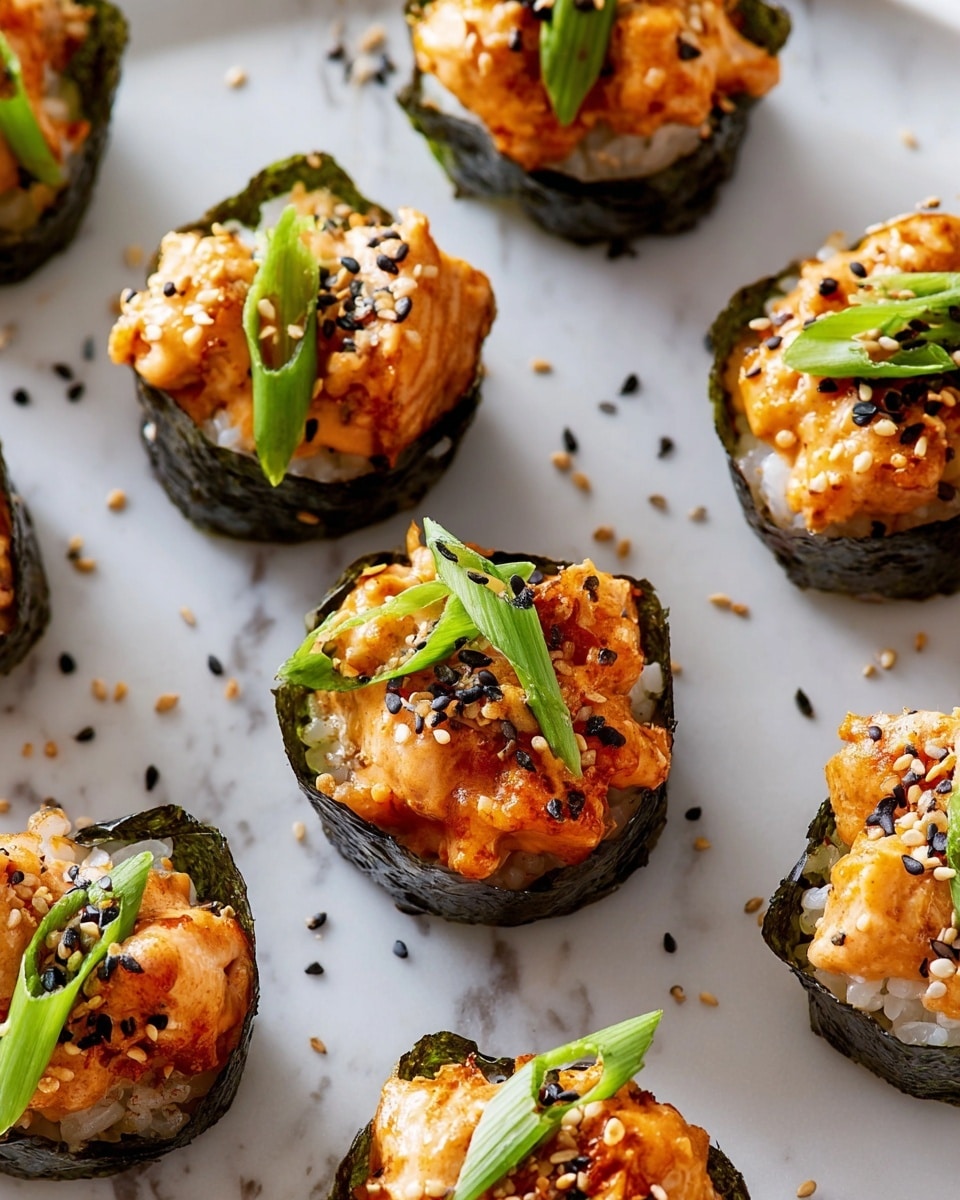
- Step 8: Arrange the sushi cups on a serving platter. Drizzle with the spicy mayonnaise mixture and sprinkle with sesame seeds and additional sliced scallions.
Tips & Variations
- For extra crunch, sprinkle finely chopped cucumber or radish on top before serving.
- Use avocado slices as a creamy topping alternative to the spicy mayo.
- To make this dish gluten-free, ensure your sriracha and mayonnaise are certified gluten-free.
- If fresh salmon is unavailable, sushi-grade frozen salmon can be thawed and used.
Storage
Store leftover sushi cups in an airtight container in the refrigerator for up to 2 days. Reheat briefly under the broiler or in a hot oven to warm the salmon without drying it out. For best texture, consume soon after reheating.
How to Serve
Serve this delicious recipe with your favorite sides.
FAQs
Can I make these sushi cups ahead of time?
You can prepare the sushi cups up to the baking step in advance and refrigerate them for a few hours, then bake and broil just before serving to keep them fresh and flavorful.
What can I substitute for Japanese mayonnaise?
If Japanese mayonnaise is not available, regular mayonnaise can be used, but the flavor will be less rich and slightly sweeter. Mixing regular mayo with a bit of rice vinegar can help mimic the tangy taste.
PrintBaked Salmon Sushi Cups Recipe

These baked salmon sushi cups are a delightful fusion of traditional sushi flavors and convenient muffin tin baking. Featuring tender chunks of salmon nestled on a bed of seasoned sushi rice inside crispy nori cups, topped with a spicy mayonnaise drizzle and toasted sesame seeds, they make a perfect appetizer or light meal with a satisfying umami kick.
- Prep Time: 15 minutes
- Cook Time: 15 minutes
- Total Time: 30 minutes
- Yield: 12 sushi cups 1x
- Category: Appetizer
- Method: Baking
- Cuisine: Japanese Fusion
Ingredients
Sushi Cups
- Cooking spray
- 2 cups cooked sushi rice
- 3 nori sheets, quartered
- 1 (1 1/2-lb.) skinless salmon fillet, cut into 1/2” cubes
- 2 scallions, thinly sliced, plus more for serving
- 1 tsp. toasted sesame oil
- 4 tbsp. Japanese mayonnaise (such as Kewpie), divided
- 2 1/4 tsp. sriracha, divided
- Kosher salt
- 2 tsp. black and white sesame seeds
Instructions
- Preheat and prepare muffin tin: Arrange a rack in the upper third of the oven and preheat the oven to 400°F. Lightly coat a standard 12-cup muffin tin with cooking spray to prevent sticking.
- Form rice base: Scoop one heaping tablespoon of cooked sushi rice into the center of each piece of quartered nori. Transfer each nori piece with rice into the prepared muffin tin, rice side up. Using a spoon, gently press and pack the rice evenly into the bottom of each muffin cup to form a compact base.
- Prepare salmon mixture: In a large bowl, combine the cubed salmon, thinly sliced scallions, toasted sesame oil, 2 tablespoons of Japanese mayonnaise, 2 teaspoons sriracha, and 1/4 teaspoon kosher salt. Toss gently but thoroughly to coat all the salmon pieces evenly.
- Assemble sushi cups: Divide the salmon mixture evenly among the muffin cups, about 1/4 cup per cup, placing it on top of the packed rice layer.
- Bake salmon cups: Place the muffin tin in the oven and bake until the salmon is almost cooked through, approximately 11 minutes.
- Broil for char: Switch the oven to broil mode and carefully broil the salmon sushi cups for 2 to 4 minutes, watching closely to ensure the tops become charred in spots without burning, and the salmon fully cooks through. Then remove from the oven and let cool for 5 minutes.
- Prepare spicy mayo drizzle: In a small bowl, combine the remaining 2 tablespoons of Japanese mayonnaise with 1/4 teaspoon sriracha, mixing until smooth.
- Garnish and serve: Arrange the baked salmon sushi cups on a serving platter, drizzle with the spicy mayonnaise mixture, then sprinkle generously with black and white sesame seeds and additional sliced scallions for freshness and visual appeal. Serve immediately.
Notes
- Use sushi rice for the best texture and flavor, and cook it according to package instructions with proper seasoning.
- Keep an eye during broiling to prevent burning; broiler strength varies between ovens.
- For extra flavor, add a small dab of wasabi or serve with pickled ginger on the side.
- Leftovers can be stored covered in the refrigerator for up to 1 day but are best enjoyed fresh.
- Substitute salmon with other firm fish like tuna or cooked shrimp if preferred.
Keywords: baked salmon sushi cups, sushi appetizer, Japanese sushi recipe, easy sushi cups, baked seafood appetizer


