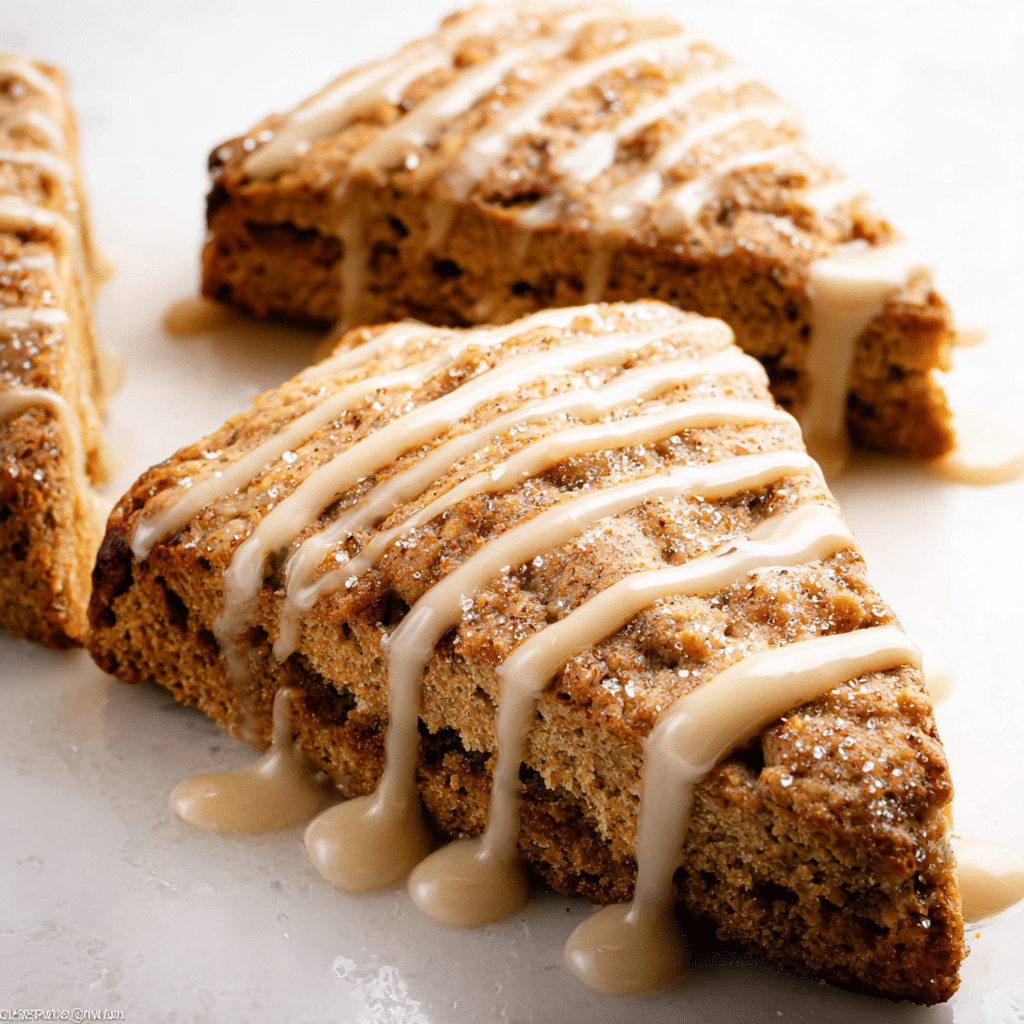
Classic Pumpkin Scones Recipe
If you are looking to capture the essence of crisp autumn mornings and cozy afternoons with a warm cup of tea, these Classic Pumpkin Scones are your perfect treat. Bursting with fragrant pumpkin pie spice and tender pumpkin puree, each bite delivers that homely, nostalgic flavor that feels like a warm hug. The flaky texture, combined with a luscious maple glaze drizzling over the top, makes these scones simply irresistible. Whether you’re serving them for breakfast, brunch, or a sweet snack, Classic Pumpkin Scones bring both comfort and festive cheer right to your kitchen.
Ingredients You’ll Need
The beauty of Classic Pumpkin Scones lies in their simple, wholesome ingredients that each play a crucial role in bringing this seasonal favorite to life. From the flakiness of frozen butter to the warmth of pumpkin pie spice, every component adds a unique touch of flavor, texture, or color that makes the final bake truly special.
- All-purpose flour (2 cups): The base that provides structure and softness to the scones.
- Baking powder (2 ½ tsp): Helps the scones rise beautifully for that tender crumb.
- Ground cinnamon (1 tsp): Adds a warm, spicy note to complement the pumpkin.
- Pumpkin pie spice (1 ½ tsp): A blend of spices that brings the classic autumn flavor to the forefront.
- Salt (½ tsp): Balances the sweetness and enhances overall flavor.
- Unsalted butter, frozen (½ cup): Essential for creating those flaky, melt-in-your-mouth layers.
- Heavy cream (1/3 cup + 2 Tbsp): Moistens the dough and adds richness for a tender crumb.
- Large egg (1): Binds the ingredients and adds a bit of fluffiness.
- Canned pumpkin puree, blotted (½ cup): Gives the scones their vibrant color and moist texture without excess liquid.
- Light brown sugar (½ cup): Provides a deep, caramel-like sweetness.
- Pure vanilla extract (1 tsp): Enhances the overall flavor profile with a subtle sweetness.
- Coarse sugar (optional): For sprinkling on top, adding a delightful crunch and sparkle before baking.
- Unsalted butter (2 Tbsp): Used in the maple glaze for a rich finish.
- Pure maple syrup (1/3 cup): Adds natural sweetness and a hint of autumn in the glaze.
- Sifted confectioners’ sugar (1 cup): Creates the smooth, sweet glaze to drizzle over warm scones.
- Pinch of salt (to taste): Balances the sweetness in the glaze and rounds out flavors.
How to Make Classic Pumpkin Scones
Step 1: Prepare Your Oven and Baking Sheets
Start by preheating your oven to 400°F (204°C), and adjust the rack to a middle-low position to ensure even baking. Line your baking sheets with parchment paper or a silicone mat—this simple step prevents sticking and helps the bottoms brown beautifully. It’s a small prep but sets you up for scone success.
Step 2: Mix Dry Ingredients and Incorporate Butter
Whisk together all your dry ingredients: flour, baking powder, cinnamon, pumpkin pie spice, and salt. Next, grate the frozen butter directly into this mix using a box grater—this is a little trick that ensures your scones get wonderfully flaky. Using a pastry cutter, fork, or your fingers, blend the butter with the flour until the mixture resembles pea-sized crumbs. These buttery pockets are the secret to flaky, tender scones.
Step 3: Combine Wet Ingredients and Form Dough
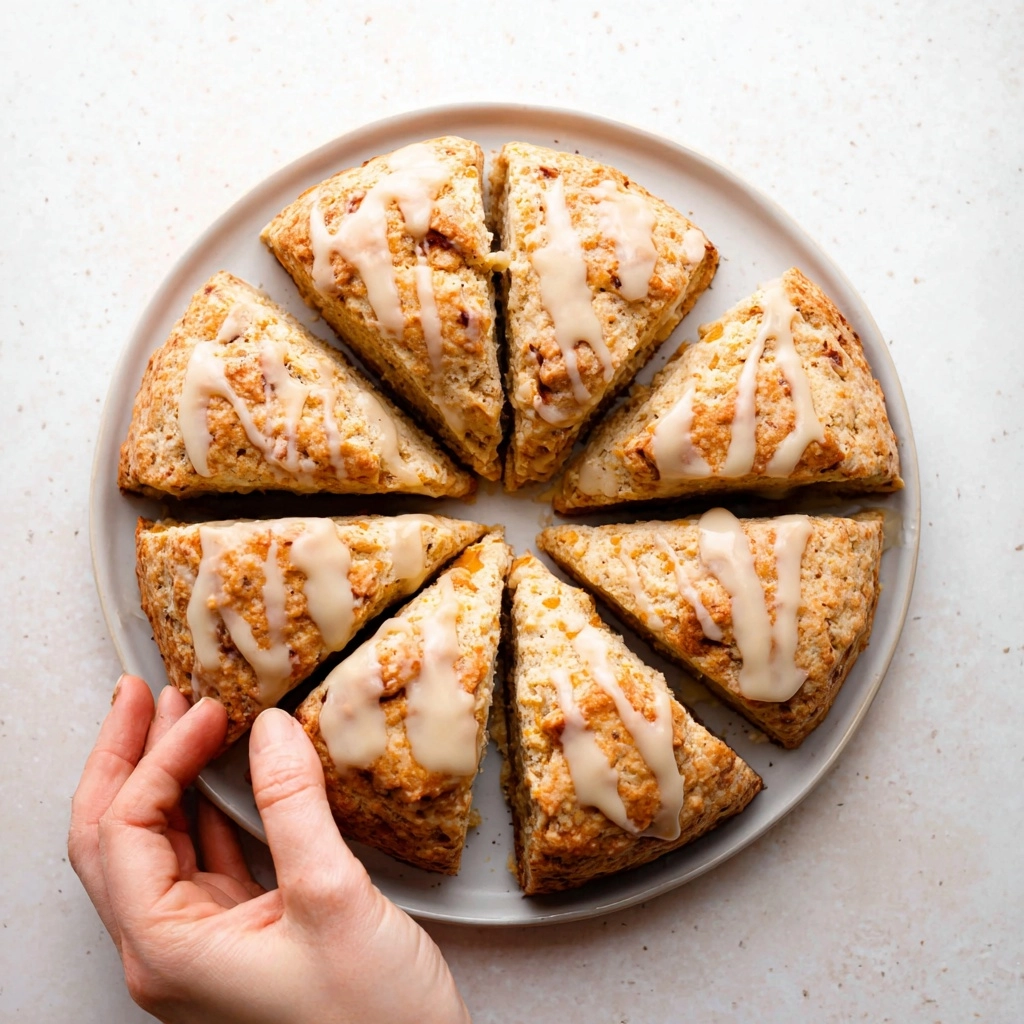
In a separate bowl, whisk heavy cream, the egg, blotted pumpkin puree, brown sugar, and vanilla extract until smooth. Drizzle this over your dry mixture and gently combine everything until just moistened. With lightly floured hands, gather the dough and press it into a neat disc on your work surface—about 8 inches wide is perfect. Use a sharp knife to cut into eight wedges, just like slicing a pie. This method creates perfect, even scones every time.
Step 4: Prep and Bake
Arrange your scones spaced at least 2 inches apart on the baking sheets, so they can rise and crisp nicely. Use the remaining heavy cream to brush the tops, then sprinkle with coarse sugar for an extra tempting crunch. Bake larger scones for 20-25 minutes or until they turn a delicate golden brown. Mini scones only need about 18-20 minutes. As they bake, your kitchen will fill with that undeniable pumpkin-and-spice aroma—pure comfort!
Step 5: Prepare the Maple Glaze
While the scones are cooling slightly, melt butter and maple syrup together in a small pan over low heat. Once combined, remove from heat and whisk in the confectioners’ sugar until smooth. Add a pinch of salt to balance the sweetness. Drizzle this glossy glaze generously over your warm scones to add a luscious, sticky finish that elevates the Classic Pumpkin Scones to something truly special.
How to Serve Classic Pumpkin Scones
Garnishes
For that extra pop of texture and sparkle, sprinkle coarse sugar over the scones just before baking. After glazing, consider a light dusting of cinnamon or a few toasted pumpkin seeds on top for visual appeal and a subtle crunch. These small touches take the Classic Pumpkin Scones from simple to stunning.
Side Dishes
Classic Pumpkin Scones make a fabulous centerpiece when paired with a pot of hot tea or freshly brewed coffee. They’re also incredible alongside a smear of clotted cream or a ricotta spread sweetened with honey. For something heartier, serve them with scrambled eggs or a fresh fruit salad for a balanced fall breakfast or brunch.
Creative Ways to Present
Dress up your scone platter by arranging the wedges in a circle with the glaze artfully drizzled in the center. Add edible flowers or autumn leaves for a festive touch if you’re hosting friends. For a fun twist, slice scones horizontally to create pumpkin scone sandwiches filled with cream cheese frosting or apple butter – perfect for impressing guests with a little extra flair.
Make Ahead and Storage
Storing Leftovers
If you find yourself with leftovers from your Classic Pumpkin Scones, don’t worry — they keep well stored in an airtight container at room temperature for up to two days. This makes for an easy grab-and-go snack or a sweet addition to the next day’s breakfast. Just be sure to cover them well to maintain moisture and prevent drying out.
Freezing
Classic Pumpkin Scones freeze wonderfully. Wrap each scone tightly in plastic wrap and place them in an airtight freezer bag or container. They’ll stay fresh for up to 2 months. When you’re ready for a cozy treat, pull them out and thaw at room temperature or gently warm in a low oven to bring back that just-baked goodness.
Reheating
The best way to reheat these scones is in a preheated oven at 300°F (150°C) for 8-10 minutes, which helps to revive their flaky texture. You can also warm them in a toaster oven or microwave for 20-30 seconds if you are in a hurry, but be careful to avoid drying them out. Adding a small dab of butter or reheating with the glaze on top makes each bite taste fresh and magical.
FAQs
Can I use fresh pumpkin instead of canned?
Yes, you can! Just roast and puree fresh pumpkin until smooth, then blot it to remove excess moisture so your dough doesn’t get too wet. This keeps your Classic Pumpkin Scones perfectly tender and not soggy.
What is the purpose of grating frozen butter?
Grating frozen butter into the flour creates tiny, evenly distributed pieces that result in a flakier texture once baked. This method is key to classic scones, giving you that light and tender crumb everyone loves.
Can I omit the glaze?
Absolutely! The glaze adds sweetness and moisture, but the scones are delicious on their own. If you prefer less sweetness or want to add your own twist, try a dusting of powdered sugar or a spread of cream cheese instead.
Can I make these scones dairy-free?
Yes, you can substitute dairy ingredients with plant-based alternatives like coconut cream or almond milk, and use dairy-free butter. Keep in mind that flavors and textures might shift slightly, but the pumpkin spice goodness will still shine!
How do I make mini Classic Pumpkin Scones?
Simply divide the dough into two smaller discs (about 5 inches each) and cut each into 8 wedges before baking. Mini scones require a slightly shorter baking time, around 18-20 minutes. They’re perfect for sharing and ideal for tea parties!
Final Thoughts
There’s nothing quite like biting into a warm, freshly baked Classic Pumpkin Scone that brings together the nostalgic flavors of fall in every crumb. Whether you’re a seasoned baker or a total beginner, this recipe offers a delightful way to celebrate pumpkin season with warmth and comfort. So grab your ingredients, preheat that oven, and get ready to make a batch of these unforgettable scones that will become a beloved staple in your home, just like they have in mine.
PrintClassic Pumpkin Scones Recipe

Classic Pumpkin Scones are a delightful autumn treat combining tender, spiced pumpkin dough with a sweet maple glaze. Flavored with warming cinnamon and pumpkin pie spice, these scones are perfect for breakfast or a cozy snack.
- Prep Time: 15 minutes
- Cook Time: 20 minutes
- Total Time: 35 minutes
- Yield: 8 scones (or 16 mini scones) 1x
- Category: Breakfast, Snack, Dessert
- Method: Baking
- Cuisine: American
- Diet: Vegetarian
Ingredients
Dry Ingredients
- 2 cups (250g) all-purpose flour (spooned & leveled)
- 2 and 1/2 teaspoons baking powder
- 1 teaspoon ground cinnamon
- 1 and 1/2 teaspoons pumpkin pie spice
- 1/2 teaspoon salt
- 1/2 cup (8 Tbsp; 113g) unsalted butter, frozen
Wet Ingredients
- 1/3 cup + 2 Tablespoons (105ml) heavy cream, divided
- 1 large egg
- 1/2 cup (115g) canned pumpkin puree, blotted
- 1/2 cup (100g) light brown sugar
- 1 teaspoon pure vanilla extract
Optional Topping
- Coarse sugar for sprinkling on top before baking
Maple Glaze
- 2 Tablespoons (28g) unsalted butter
- 1/3 cup (80ml) pure maple syrup
- 1 cup (112g) sifted confectioners’ sugar
- Pinch salt, to taste
Instructions
- Preheat Oven: Preheat your oven to 400°F (204°C) and adjust the rack to the middle-low position. Line one or two large baking sheets with parchment paper or a silicone baking mat to prevent sticking.
- Mix Dry Ingredients: In a large bowl, whisk together the flour, baking powder, cinnamon, pumpkin pie spice, and salt until evenly combined.
- Add Butter: Grate the frozen unsalted butter using a box grater and add the grated butter to the flour mixture. Using a pastry cutter, fork, or your fingers, mix until the mixture resembles pea-sized crumbs.
- Combine Wet Ingredients: In a small bowl, whisk together 1/3 cup heavy cream, the egg, blotted pumpkin puree, brown sugar, and vanilla extract until smooth.
- Form Dough: Drizzle the wet mixture over the dry ingredients and mix gently until the dough is just moistened. Flour your hands and work the dough into a ball on a floured surface.
- Shape and Cut: Press the dough into an 8-inch disc (or two 5-inch discs for smaller scones). Using a sharp knife, cut the dough into 8 equal wedges for the larger scones, or 16 pieces if using smaller discs.
- Prepare for Baking: Place the scones at least 2 inches apart on the prepared baking sheets. Brush the tops lightly with the remaining 2 tablespoons of heavy cream and sprinkle with coarse sugar if desired for a crunchy topping.
- Bake: Bake larger scones for 20-25 minutes, or smaller scones for 18-20 minutes, until they are lightly browned and cooked through. Remove from oven and let cool slightly.
- Make Maple Glaze: In a small saucepan over low heat, melt butter and maple syrup together, stirring occasionally. Remove from heat and whisk in the sifted confectioners’ sugar. Add a pinch of salt to balance sweetness if desired.
- Glaze and Serve: Drizzle the warm maple glaze over the scones while still warm. Serve immediately for the best flavor and texture.
Notes
- Blot pumpkin puree with a paper towel to remove excess moisture; this helps prevent soggy scones.
- If making mini scones, bake on two sheets and reduce baking time slightly.
- For a crunchier top, sprinkle coarse sugar before baking.
- Scones are best enjoyed fresh but can be stored at room temperature or refrigerated for up to 2 days.
- Use a very sharp knife for clean, even wedges.
Nutrition
- Serving Size: 1 scone
- Calories: 280
- Sugar: 18g
- Sodium: 220mg
- Fat: 14g
- Saturated Fat: 8g
- Unsaturated Fat: 5g
- Trans Fat: 0g
- Carbohydrates: 33g
- Fiber: 2g
- Protein: 4g
- Cholesterol: 55mg
Keywords: pumpkin scones, pumpkin recipe, autumn recipe, pumpkin spice, maple glaze, breakfast scones, fall treats
