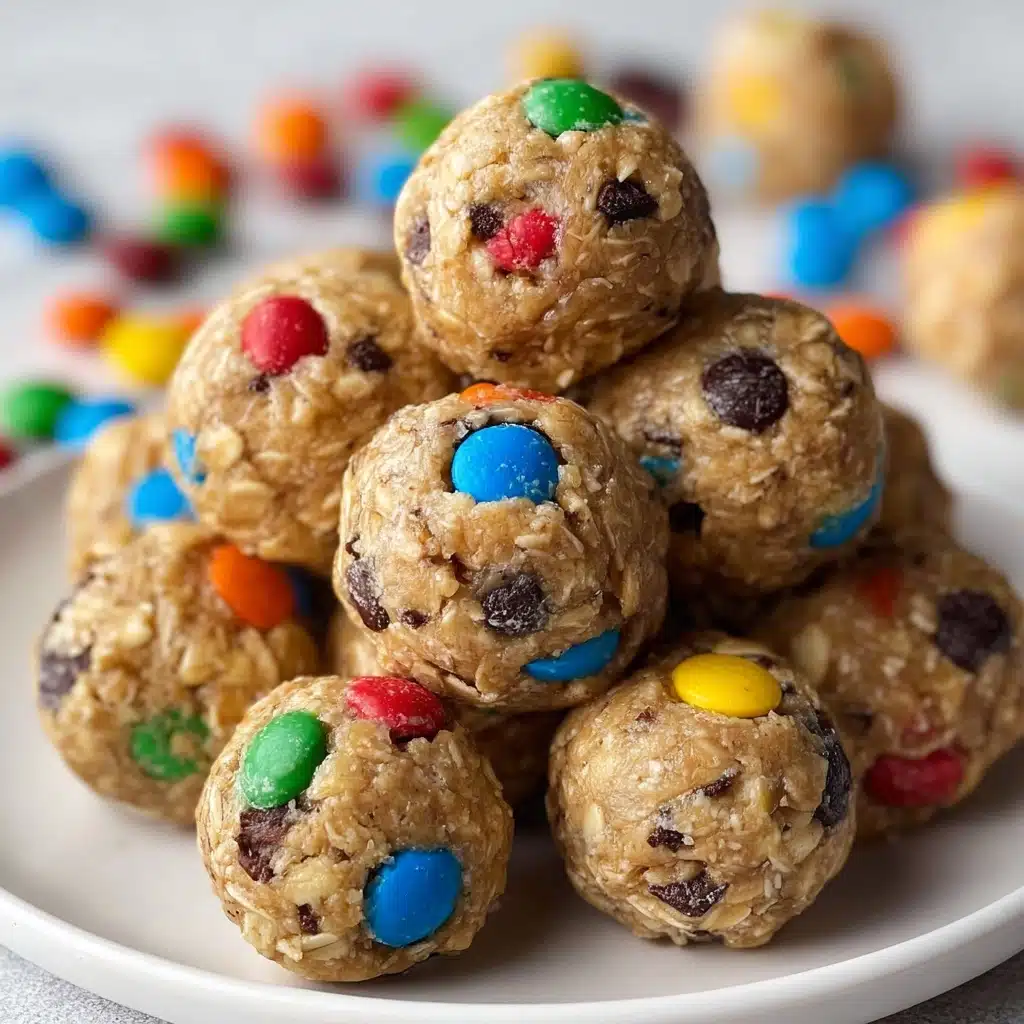
Monster Cookie Energy Balls Recipe
If you love classic monster cookies but dream of a satisfying, no-bake treat you can grab on the go, you’re about to meet your new obsession: Monster Cookie Energy Balls. Packed with peanut butter, chocolate chips, and colorful mini M&M’s, these fun, chewy bites bring together everything you crave in a monster cookie with a wholesome twist. They’re perfect for energizing snacks, easy lunchbox additions, post-workout pick-me-ups, or late-night nibbling when your sweet tooth won’t quit.
Ingredients You’ll Need
The magic of Monster Cookie Energy Balls is all in the mix: each familiar pantry staple brings flavor, color, and energy. These ingredients turn simple into seriously craveable—here’s what you’ll need and why it matters.
- Quick oats: The chewy backbone of each ball, oats create that hearty texture you’ll love in every bite.
- Creamy peanut butter (not all-natural): This helps bind everything together and gives a rich, nutty flavor—choose regular peanut butter for the best hold and classic taste.
- Honey: Adds natural sweetness and works with the peanut butter to help everything stick, plus a hint of floral aroma.
- Vanilla extract: Just a splash deepens the cookie-like flavor and makes all the other ingredients sing.
- Mini chocolate chips: These bring those irresistible pockets of melty chocolate you expect from a monster cookie.
- Mini m&m’s: For fun, crunch, and a pop of color in every bite—plus, who can resist a rainbow?
How to Make Monster Cookie Energy Balls
Step 1: Gather Your Ingredients
Before you start, measure out all your ingredients and set up your mixing area. A little prep work makes throwing together your Monster Cookie Energy Balls a breeze—you’ll have everything ready to go and no last-minute scavenger hunts for honey!
Step 2: Mix Everything Together
In a large mixing bowl, add your quick oats, peanut butter, honey, vanilla, mini chocolate chips, and mini m&m’s. Using a wooden spoon or (even better) a handheld mixer, blend everything together until you have a thick, well-combined dough. The hand mixer really makes this step easy—no arm workout required and it ensures every bite gets some chocolate chip and m&m magic.
Step 3: Shape Your Energy Balls
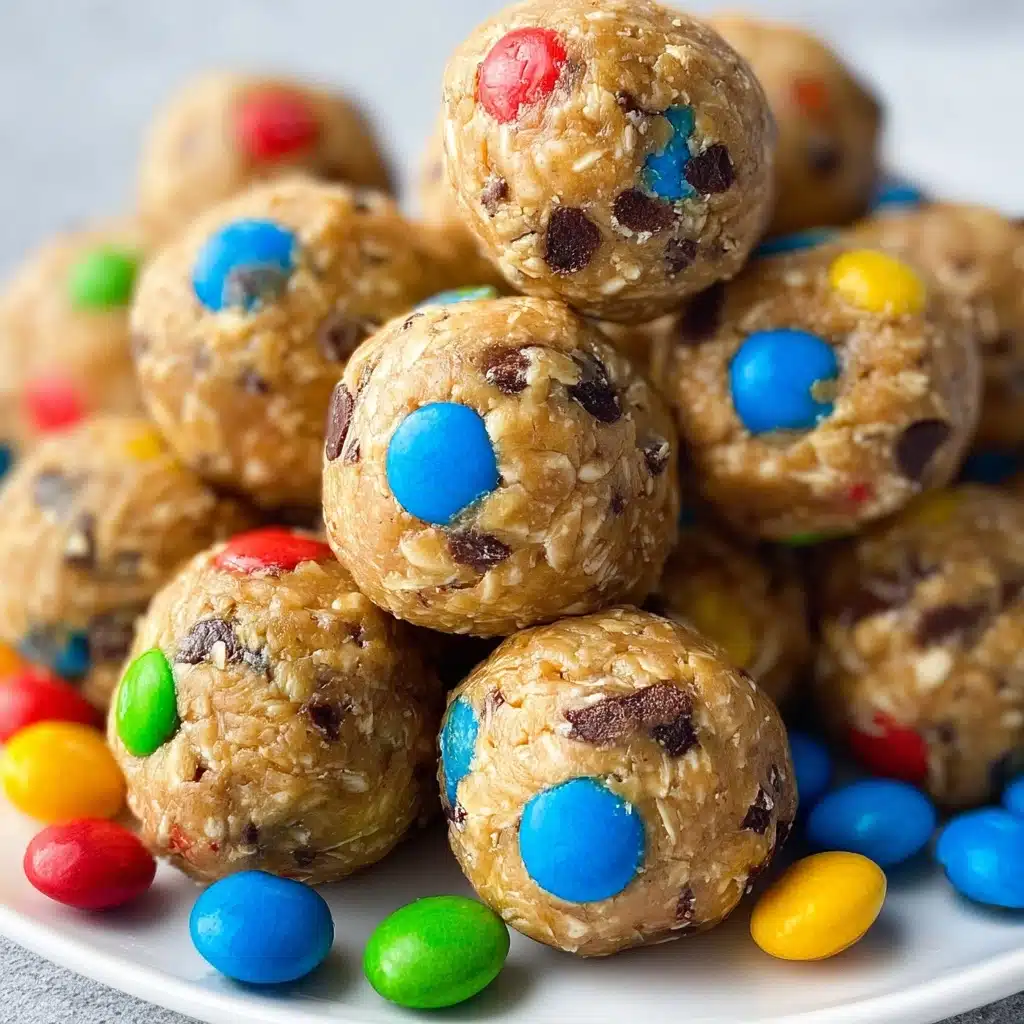
Scoop out about a tablespoon of the mixture and roll it between your palms to form a 1-inch ball. Line them up on a plate or tuck them into a Tupperware container as you go. You’ll end up with about 36 adorable, poppable Monster Cookie Energy Balls that promise smiles at first sight.
Step 4: Chill (Optional but Highly Recommended)
While you can absolutely enjoy these right away, pop the finished balls into the fridge for 30 minutes to an hour if you have the patience. Chilling helps them firm up, makes the flavors meld, and (honestly) they taste absolutely dreamy cold.
Step 5: Store and Savor
Keep your Monster Cookie Energy Balls in the fridge, covered, so they stay fresh and soft. They’re ready to energize your day whenever you need a snack or a sweet treat.
How to Serve Monster Cookie Energy Balls
Garnishes
Want to elevate your Monster Cookie Energy Balls for a party platter or just make them extra special? Roll the finished balls in a little bit of extra mini chocolate chips, a sprinkle of sea salt, or even a dusting of cocoa powder for that bakery-worthy finish.
Side Dishes
While these little bites are loaded with energy, pair them with a cold glass of milk or your favorite coffee drink for a cozy snack break. Fresh fruit, like apple slices or berries, is fantastic alongside for a balanced flavor and color combination.
Creative Ways to Present
Serve the energy balls in mini muffin liners for parties, stack them in a mason jar tied with a ribbon for a fun edible gift, or arrange them as part of a snack board with nuts and dried fruit. They also make magical toppers for smoothie bowls or yogurt parfaits—just tuck one or two on top for a dessert-meets-breakfast feel.
Make Ahead and Storage
Storing Leftovers
Leftover Monster Cookie Energy Balls will keep beautifully in an airtight container in the refrigerator for up to one week. The chilled peanut butter and honey keep them moist and chewy so you can grab one anytime you need a boost.
Freezing
Want to double up for future snacking? These energy balls freeze like a dream! Arrange them on a baking sheet to freeze individually for about an hour, then transfer to a zip-top bag or container. Store in the freezer for up to three months and let them thaw in the fridge or at room temperature before eating.
Reheating
Monster Cookie Energy Balls are best enjoyed chilled or at room temperature, so there’s no need to reheat them. If you do want to soften them up a touch, let them sit out for 5-10 minutes after pulling them from the fridge or freezer.
FAQs
Can I use old-fashioned oats instead of quick oats?
You can, but the texture will be a bit heartier and chewier. Quick oats blend more easily with the peanut butter and honey, creating a softer, more cohesive bite typical of these energy balls.
What if I have only natural peanut butter?
Natural peanut butter is oilier and less stable, so your mixture may be stickier or prone to crumbling. If that’s what you have, just mix well and add a bit more oats if the dough seems too wet, or briefly chill the dough before rolling.
Can I substitute maple syrup for honey?
Absolutely! Maple syrup works just as well and adds a touch more depth to the sweetness. Keep in mind the mixture might be slightly looser, so use just a smidge less if needed.
Are Monster Cookie Energy Balls safe for kids’ lunchboxes?
Yes, these energy balls are great for kids and easily packable! Just beware if your school is nut-free—in that case, try sunflower seed butter as a swap for the peanut butter to keep everyone happy and safe.
How long do Monster Cookie Energy Balls keep?
In the fridge, these will last up to a week, and in the freezer up to three months. If they last that long (spoiler: they usually don’t!), you’ll always have a homemade snack at the ready.
Final Thoughts
I’m beyond excited for you to try these Monster Cookie Energy Balls—they’re the universal crowd-pleaser that manage to feel like an indulgence and an energy boost all at once! Whip up a batch to share (or not!) and watch everyone come back for more. You’re in for a wholesome treat that’s as fun to make as it is to eat!
PrintMonster Cookie Energy Balls Recipe

These Monster Cookie Energy Balls are a delicious and easy-to-make snack that’s perfect for a quick energy boost. Packed with oats, peanut butter, honey, and mini chocolate chips, these energy balls are a tasty treat for any time of day.
- Prep Time: 10 minutes
- Total Time: 40 minutes
- Yield: 36 energy balls 1x
- Category: Snack
- Method: Mixing
- Cuisine: American
- Diet: Vegetarian
Ingredients
Ingredients:
- 2 ½ cups quick oats
- 1 cup creamy peanut butter (not all-natural peanut butter)
- 1/2 cup honey
- 1 teaspoon vanilla extract
- 1/2 cup mini chocolate chips
- 1/2 cup mini m&m’s
Instructions
- Add all ingredients into a mixing bowl. Use a wooden spoon or a handheld mixer to combine together. I find that using a hand mixer is the easiest way to combine the ingredients thoroughly.
- Shape into balls, about 1″ in size, and place on a plate or Tupperware type container. Recipe yields 36 energy balls when shaped into a small 1-inch sized ball.
- You can eat right away OR refrigerate for about 30 minutes to 1 hour before serving. I love these cold straight from the fridge.
- Store energy balls in a covered container in the fridge.
Nutrition
- Serving Size: 1 energy ball
- Calories: 120
- Sugar: 8g
- Sodium: 60mg
- Fat: 6g
- Saturated Fat: 2g
- Unsaturated Fat: 4g
- Trans Fat: 0g
- Carbohydrates: 14g
- Fiber: 2g
- Protein: 3g
- Cholesterol: 0mg
Keywords: Monster Cookie, Energy Balls, Snack, Peanut Butter, Oats, Chocolate Chips


